


Service cloud is an application within Salesforce that is geared toward making things easier for customer service by providing features such as: service console, case management, channels & digital engagement, and many more that will be outlined below. Also, service cloud will allow us to track the service that is being provided to our customers to ensure quality. Salesforce Service Cloud is a streamlined way of a positive customer experience and productive support interaction. Customers are easily able to reach out through services such as email, phone, or social media, and as always, from their desktops or mobile devices through a variety of applications.
Service Cloud Features
Service Console – This is the tool that members of our service team will utilize to support our customers on a daily basis providing our support team member with an in-depth view of each customer attached to their case(s).
Features of Service Console:
-
- Split views – Broadcasts a list of cases alongside your workspace.
- Related record and related list components – All information related to customer included in case.
- Highlight panel component – The sections of the console you will most likely need to use will be highlighted for quick access.
- Compact case feed – An overview of case progression and history provided with a newsfeed like feel. Salesforce provides colorful icons to easily distinguish between customers in the feed.
- Knowledge component – See suggested articles or search articles to help resolve cases faster. You are able to attach solutions from similar cases with this as well.
- Preconfigured utility bar – Allows users to include tools such as notes or history for recently accessed objects.
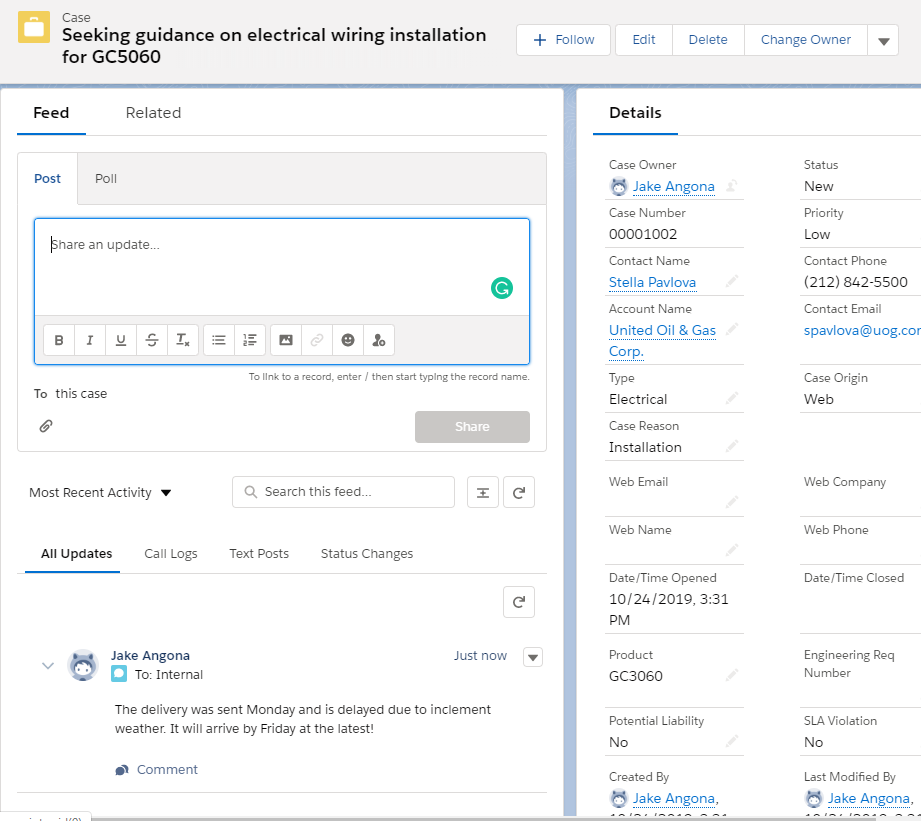
Case Management – A case is one of the standard objects in Salesforce and the case object allows for customers to describe issues, complaints, requests, etc. The important thing is that all information about the customer is included with the case such as their account, contact, product, and service history to allow a support agent to provide the best experience possible.
Features of Case Management
-
- Queues – This is a way to prioritize cases into lists that easily allow agents to go from case-to-case.
- Assignment Rules – Specific agents get assigned cases based on criteria within the case
- Escalation Rules – Whenever a case doesn’t get solved within a defined time frame the case can be escalated to the right person to solve it.
- Autoresponse Rules – Based on the case details an automatic response will be sent to the customer.

Channels & Digital Engagement – This is the convenience of creating and servicing cases: allowing customers to send cases via email, phone, web chat, social media, or text message. Regardless of where the case is from, agents can access the service console from their favorite device or app to ensure the case is handled quickly.
Automatic Workflows – When the customer creates a case, automatic workflows can take the information from the case and assign the customer the best agent for their issue based on criteria determined by our team.
Knowledge Base – Knowledge bases are useful to store articles/answers related to cases and agents are able to provide these in some scenarios to speed up the support process. Also, self-service website or community would allow the customer to research the knowledge on their own.
Instant Metrics – If a service team is looking to improve efficiency, instant metrics is what you need. You are able to see statistics such as response time and resolution time to determine areas of improvement for the team.
Mobile & Field Service Ready – This is the feature that Salesforce provides to keep all of our business data, custom processes/workflows in one place – all of these things are available on mobile as well.
Service for Everyone – To ensure this service is available to everybody Salesforce has included assisting tech such voice recognition software and screen readers.
Setting up Service Cloud and Case Management Automation
There are basically four different ways to get started when setting up service cloud in Salesforce that anyone with basic experience in Salesforce administration can get started.
- Guided Setup Flows
These are the prompts that Salesforce provides to set up Service Cloud, so your email and social channels are up and ready for your customers to create cases with. - Service Metrics
A dashboard that allows an administrator to monitor service performance and check on how satisfied your customers are with their experiences. - Recommended Setup
Simple steps provided by salesforce to set up and configure key features and learn more about Service Cloud. - Setup Tree
Here you can explore all features service cloud has to offer and Salesforce ensures the tree is only displaying essential features.
In terms of setting up your service cloud there is going to be four main steps administrators should follow to ensure their service cloud is providing the best possible experience to the customer.
- Automate Case Management
- Add multiple ways for customers to create cases
- Capture Knowledge
- Become more Efficient with Artificial Intelligence
Defining a Queue for Service Cloud
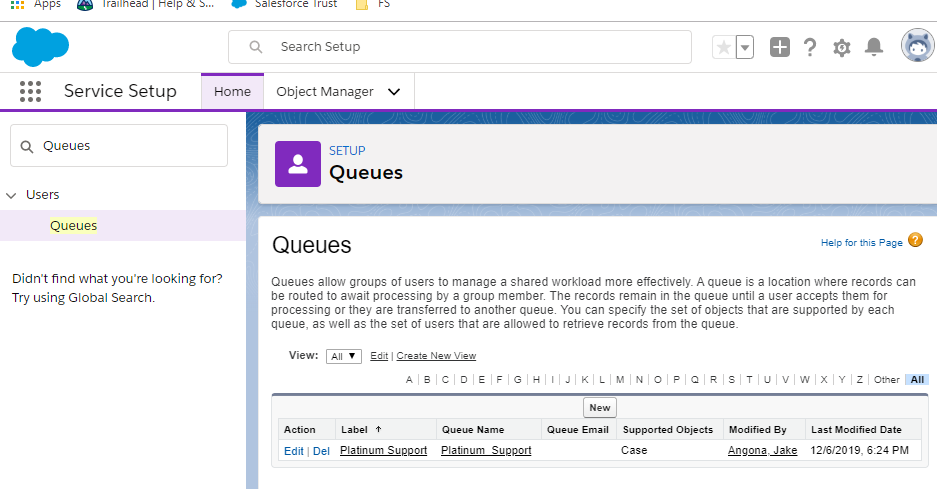
We will be outlining steps in configuring the first step in setting up service cloud for your salesforce org and that is preparing the case management tools. First we need to define a Queue for our support team to easily manage and distribute cases to agents as they are coming in.
Navigate to Service Setup -> Search for Queues -> New Queue
Here you will assign the case object and users that you want to have access to your newly created Queue. Now if you go back to your Cases tab and click the drop down arrow you will see your newly created Queue which is going to be empty until cases are created.
Creating Case Assignment Rules
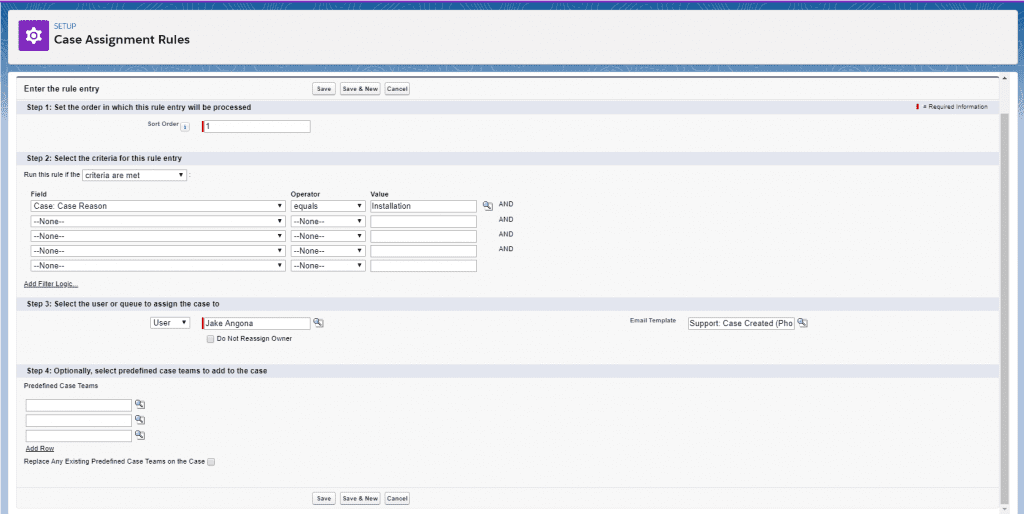
Now let’s get familiar with creating assignment rules for our cases. Our cases can be assigned to a single person, group of people, or to a queue. For instance if you had a case regarding hardware installation you would want that to be assigned to somebody with the skill level to handle the issue.
Navigate to Service Setup -> Search for Case Assignment Rules -> New (Fill out name and save) -> Click your new rule -> New Rule Entry
Once you are here this is where you create the rule that will ultimately assign your case. You first choose the order that the rule is processed since you can have multiple rules for case creation, then you set criteria, select the user the case gets assigned to if the criteria is met along with an email template to fit the customer’s needs, and if you have case teams you can assign them as well.
Case Escalation Rules
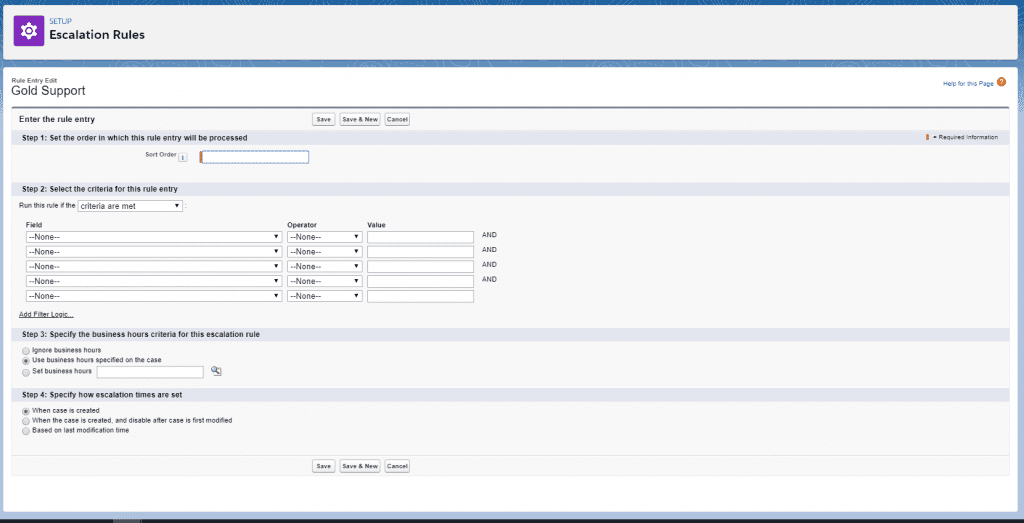
Sometimes things get busy or a case may be too difficult for the current agent and we do not want the customer to be waiting for too long so it is important that we define some case escalation rules. First you determine how long is too long then figure out who the case should be assigned to after this time has passed so it can be solved quickly.
**Almost identical process to Case Assignment Rules**
Navigate to Salesforce Setup -> Search for Escalation Rules -> New -> Type a Name and Click Active (WARNING deactivates any existing rule) -> Click your new rule -> Click new to add rule entry
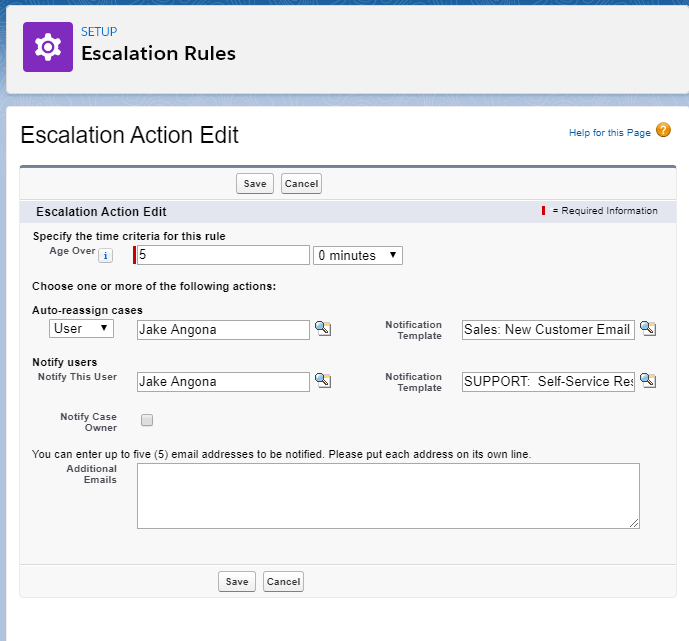
The options for Escalation rules are almost exactly the same as Assignment rules except the 3rd and 4th step you specify business hours and specify your escalation time frame respectively. Again you have the ability to set the sort order followed by your criteria on the rule. Then you must specify business hours which is recommended you set to the org default, and finally you must choose if your timer until escalation is based on creation, modification, or disable escalation after first modification.
To set the time until your escalation rule goes you must create an escalation action which will be available in your escalation rule page. You can set the age over to the number of hours you want a case closed by. You also will have options to auto-reassign cases, notify users, notify the case owner, and add up to 5 additional users to be notified.
Auto-Response Rule
As a company you can create auto-response rules for customers for a number of reasons including welcoming them or even addressing something that is commonly appearing in the cases. The email the customer is sent can be completely personalized with the processes outlined below.
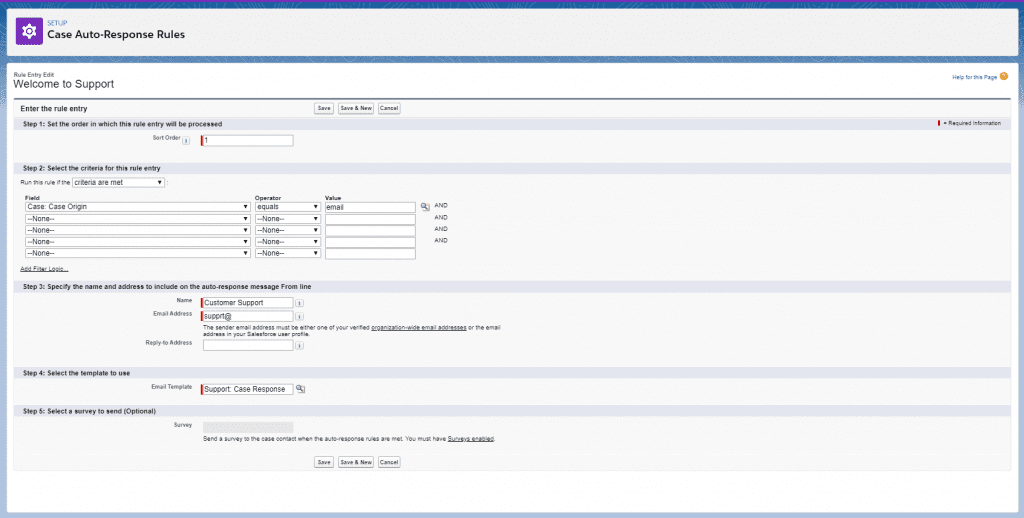
Navigate to Service Setup -> Search for Case Auto-Response Rules -> New -> Type a name for your rule and click active (WARNING will deactivate any other rules) -> Select your rule -> Click new to add rule entry
The main differences from creating the other two rules are in step 3 you get to decide the email address and name your automated support messages are marked as and can include a reply-to-address. You can then decide on a template you are going to use.
Have any questions about Salesforce Service Cloud for Lightning? Don’t hesitate to contact us at any time!
This publication contains general information only and Sikich is not, by means of this publication, rendering accounting, business, financial, investment, legal, tax, or any other professional advice or services. This publication is not a substitute for such professional advice or services, nor should you use it as a basis for any decision, action or omission that may affect you or your business. Before making any decision, taking any action or omitting an action that may affect you or your business, you should consult a qualified professional advisor. In addition, this publication may contain certain content generated by an artificial intelligence (AI) language model. You acknowledge that Sikich shall not be responsible for any loss sustained by you or any person who relies on this publication.