


In the first of this series of blog posts, Secure Azure Workloads with a Next-Generation Firewall, we explored how a virtual Fortinet Next-Generation Firewall (NGFW) appliance fits in your existing Azure environment and how to deploy it into the Azure environment. We also explored how to route all outbound Internet traffic from Azure workloads through the FortiGate so that internet traffic can be further inspected and filtered by the FortiGate; this provides much greater security than using the built-in outbound NAT service provided by Azure Network Security Group.
In this and the following posts, we will explore additional security features provided by a FortiGate in the Azure environment.
One of the most important use cases for deploying a NFGW appliance in Azure is to provide Virtual Private Network (VPN) access to Azure workloads for remote users, either from an on-premises network or the public Internet. In this post, we are going explore the VPN security features offered by FortiGate.
In a typical Azure network environment without a FortiGate, VPN functionality is provided by the Azure VPN Gateway, which offers both site-to-site and point-to-site VPN services.
Once a FortiGate is added to the Azure network, we can leverage the VPN features of the firewall to replace the Azure VPN Gateway.
Deploy a Site-to-Site VPN solution with a FortiGate in Azure
In this section, we will explore the steps to configure a site-to-site VPN from the FortiGate in Azure to another network which is also protected by a FortiGate. In most cases, this would be an on-premises network. However, it also can be another vNET in another Azure subscription, in the same Azure tenant or a different one.
Continuing with the same Azure environment we cited in our previous blog post, we have the following Azure resources:
- Resource Group: RG1
- Virtual Network: VNET1, 192.168.10.0/24
- Servers Subnet: VNET1/Servers, 192.168.10.0/28
- FortiGate subnet: Internal, 192.168.10.16/28
- FortiGate subnet: External, 192.168.10.32/28
- FortiGate Route Table: RT1, attached to subnet VNET1/Servers
- Network Security Group: NSG1, attached to subnet VNET1/Servers
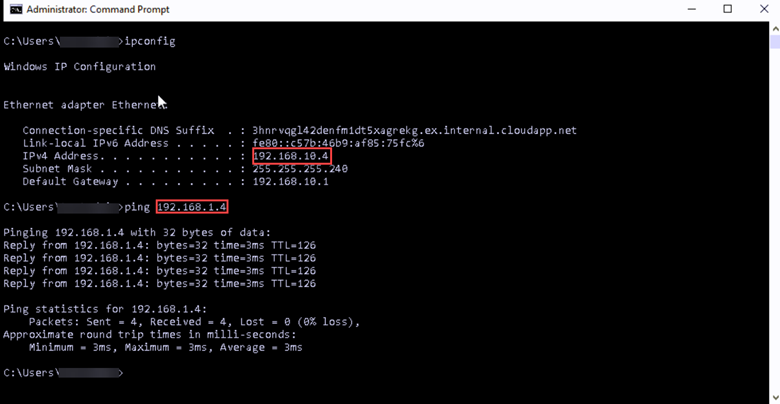
- VM1 with IP address, 192.168.10.4 and public IP address, VM1-ip
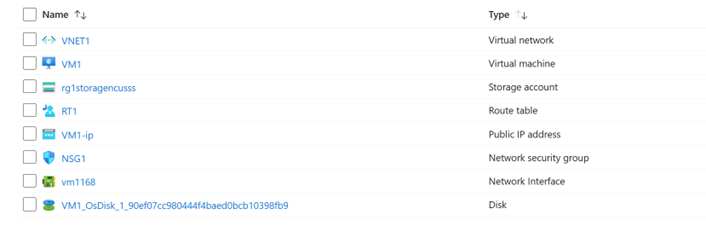
- FortiGate resource group: RG2
- FortiGate VM with two virtual NICs, one internal and one external
- Network Security Group for FortiGate VM
- FortiGate Public IP address attached to the FortiGate VM’s external NIC: FTG1-FGT-PIP

The VNET1/Servers subnet is where the virtual machine is connected.
An Azure Route Table (RT1) is used to route all virtual server network traffic through the FortiGate’s internal IP address.
The FortiGate VM provides security protection for all Azure worklords.
The FortiGate Public IP address, FTG1-FGT-PIP, is used for all inbound/outbound traffic of Azure VMs.
Assume the remote network has an IP subnet of 192.168.1.0/24 and a VM, VM2, with the IP address of 192.168.1.4
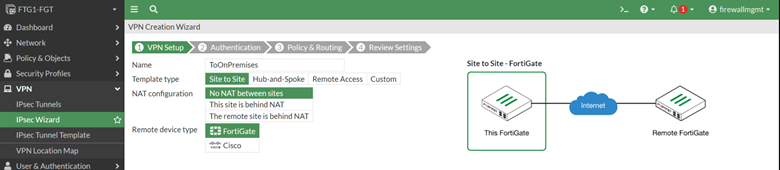
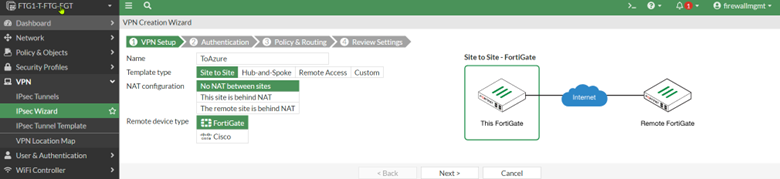
Let us start with opening the web GUI of FortiGate in Azure. Go to VPN tab| IPsec Wizard.
We will use the IPsec Wizard to create a basic IPsec configuration for a remote site. Although we are choosing FortiGate as the remote device type, we will be able to update the IPSec configuration to connect to any firewall devices at the remote site.
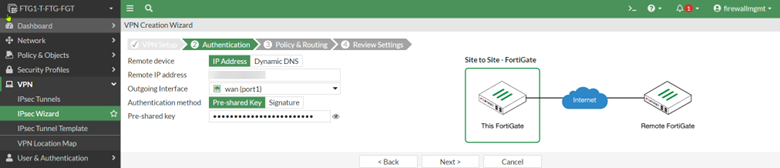
Complete the IPsec Wizard by filling in the required information such as tunnel name, the public IP address of the remote site, the remote subnet, etc.
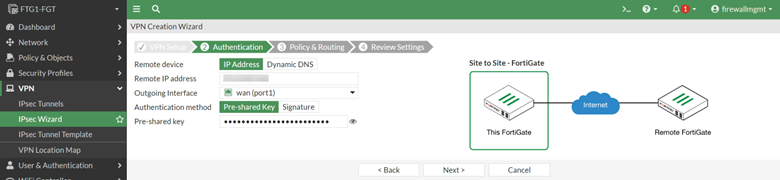
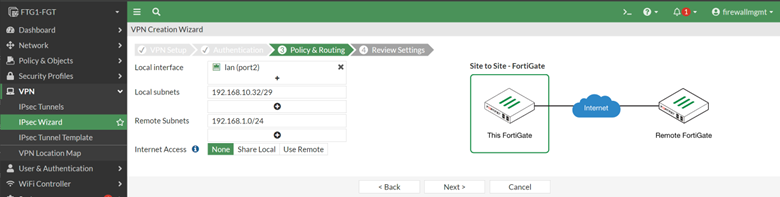
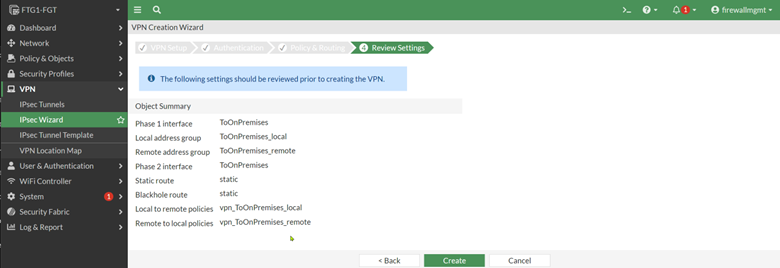
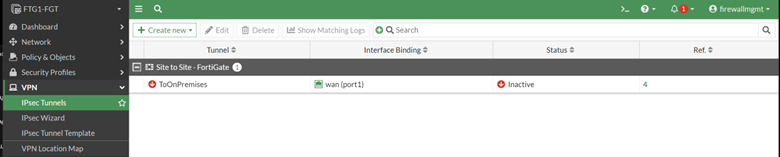
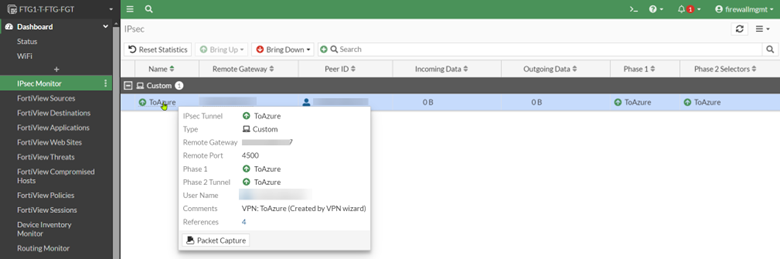
The status of the VPN will be Inactive until we have completed the matching IPsec policy at the remote firewall.
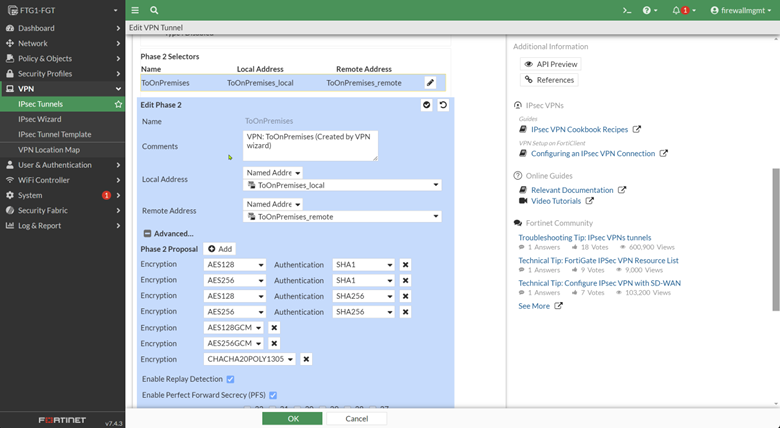
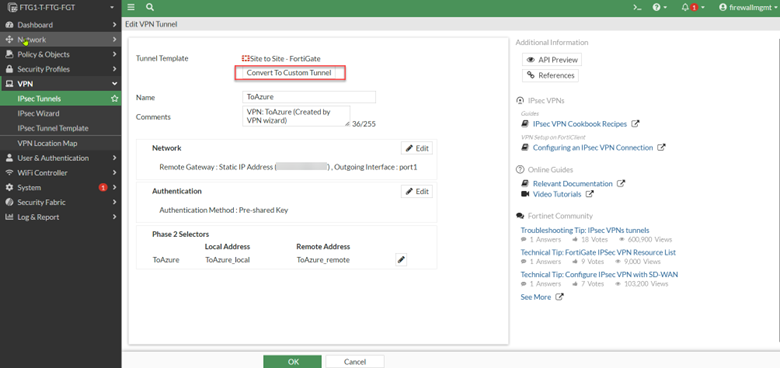
The IPsec Wizard created an IPsec tunnel named “ToOnPremises.” However, if you open it to edit, you will find that there are not a lot of items you can change. This is because we created the tunnel based on a prebuilt template provided by FortiGate. To change that so we can fine tune the settings for the VPN tunnel to connect to any remote devices that support the IPsec standard, we need to convert the template to a Custom Tunnel type by simple clicking on the “Convert To Custom Tunnel” button.
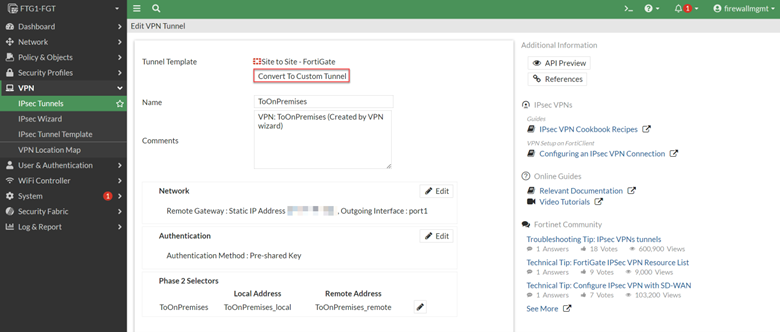
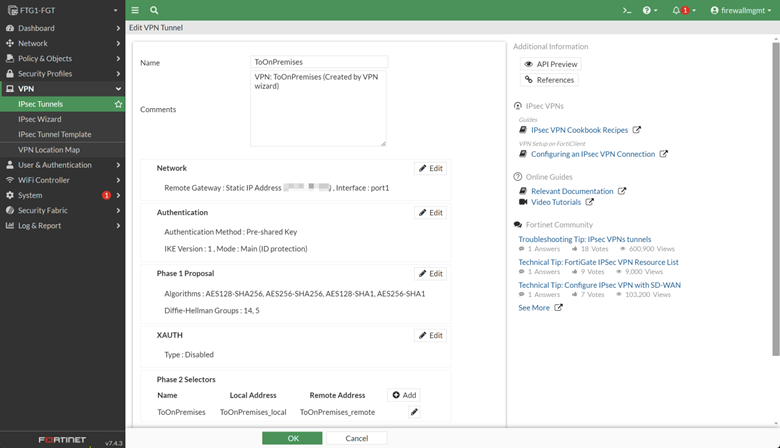
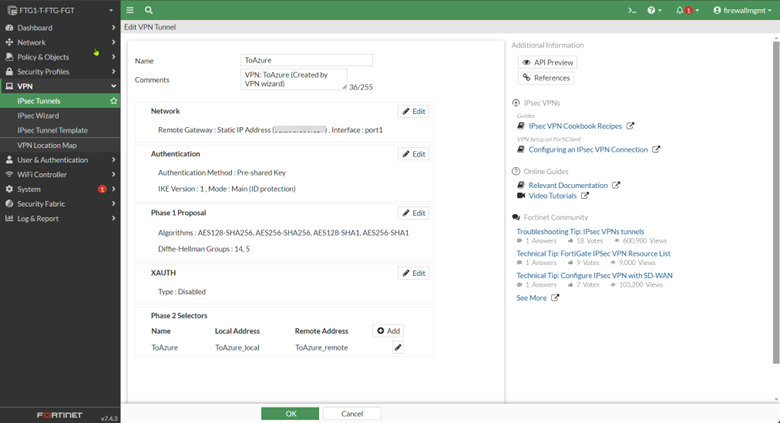
After the conversion, the FortiGate opens all the options you can change to accommodate any remote device type that supports the IPsec protocol.
Before moving on and creating an IPsec policy at the remote site, let’s examine what the IPsec Wizard has created behind the scenes other than the IPsec policy.
Static Routes
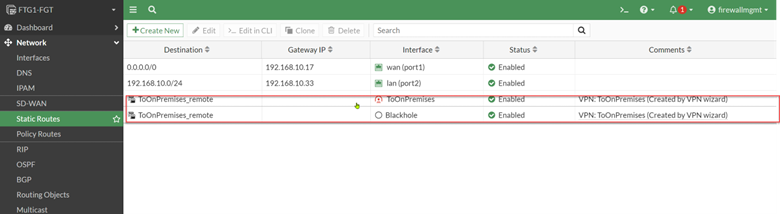
A new interface was created for the IPsec tunnel, and a static route was created to use that interface. This is an indication that a route-based IPsec tunnel was created by the wizard. Also, a Blackhole route was created. We will discuss this further later.
Address objects were created, representing the local and remote networks were created:

Two firewall rules were created; they allow traffic to traverse between the local and remote networks via the IPsec tunnel:

Two firewall rules to allow traffic traverse between local and remote network via IPSec tunnel were created.
The wizard has created everything we need in the Azure FortiGate to support an IPsec tunnel.
Let’s create a matching IPsec policy at the remote FortiGate.
We are using another FortiGate at a remote location. However, you can use any IPsec-supported device to connect with the FortiGate in Azure.
Open the web GUI of the FortiGate at the remote network.
Again, we will use the IPsec Wizard to create a basic IPsec policy and convert it to a Custom Tunnel.
Because we have another FortiGate at the remote site, the IPsec wizard created everything we need to set up the tunnel. The new IPsec tunnel should be up and passing traffic without additional configuration.
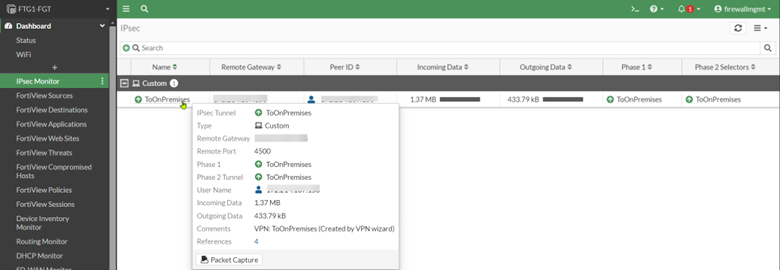
We can now ping VM2, 192.168.1.4, at the remote site from VM1, 192.168.10.4, in Azure.
As you can see, it’s quite easy to establish a VPN tunnel between an Azure network and an on-premises network via site-to-site VPN services provided by the FortiGate in Azure. This replaces the functionality of the Azure Virtual VPN Gateway. In addition, if you are using a FortiGate in the on-premises network, setting up the VPN tunnel is even easier.
Blackhole Routing
One of the reasons we recommend creating an IPsec policy with the IPsec Wizard is that the wizard creates a Blackhole route in addition to all the components you need to set up an IPsec tunnel. Any limitations of the wizard-created IPsec policy can be customized after you convert it to a Custom Policy.
The Blackhole route has several uses. In the case of FortiGate IPsec tunnels, it reduces the recovery time should the tunnel go down and need to come back up. It also helps make the network more secure because traffic that is supposed to enter the encrypted tunnel is now not pushed to the default route (ISP) when the tunnel is down.
Summary
In this blog post, we have shown that we can use the VPN feature of the FortiGate to quickly set up a site-to-site VPN tunnel to allow on-premises resources to access Azure workloads securely, replacing the Azure VPN Gateway. In addition, if you already have a FortiGate in your on-premises environment, you will find that it takes very little effort to set up a VPN tunnel to access Azure workloads securely. This is great news for seasoned FortiGate administrators!
In the next post, we will continue to explore the SSLVPN feature of the FortiGate, which allow remote users to access Azure workloads securely. FortiGate SSLVPN will replace the point-to-site VPN service provided by the Azure VPN Gateway. Stay tuned!
This publication contains general information only and Sikich is not, by means of this publication, rendering accounting, business, financial, investment, legal, tax, or any other professional advice or services. This publication is not a substitute for such professional advice or services, nor should you use it as a basis for any decision, action or omission that may affect you or your business. Before making any decision, taking any action or omitting an action that may affect you or your business, you should consult a qualified professional advisor. In addition, this publication may contain certain content generated by an artificial intelligence (AI) language model. You acknowledge that Sikich shall not be responsible for any loss sustained by you or any person who relies on this publication.