


As more and more companies move their on-premises servers into the Microsoft Azure cloud, the security and protection of the Azure workload becomes paramount.
Until recently, the only option to deploy a next-generation firewall (NGFW) in Azure was to deploy Microsoft’s own Azure Firewall Premium, which utilizes cloud-native network security firewall services. However, this option is very pricy and there is a significant learning curve to effectively manage this Microsoft offering. Because of this, many small and midsize companies use Azure Network Security Group (NSG) features to provide basic security protection. Unfortunately, what the NSG offers is not adequate to protect the Azure workload from ever-increasing security threats from the Internet.
The good news is that help is here. In the last few years, several traditional firewall appliance vendors, recognizing that companies are moving their servers into Azure, have started to make available NGFW services as virtual machines which can be deployed in Azure to protect Azure workloads. And IT professionals, well-versed in maintaining their on-premises appliances, can easily manage virtual Azure appliances from vendors with whom they’re already familiar.
There are many NGFW appliance vendors in the market. In this series of blog posts, we will look into the virtual NGFW appliances provided by Fortinet, who sells and supports on-premises and cloud-based FortiGate security appliances. In this post, we will discuss how a virtual appliance fits into your existing Azure environment and how to deploy a FortiGate NGFW appliance.
How a virtual appliance fits into your existing Azure environment
In a simple Azure environment, you will likely see the following Azure resources:
- Resource Group: RG1
- Virtual Network: VNET1, 192.168.10.0/24
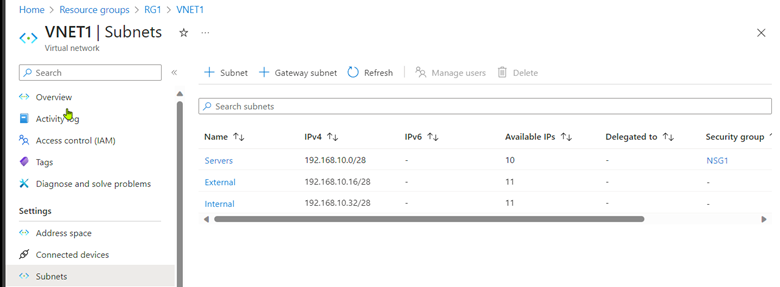
- Servers Subnet: VNET1/Servers, 192.168.10.0/28
- Network Security Group: NSG1, attached to subnet VNET1/Servers
- Public IP addresses for each virtual machine: VM1-ip
The VNET1/Servers subnet is where the virtual machines are connected.
Each virtual server communicates directly with the internet. Inbound/outbound rules in NSG1 provide basic protection for each virtual machine.
After the deployment of the FortiGate NSGW appliance, the following Azure resources will be added to the existing Azure environment.
- FortiGate resource group: RG2
- FortiGate subnet: Internal, 192.168.10.16/28
- FortiGate subnet: External, 192.168.10.32/28
- FortiGate VM with two virtual NICs, one internal and one external
- Network Security Group for FortiGate VM
- FortiGate Route Table: RT1
- FortiGate Public IP address attached to the FortiGate VM’s external NIC: FTG1-FGT-PIP
The FortiGate VM is deployed to its own resource group and subnets, with a unique network security group and public IP address.
An Azure Route Table is created and used to route all virtual server network traffic through the FortiGate’s internal IP address.
The FortiGate VM replaces NSG1 to provide security protection for all virtual servers.
The public IP addresses that were assigned to each virtual server can be removed.
Deploy a FortiGate next-generation firewall
In this section, we are going to explore the steps of deploying a new FortiGate next-generation firewall in an Azure environment via the Azure admin portal in detail.
We assume that we have a typical Azure environment in place as described previously before the NGFW is added, and we have an Azure virtual machine, VM1, attached to the Servers subnet.
Before starting, let us create two new subnets, External and Internal, in VNET1.
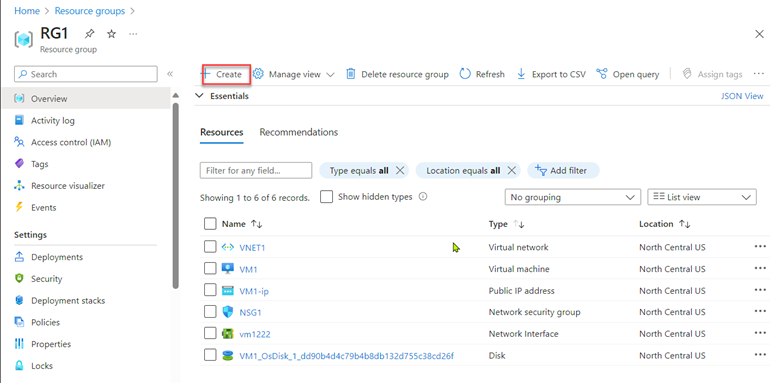
From the RG1 resource group in the Azure Portal, click Create, which will open the Azure Marketplace.
Search for FortiGate, then select Fortinet FortiGate Next-Generation Firewall.
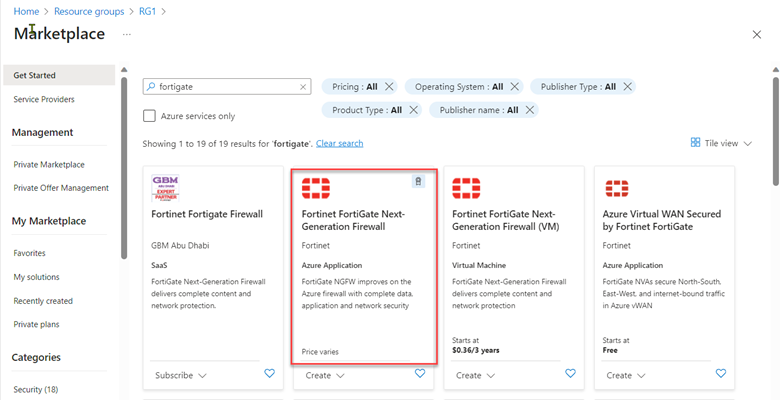
Select Single VM, then Create. This starts the FortiGate NGFW deployment wizard.

In the Basics tab, fill in the information needed. Make sure to create a new resource group (RG2) and select the Pay As You Go SKU (explained later). Click Next.

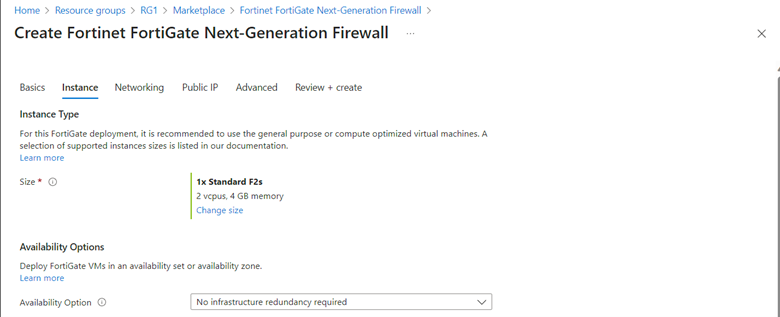
On the Instance tab, accept defaults and click Next.
On the Networking tab, select the existing virtual network.
If you have an existing virtual network and all the subnets created (which we have done earlier), you have better control of how the firewall is deployed.
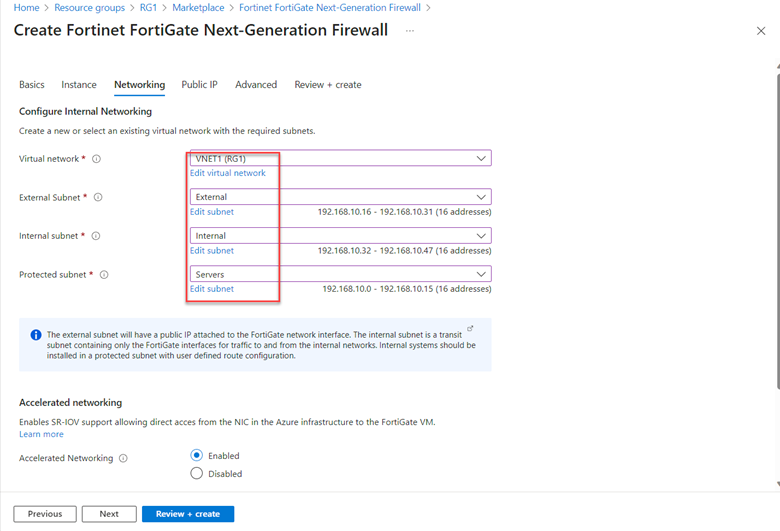
Click Next to Public IP tab. Accept default. A new public IP address will be created.
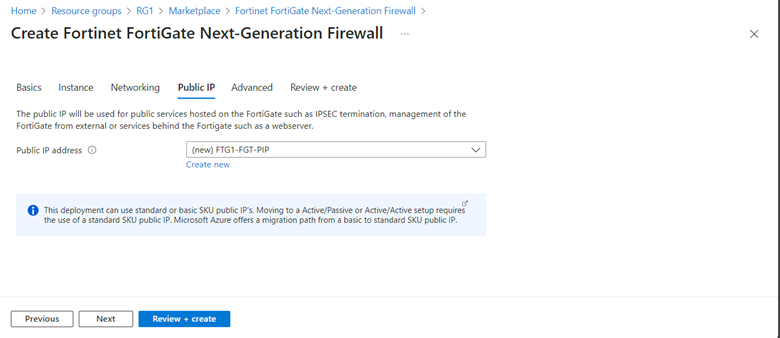
Click Review + create and then Create to start deploying the new firewall.

After the deployment is complete, a new resource group, RG2, has been created; it contains all the Azure resources for the next-generation firewall except the route table. We will create that manually later.

Access the new firewall
At this point, no further configuration on the firewall virtual appliance itself in Azure is required.
Once the new firewall appliance has been deployed, you will manage it via its command line or web interface, similar to how you would manage an on-premises FortiGate firewall appliance. If you are a seasoned FortiGate administrator, you will find the admin interface is similar to your on-premises hardware appliances.
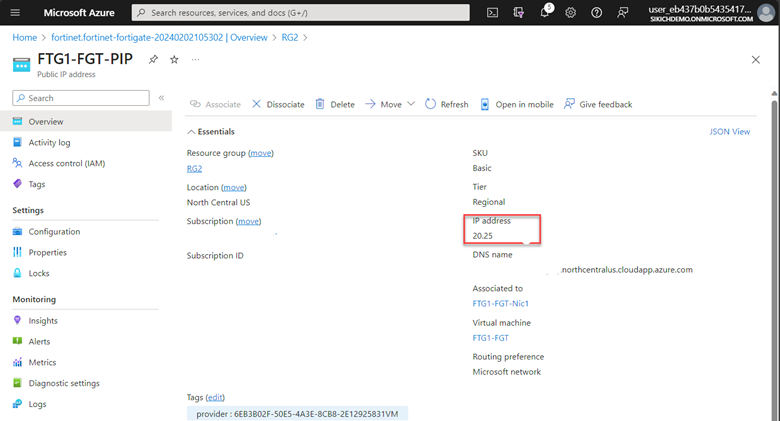
Note: You can find the public IP address of the FortiGate from FTG1-FTG-PIP.
Go to https://<public-ip-address>/ and sign in with the username and password you entered during the deployment process.
The FortiGate will start its initial setup wizard if this is the first login.
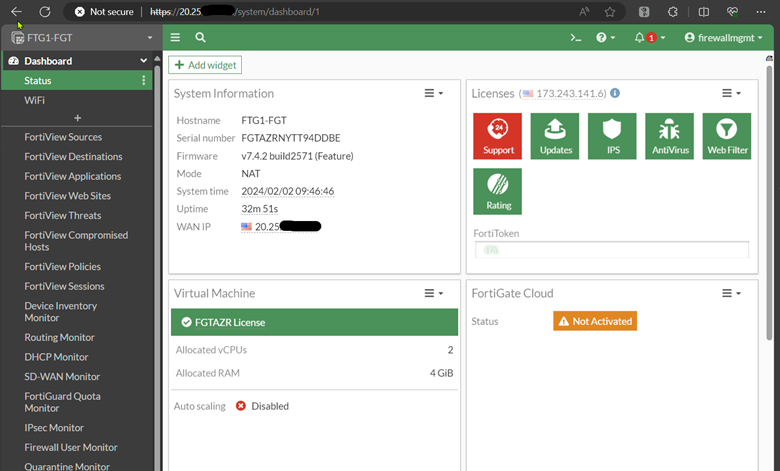
We have now completed the initial virtual FortiGate deployment process.
Route Azure virtual machine outbound traffic through FortiGate
There are two tasks we need to do to route VM1 internet traffic through the FortiGate.
Create an outbound firewall rule on the FortiGate
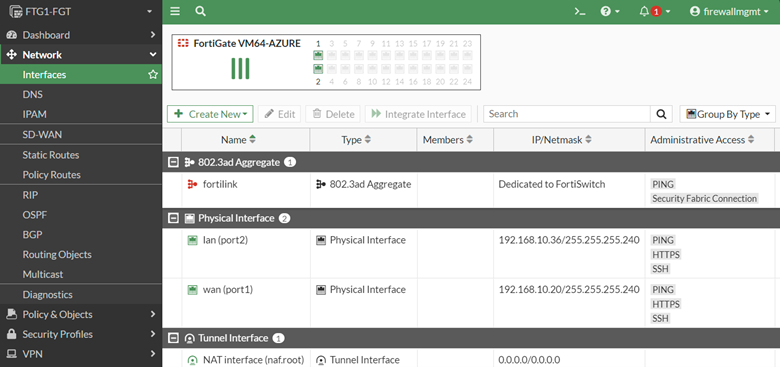
To easily identify WAN and LAN interfaces on the FortiGate, we assign an alias for port1 (WAN) and port2 (LAN). Also, we create an address range, 192.168.10.0/28, which represents the Servers subnet. Then, we create an Outbound Internet Firewall Policy.
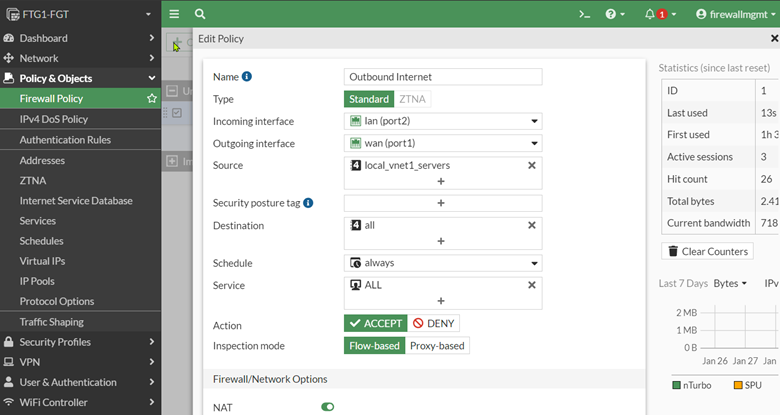
This policy allows all outbound traffic from the Servers subnet to the Internet.
Create an Azure Route Table and route all network traffic from VM1 to the FortiGate.
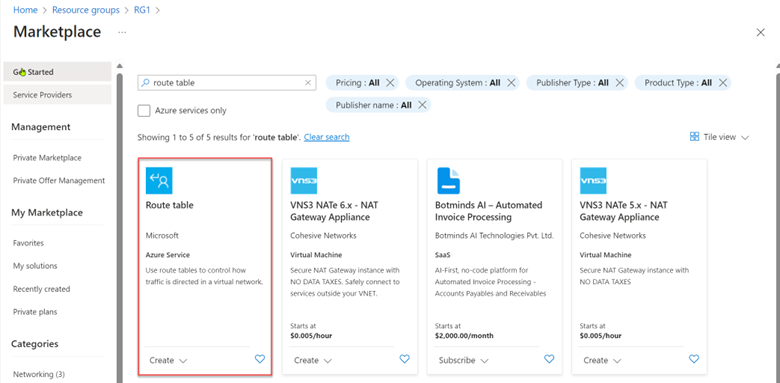
From the RG1 resource group in the Azure Portal, click Create, which will open the Azure Marketplace.

Search for route table, then select Route Table.
Go through the wizard. Accept the default values. and create a new Route Table, RT1.
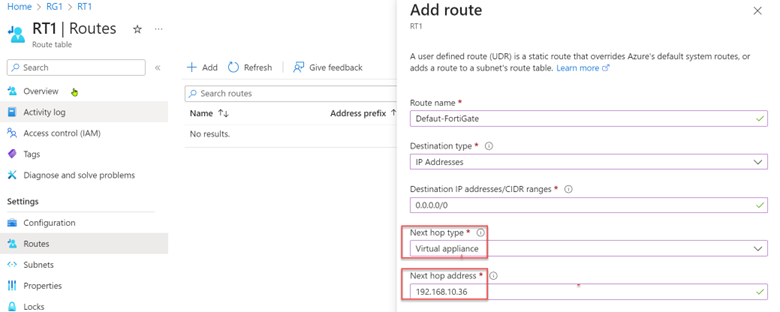
Open the RT1 route table. Add a new default route. The next hop of the default route is the internal IP address of the FortiGate, 192.168.10.36.
Attach the new route to the Servers subnet.
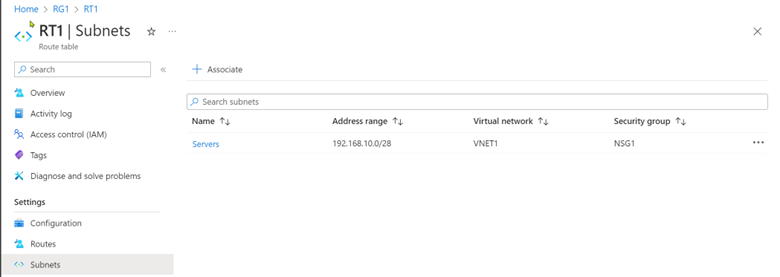
This action will re-route the internet traffic of all virtual machines in the Servers subnet through the FortiGate. Please note that updating the Azure route table will cause a brief Internet disruption for those virtual machines. Proceed with caution when working on this in a production environment.
We have successfully deployed a new FortiGate NGFW appliance and replaced the Network Security Group with it.
You can proceed to remove the NSG1 and VM1-ip from RG1 if there is no need for them.
Summary
In this blog post, we have shown that it is very easy to deploy a FortiGate next-generation firewall into an existing Azure environment, replacing the Network Security Group. By using the Pay as You Go SKU of the FortiGate virtual appliance, we can have a fully functional FortiGate firewall running very quickly. This is a perfect way to test the firewall and many of its next-generation features. Most importantly, if you are a seasoned FortiGate administrator, you should feel right at home managing the new virtual appliance.
We are only scratching the surface of what FortiGate NGFW has to offer in this post. In the upcoming posts, we will continue to explore additional features of what the FortiGate NGFW can do to provide additional protection of Azure workloads and be more than just an Azure Network Security Group replacement.
Have any questions about how to deploy a FortiGate next-generation firewall in your Azure environment? Please contact us at any time!
This publication contains general information only and Sikich is not, by means of this publication, rendering accounting, business, financial, investment, legal, tax, or any other professional advice or services. This publication is not a substitute for such professional advice or services, nor should you use it as a basis for any decision, action or omission that may affect you or your business. Before making any decision, taking any action or omitting an action that may affect you or your business, you should consult a qualified professional advisor. In addition, this publication may contain certain content generated by an artificial intelligence (AI) language model. You acknowledge that Sikich shall not be responsible for any loss sustained by you or any person who relies on this publication.