


As of October 2022, Microsoft has released a new form of Advanced Find within Dynamics 365. This is big news, due to the fact that this feature has not had a significant update in a long time. Not only did the location of the feature change with the update, the entire feature now has a new modern experience. It allows you to search rows, create personal views, and share with members of a team in a more efficient way. Here’s how to use the updated Dynamics 365 Advanced Find feature.
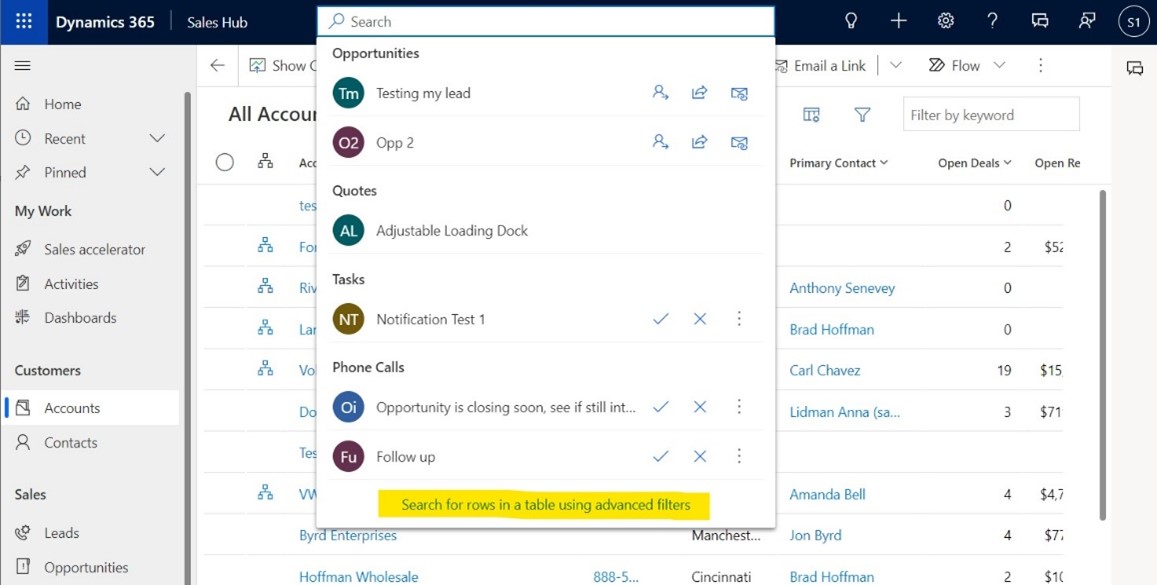
Here you will notice that the Advanced Find icon, which would typically be in the top right corner, is no longer available. Instead, we need to utilize the search bar by selecting “Search for rows in a table using advanced filters.”
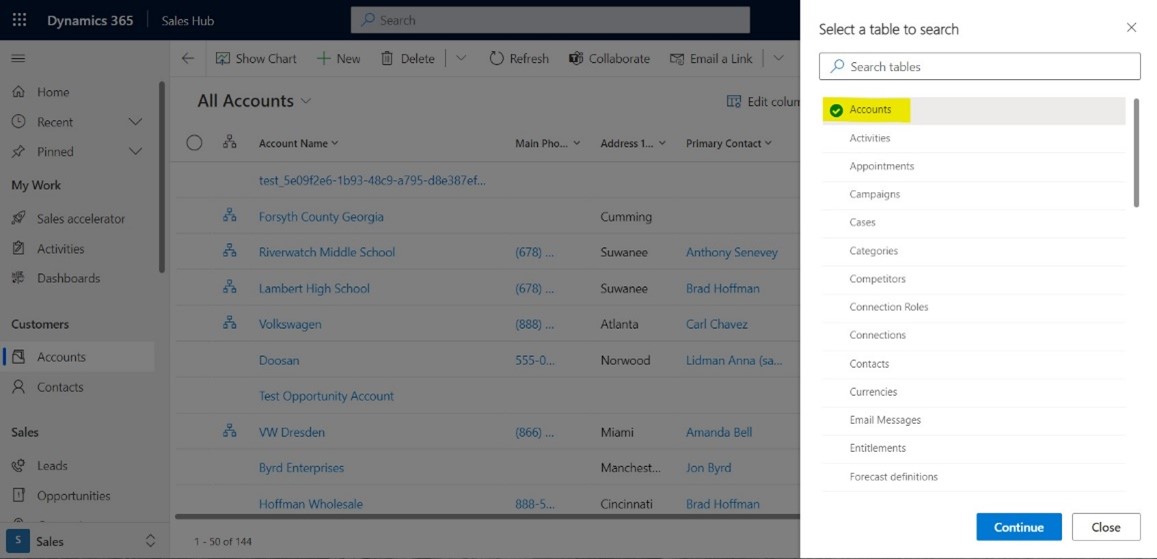
After making that selection we are brought to the “Select a table to search” window. This displays all of the available tables that we can search on. Let’s select “Accounts.”
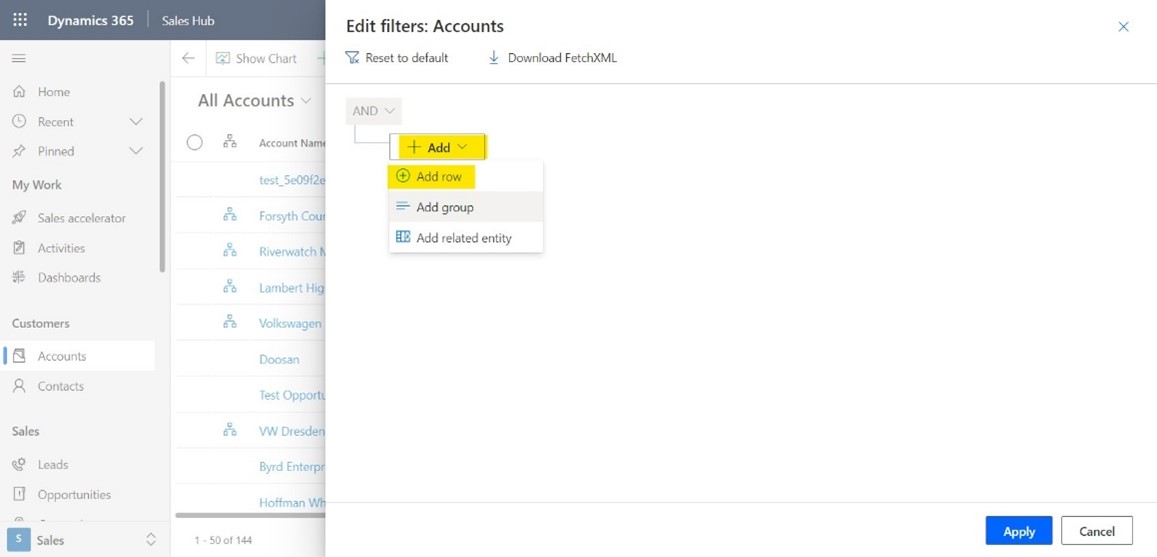
If we select “Continue,” we are taken to the “Edit filters: Accounts” window. Here we can create specific filters to help us find certain information. Let’s say we wanted to create a personal view with all Accounts located in Los Angeles with an annual revenue equal to or greater than $100,000. We would need to click “+ Add” and “Add row.”
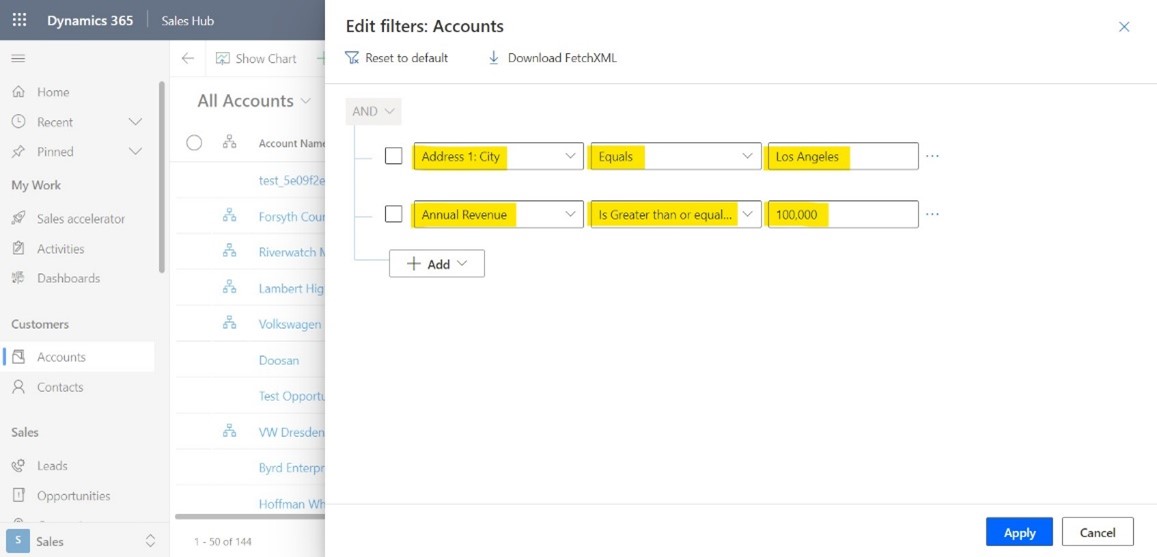
Enter “Address: 1 City” Equals “Los Angeles” in the first row. Enter “Annual Revenue” Is Greater than or equal to “100,000” in the second row. Select “Apply.”
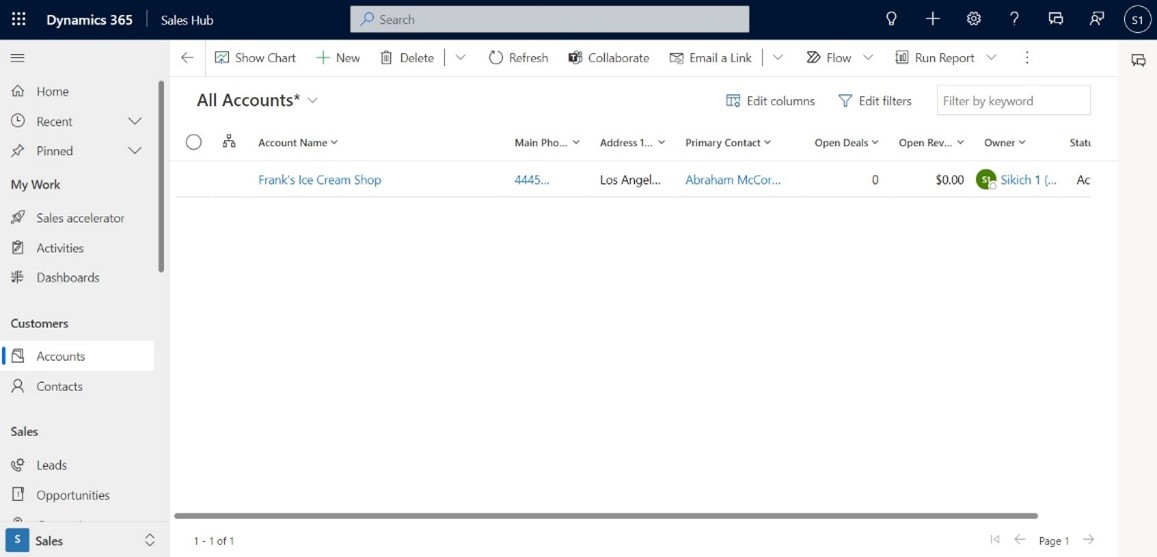
As a result, the “All Accounts*” view will display all accounts located in Los Angeles, with an Annual Revenue equal to or greater than $100,000.
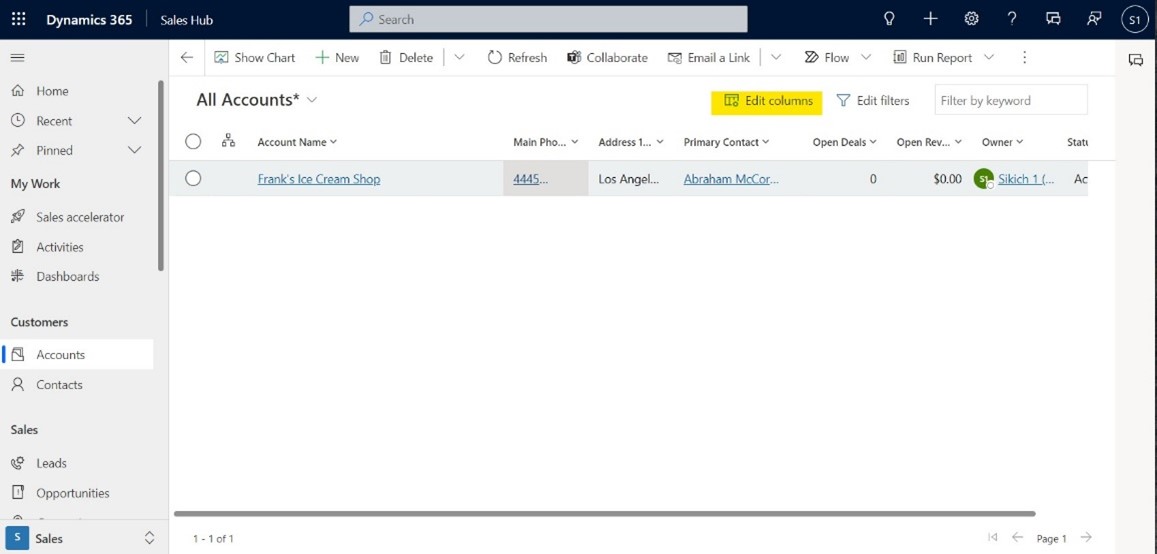
With this update, Microsoft has made it easy to adjust the layout of views. You can pick and choose what columns they want to be displayed. For this scenario, we want to switch the Primary Contact column and the Main Phone Number column, along with adding the Annual Revenue column.
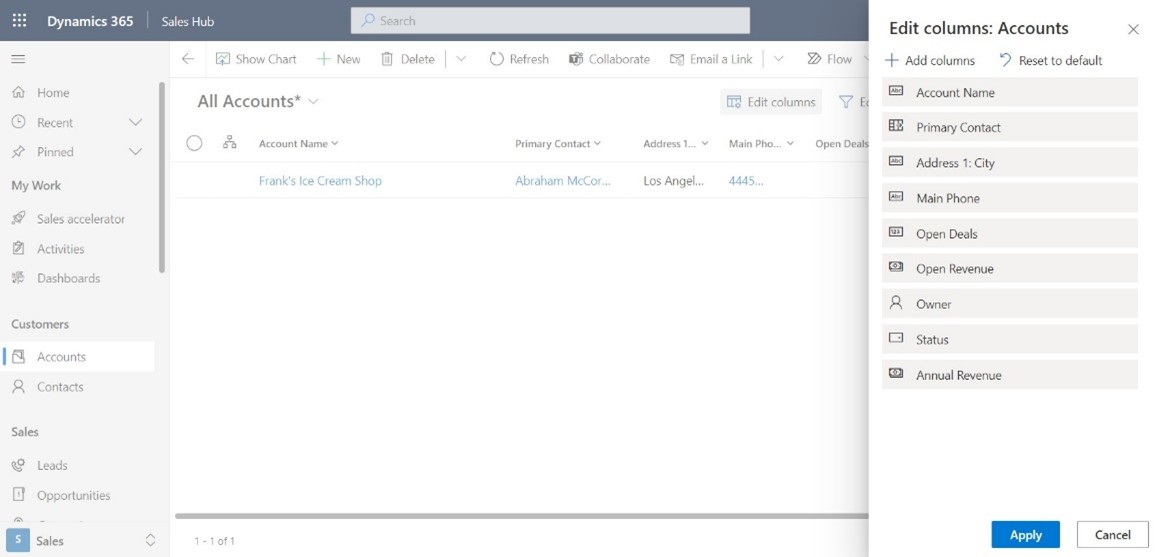
First we will want to select “Edit columns,” in order to rearrange and edit our view.
The “Edit columns: Accounts” window will appear showing all of the current columns being displayed. Click and drag the columns you want to rearrange.
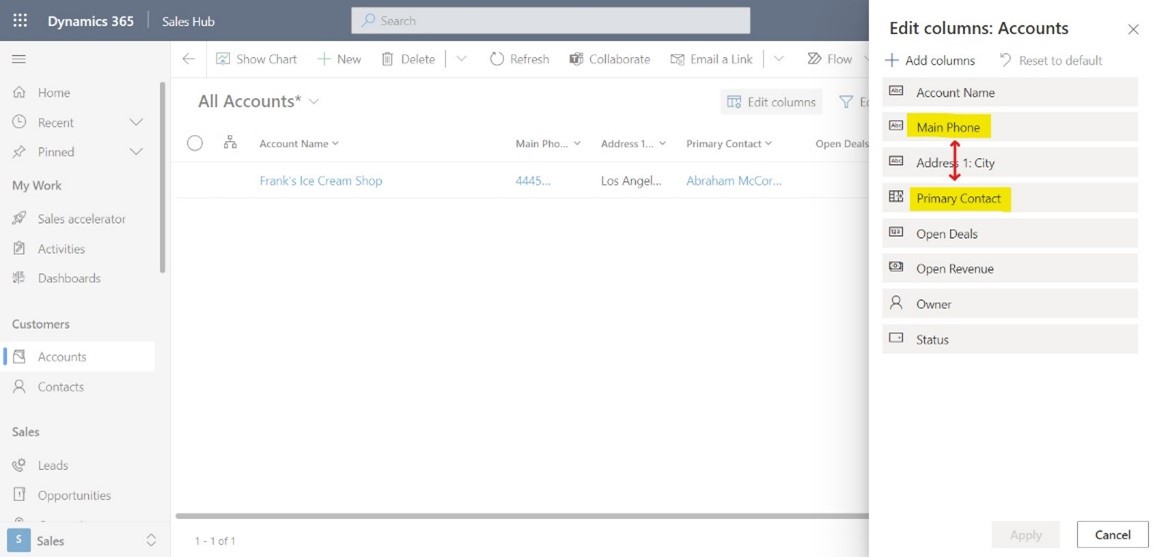
Before we apply this edit, we want to add the Annual Revenue column to the view by selecting “+ Add columns.”
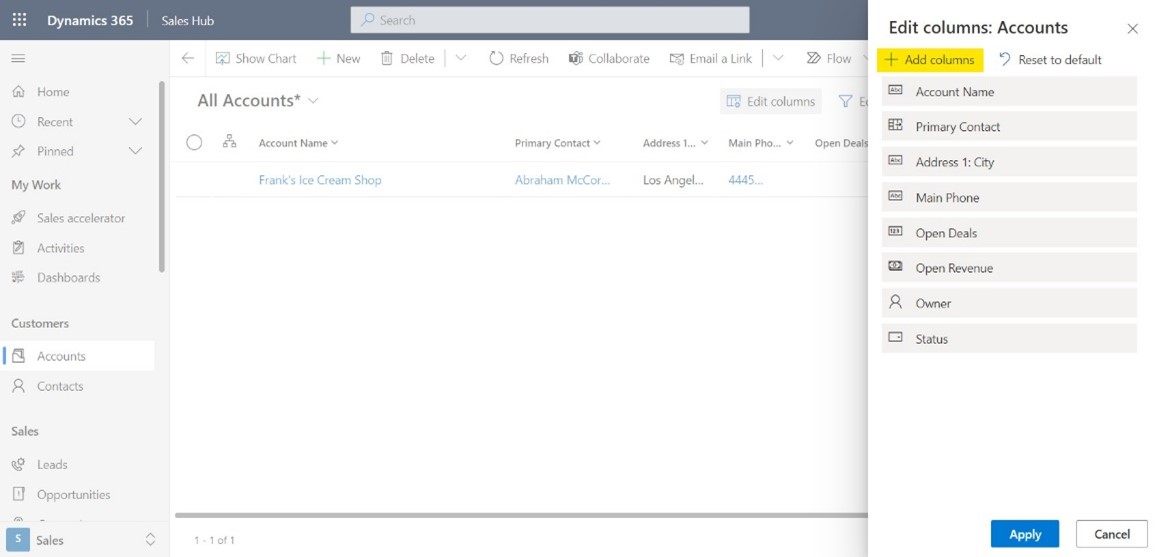
The “Add columns” window will appear showing us all of the additional columns we can add to the view. We want to select the “Annual Revenue” column and then “Close.”
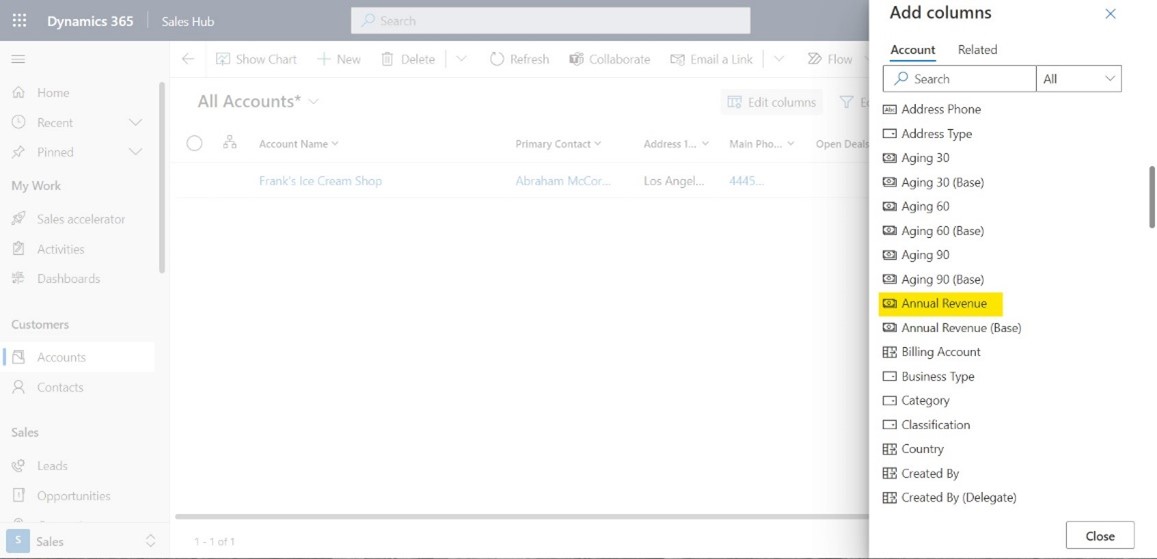
The “Annual Revenue” column will be added to the list of displayed columns. Select “Apply.”
Part of this new update also allows you to create personal views. These are views that live within the system, can only be seen by their creator.
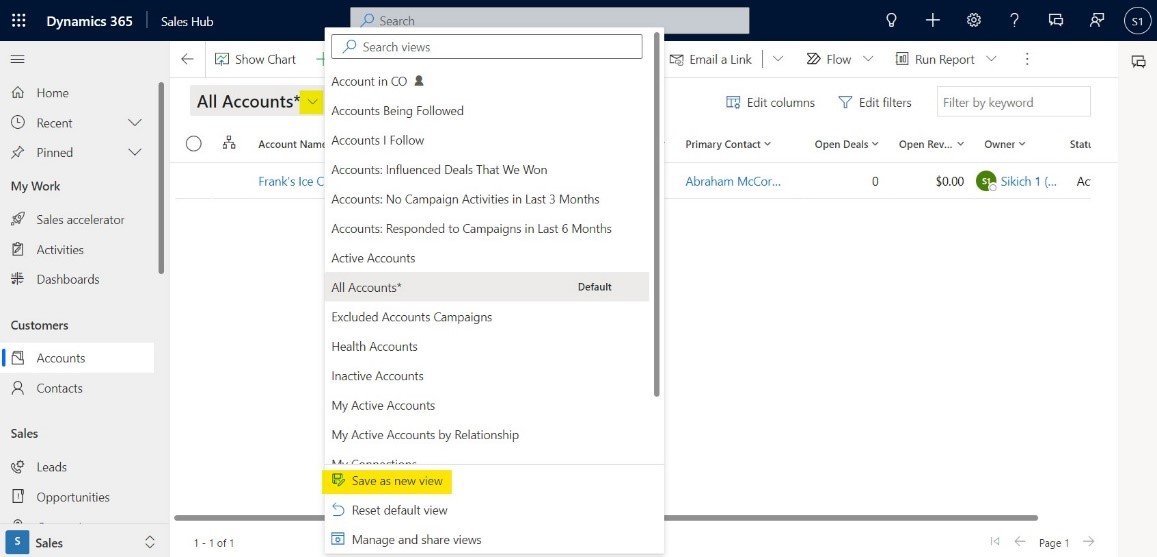
Using the view that we just created, select the “Drop down” next to All Accounts*. Then select “Save as new view.” This allows you to always have access to this view without having to set the same filters every time you need to see that information.
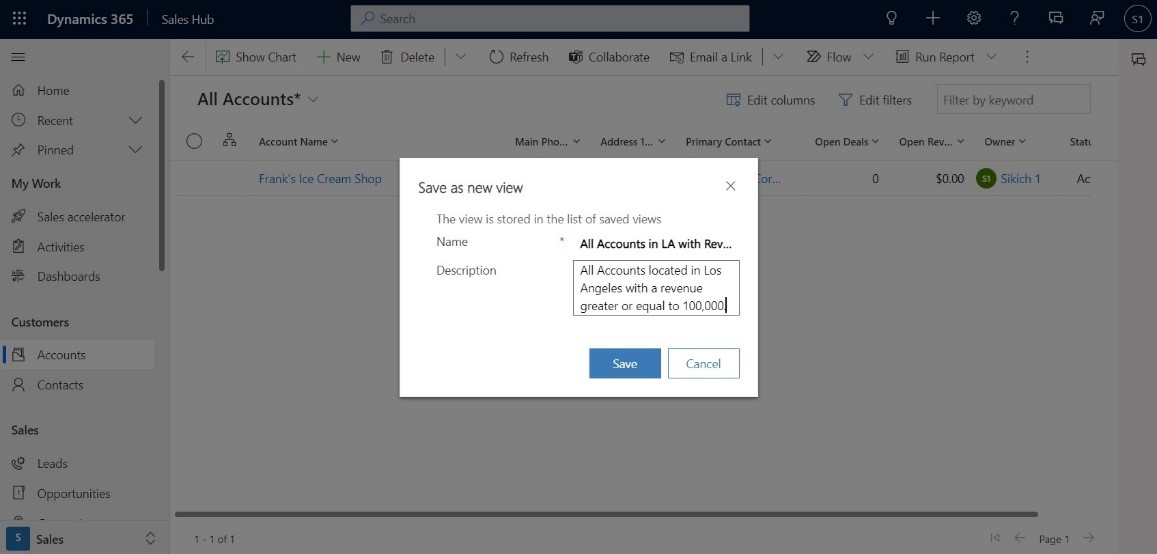
Enter a Name and a Description for the new view and then select “Save.” It’s always a good idea to add a clear and concise title for your view. This allows you to find the needed information quickly and efficiently.
The newly created view will appear as an option in the account views drop-down menu.
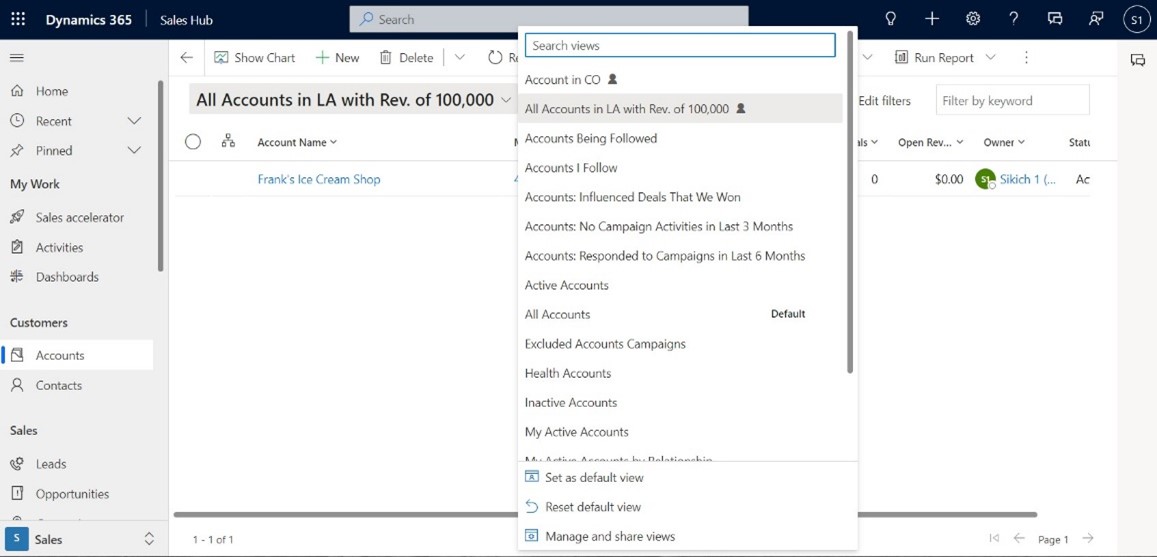
Lastly, now that the view is created and saved, you have the ability to share it with other team members. From the account views drop down menu select “Manage and share views.”

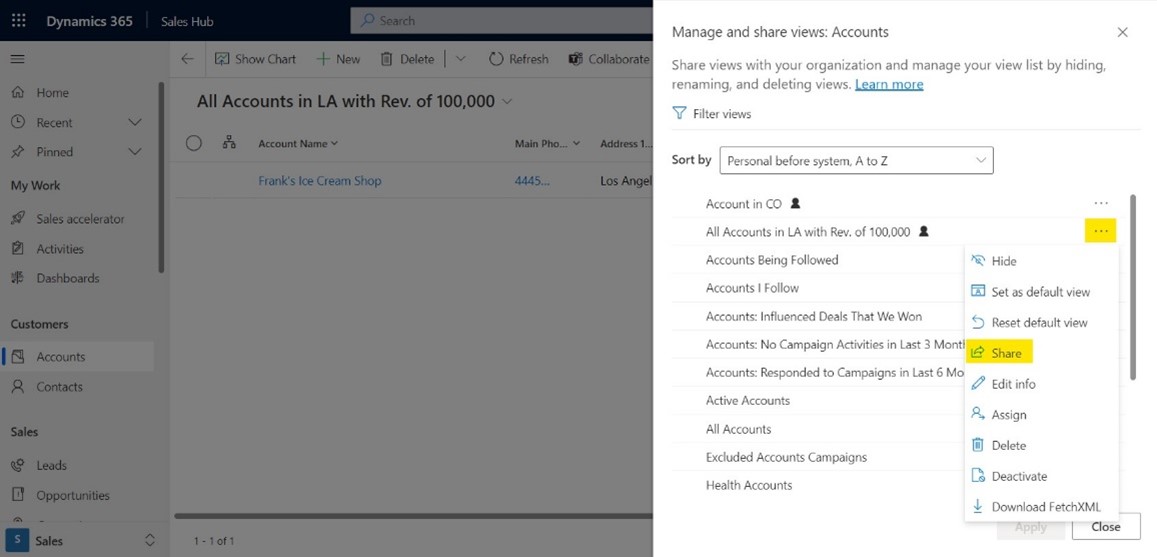
As a result the “Manage and share views: Accounts” window will appear, showing all the views available. Select the “Ellipsis” next to the newly created view and select “Share.”
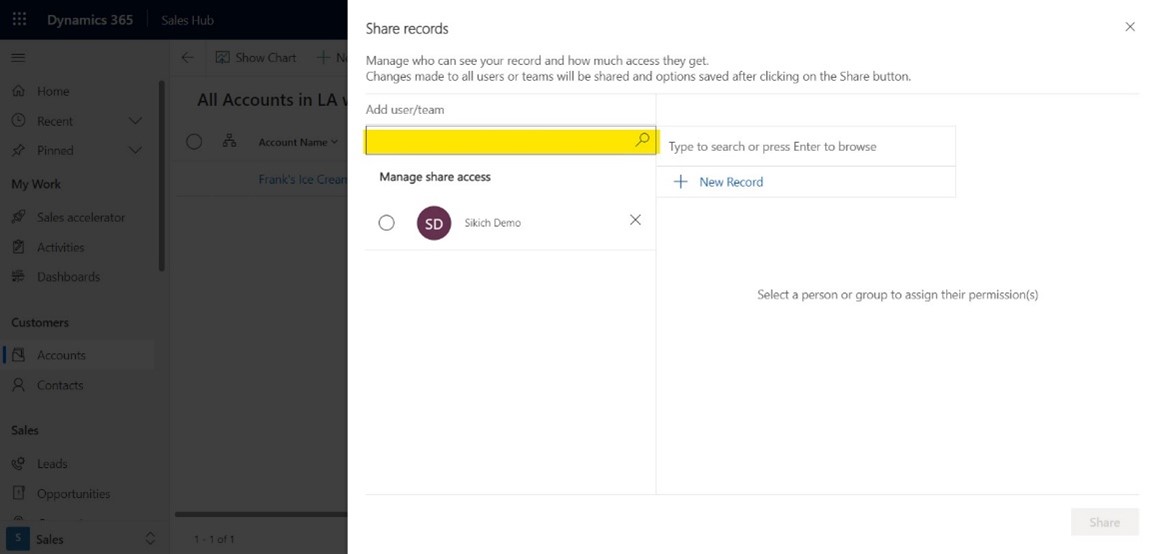
The “Share records” window will appear, displaying all of the available users and teams you can share with. Select “Add user/team” and add team members.
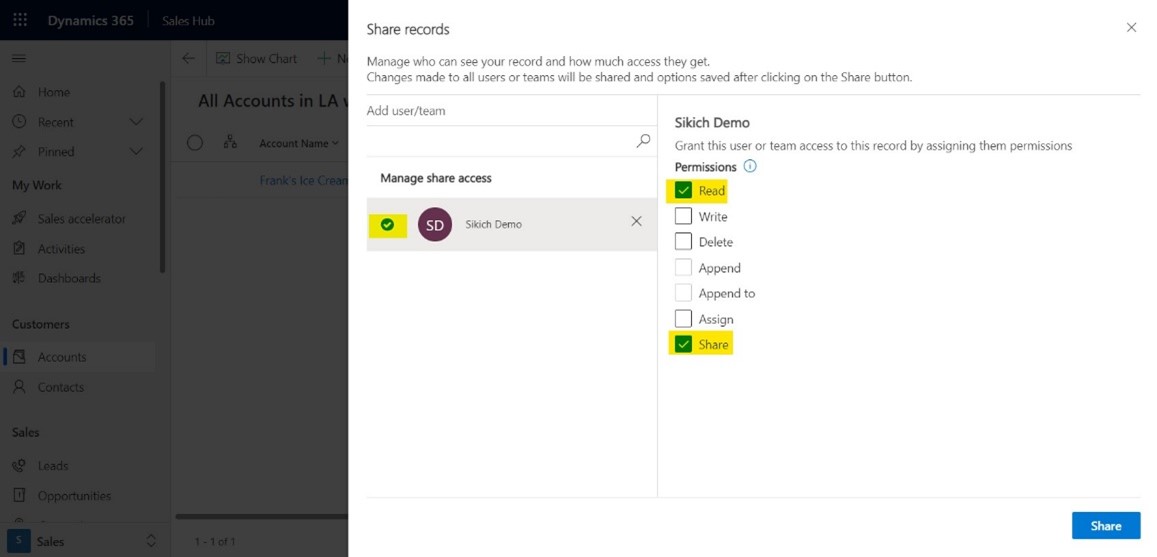
By selecting the user or team that was just added, a permissions window will appear. Depending on the person you are sharing with, you have the ability to give different people unique permissions. Select the desired permissions and then “Share.”
Although the previous version of Advanced Find has been around for a long time, this new way of searching rows, creating views, and sharing with team members is extremely intuitive.
Have any questions about how to use the updated Dynamics 365 Advanced Find feature? Please feel free to contact us at any time!
This publication contains general information only and Sikich is not, by means of this publication, rendering accounting, business, financial, investment, legal, tax, or any other professional advice or services. This publication is not a substitute for such professional advice or services, nor should you use it as a basis for any decision, action or omission that may affect you or your business. Before making any decision, taking any action or omitting an action that may affect you or your business, you should consult a qualified professional advisor. In addition, this publication may contain certain content generated by an artificial intelligence (AI) language model. You acknowledge that Sikich shall not be responsible for any loss sustained by you or any person who relies on this publication.