


Booking types within OpenAir are one of the most commonly used features to help companies categorize the they type of work their staff is being allocated to. The most common practice is to set up the following two OpenAir booking types:
- Confirmed
- Tentative
These are popular, because they enable businesses to “pencil” in resources for future work via the Tentative type and lock down resources for work via the confirmed type. Furthermore, when viewing booking types via the planner view, these two categories provide valuable information to the resource manager/PM around what exactly their team is working on. For example, take the screen shot below:
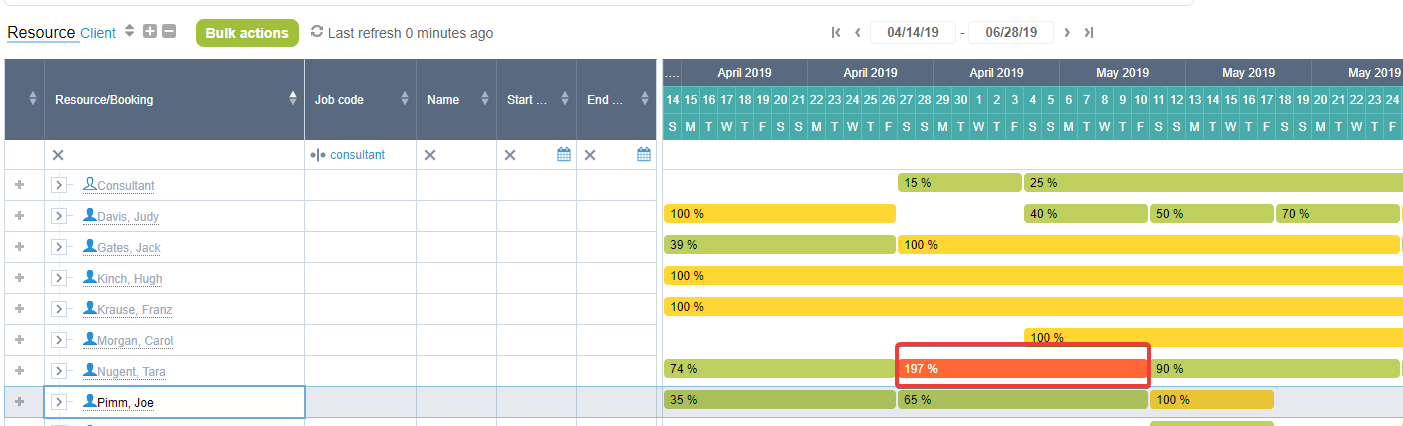
At first glance, you immediately notice that Tara appears to be way over booked for the month of April. However, when expanding this value, we notice a significant portion of this booked utilization is made up of a tentative booking (denoted in orange):

What conclusions can we draw from this? First, is that Tara is not actually over utilized, as her confirmed booking makes up 100% of her time. Second, the tentative booking tells us there is an outstanding staffing need on that project. Presumably, the resource manager or PM would take this information and find another available resource to take on what’s currently tentatively booked against Tara.
While this is great, the process I just described only really works if are drawn to the over utilization and discover the overlapping bookings. What happens though if the resource manager or project manager misses this? This could potentially lead to a missed staffing requirement and subsequently delays in the project. This problem can be alleviated by leveraging another booking type, specifically geared for staffing requests—the “Requested” booking type.
Creating a New OpenAir Booking Type
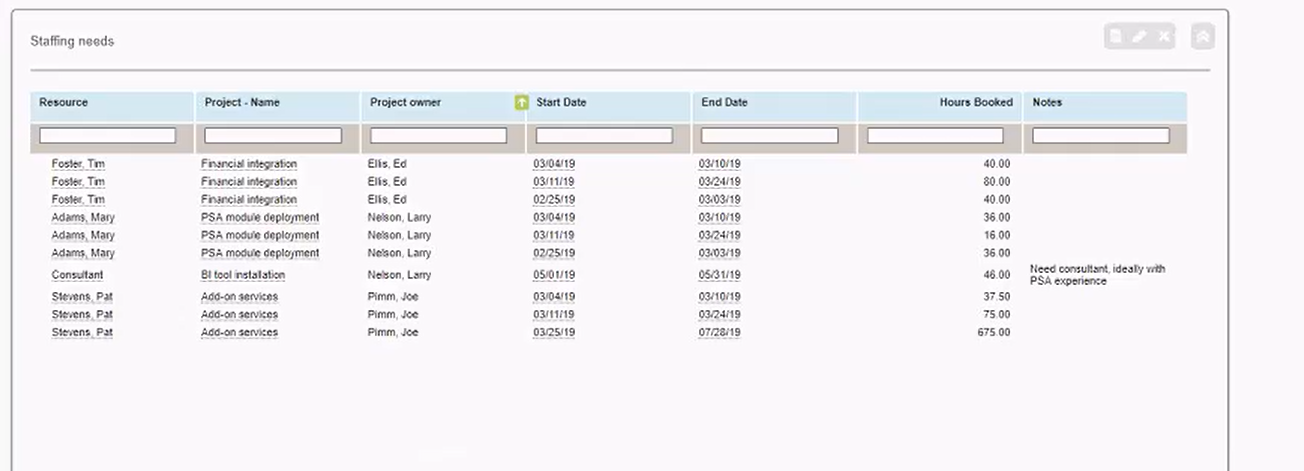
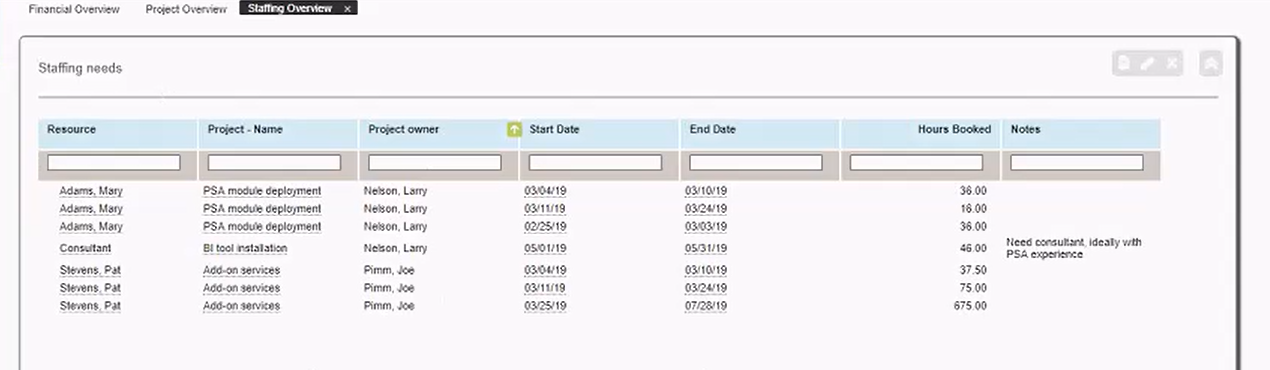
By simply adding a new booking type, we can create a more streamlined business process to identify your companies staffing needs sooner. Here’s an example of how this works in practice. Our example resource manager logs into OpenAir, navigating to their dashboard. The first report present is a list of all current booking requests within the system:
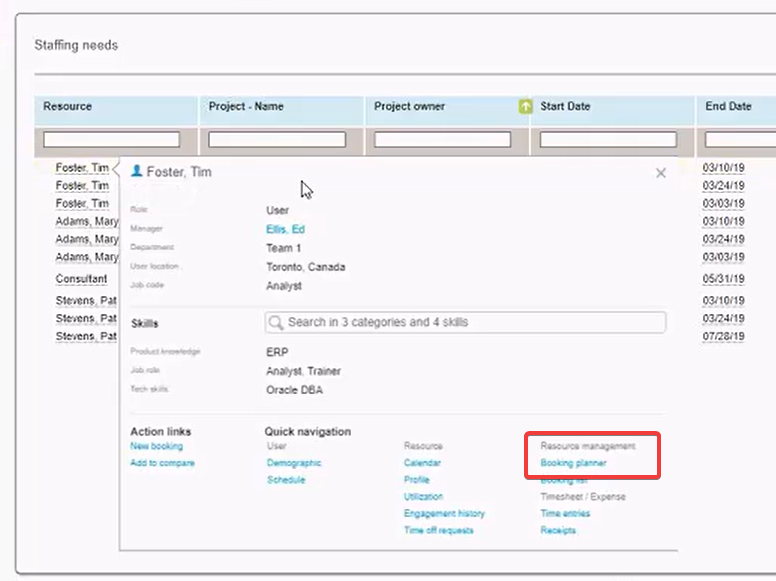
Our resource manager then navigates to the planner view of the first request via the quick menu in order to gauge if the individual has the capacity for the work:
Once there, they are able to quickly identify the requests (denoted in pink) and then either adjust the bookings to confirmed (committing the resource) or begin finding an alternative:
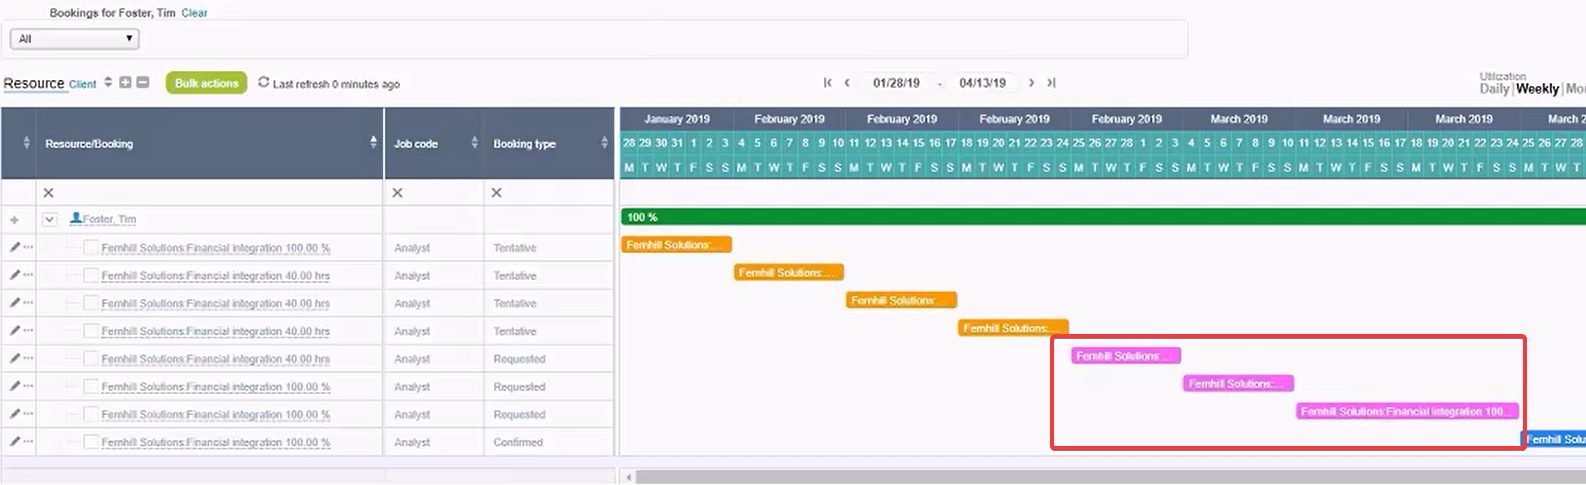
In this case the request matches their availability and the resource manager adjusts the booking types from requested to confirmed. Once complete, they navigate back to their dashboard, refresh the report, and continue processing the next requests in a similar manner!
Before you know it, all staffing needs are met and the resource manager can continue addressing their other responsibilities.
To get some more information around the resource management process please view the following video via YouTube. In addition, below you’ll find the basic configuration needed to accomplish this (Note: This is generic configuration advice and may not fit your exact instances design, please test any new config within a sandbox environment before making changes in production!)
- Administrator should create a new booking type (under Administration>Application settings> Resource settings > Booking types)
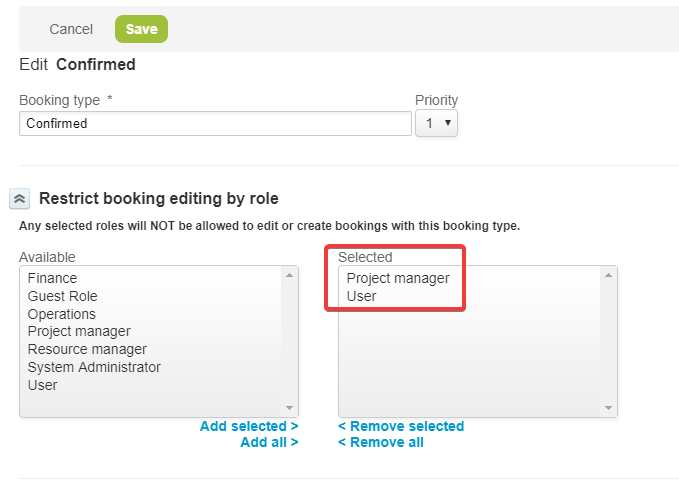
- Modify access to other booking types restricting PMs (or whomever makes the initial request in your organization) to only be able to create bookings with a type of “requested.” This can be done by editing other booking types and selecting all roles that should not have access to it. The screen shot below shows an example of removing access to the “Confirmed” booking type for the project manager and user roles.
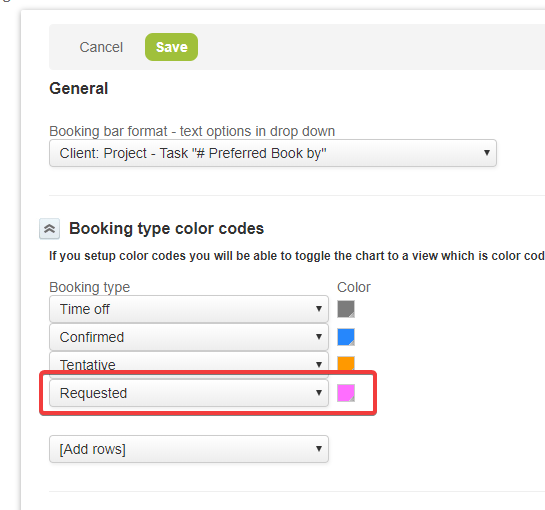
- Update your booking planner color settings and assign the “requested” booking type a color (preferably one that contrasts well with white).
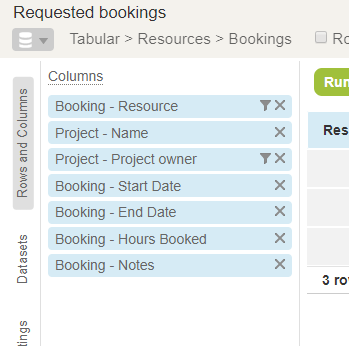
- Create a Bookings tabular report, filtered by booking type “requested” with the following columns:
- Bring the report made in step 4 onto your dashboard
Just like that you’re ready to go!
If you’d like to learn more about NetSuite OpenAir, please contact us at any time! You can also learn about more great tips for NetSuite on our YouTube playlist or our other blog posts.
This publication contains general information only and Sikich is not, by means of this publication, rendering accounting, business, financial, investment, legal, tax, or any other professional advice or services. This publication is not a substitute for such professional advice or services, nor should you use it as a basis for any decision, action or omission that may affect you or your business. Before making any decision, taking any action or omitting an action that may affect you or your business, you should consult a qualified professional advisor. In addition, this publication may contain certain content generated by an artificial intelligence (AI) language model. You acknowledge that Sikich shall not be responsible for any loss sustained by you or any person who relies on this publication.