


With so many tools at our disposal for Microsoft Dynamics CE, all of which help make the work of module configuration easier and more streamlined, there is one “tool” that often rises head and shoulders above the others for its sheer number of embedded tools within it. The clear winner is XRMToolbox. It has become a staple for configuration shortcuts and is especially useful in the online instances of CE.
The tool itself is free of charge and can be found at the following URL: https://www.xrmtoolbox.com/
Even their description of the product provides a quick glimpse into the power of the tool.
What is XrmToolBox?
XrmToolBox is a Windows application that connects to the Common Data Service for Apps (CDS). Dynamics 365 Customer Engagement (CE) applications, like Dynamics 365 for Sales, Service, or Talent, also use the Common Data Service for Apps as their foundational data service. XrmToolBox provides tools to ease customization, configuration, and operation tasks for anything built on CDS, including Dynamics 365 CE (formerly CRM) and model-driven PowerApps. It is shipped with more than 30 tools to make administration, customization, or configuration tasks easier and less time-consuming. And more than 100 other tools are available in the Tool Library.
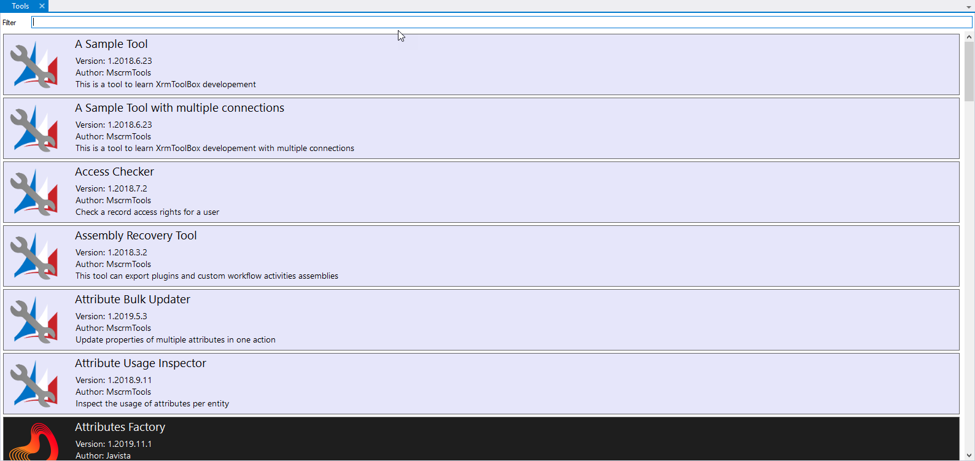
Once you’ve downloaded the solution to your desktop and opened it for the first time, you are presented with a myriad of options and shortcuts.
The real power, though, comes from the connection wizard to your online or on-premise CE instances. You can add a New Connection by providing the necessary login information, including any two-factor authentication requirements.
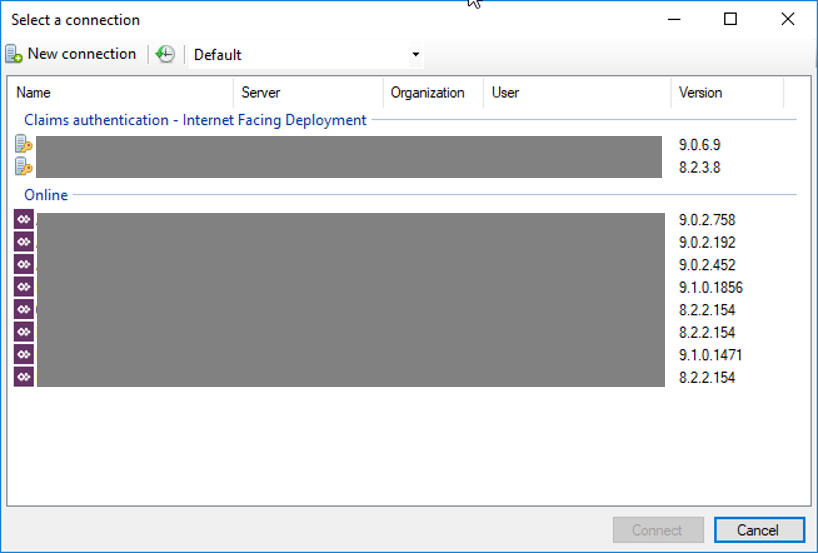 Then it’s as simple as clicking the Connect icon at the top of the navigation bar and selecting the desired client CE instance.
Let’s look at a couple of examples of the modules “tools” within the XRMToolbox platform.
Ribbon Workbench 2016
Ribbon Workbench has been a staple tool available as a standalone configuration assistant for many years. The power of this tool is the ability to make quick updates to the CE ribbons without directly editing the XML version of the ribbon.
The following is a quick example.
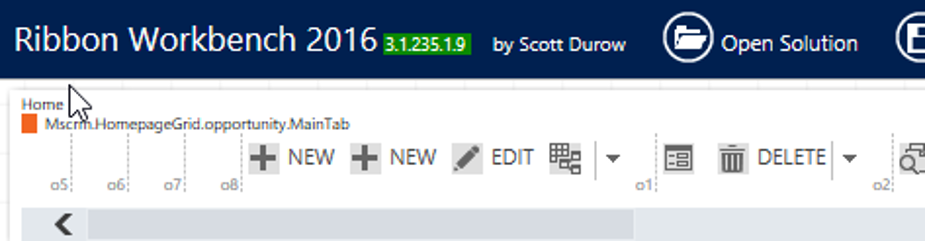
Once logged into the appropriate client CE instance, click on the Ribbon Workbench 2016 bar.
You will be presented with the palate for the Ribbon Workbench interactive tool. You must first select a CE solution specifically for the entity you want to change a ribbon for. The example below is the Opportunity entity and its associated ribbon options. Although it looks rather complicated, once you’ve used it one or two times, it will become quite simplistic.
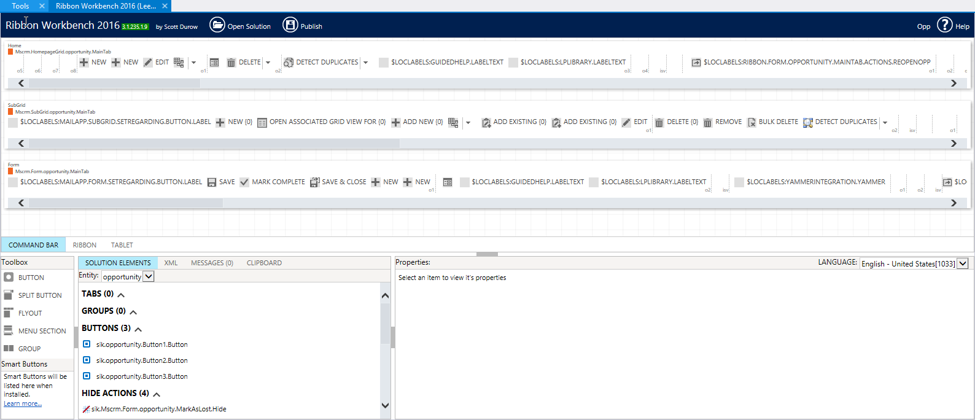
In the format shown, there are three levels of navigation updates to the ribbons:
- Home – this is the navigation bar that would be displayed when looking at a list view for the particular entity.
- SubGrid – as the name implies, this is the ribbon that is displayed when the entity records are displayed in the form subgrid version.
- Form – this is the ribbon displayed when viewing a particular record in the entity form.
For our example, we would like to remove the ability to create a new Opportunity from the main list view of Opportunity records. The premise is that we only want Opportunity records to be created from a relationship to an Account, Contact, etc.
In the “Home” row of the Ribbon Workbench, you will notice the symbol for adding a new record – “+NEW.”
By hovering over the symbol and right-clicking your mouse, you will be presented with a popup menu as follows:
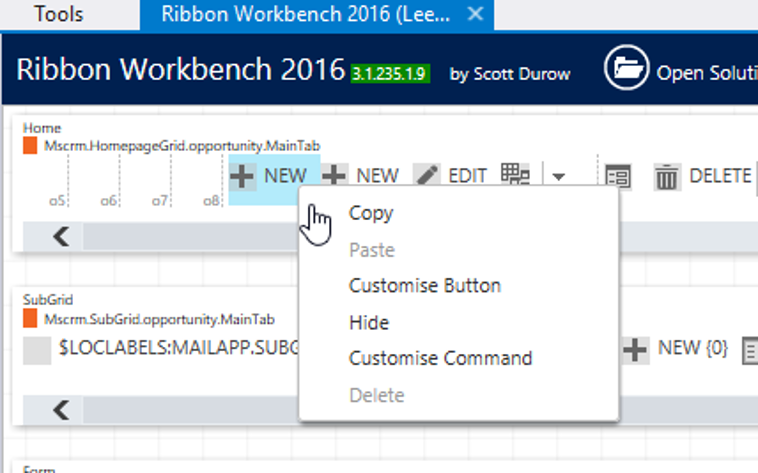
Note there is an option for hiding the icon, which is labeled as “Hide.” Click on this option, and the popup window will be hidden, and the +NEW icon will be displayed with a red slash across it.
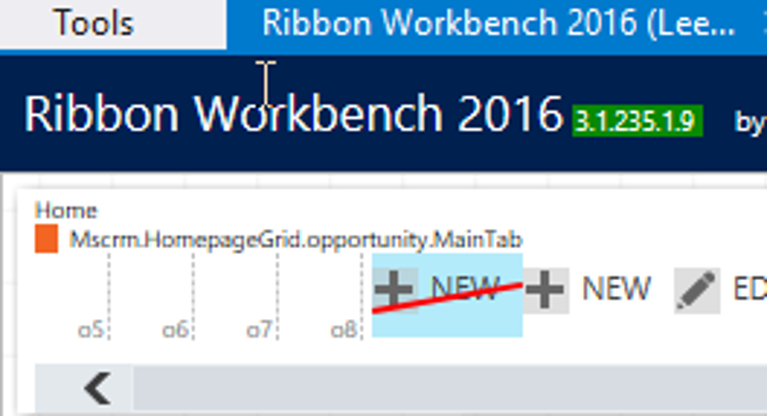
This designates that you desire for this icon to be hidden from view. This will not be implemented until you also select the Publish icon in the workbench tool. Once the change(s) have been published, they will take immediate effect in the CE instance.
By hovering over the symbol and right-clicking your mouse, you will be presented with a popup menu as follows:

Clone Field Definitions
A second example of a useful tool within the XRMToolBox set of tools is the “Clone Field Definitions.” I must admit that this tool, at first glance, did not appear to be of value or one that I would use with any degree of frequency, but I was wrong. There have been several client examples over the years where I’ve needed to add the same fields into multiple entities, all of which needed to be exact duplicates for Field Relationship Mapping to work correctly.
Imagine the example of a half dozen fields that need to be added to the Opportunity record and then be carried from the Opportunity to a related Quote, Order, and ultimately an Invoice. You could certainly add them manually into each entity, but why do that when there is a tool that simplifies it all together, such as Clone Field Definitions!
When you click on the toolbar, you are presented with the palate of choices:
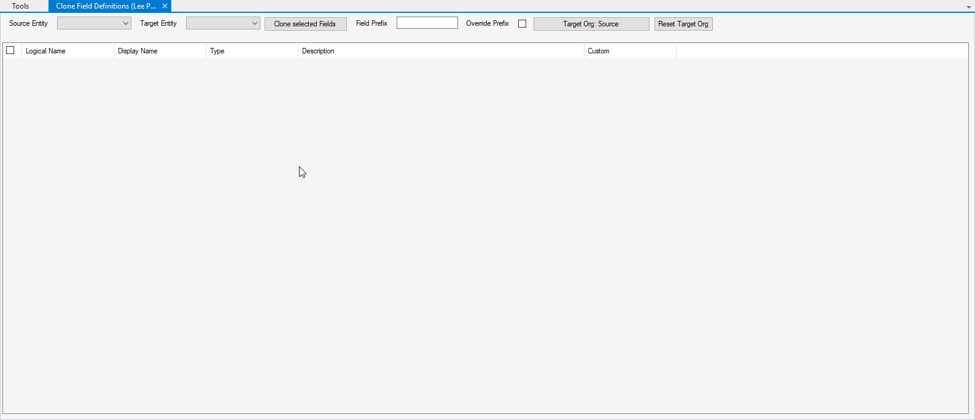
Note that you can select the Source and Target entities, and the associated fields for both objects will be displayed. You can then choose the fields you would like to clone from the Source entity list, and then click the icon labeled “Close selected Fields.”
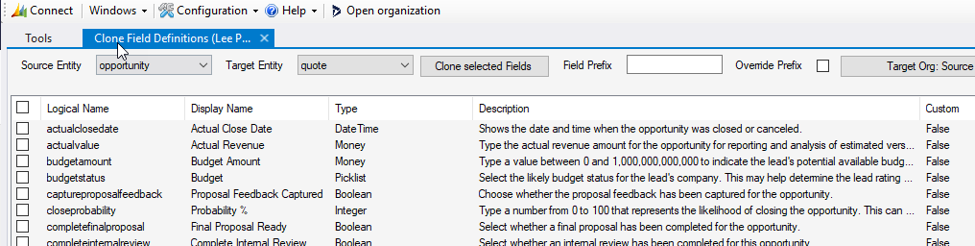
Within seconds, your fields will be copied from one entity to the other without opening the Default system solution and creating them one at a time in the new entity of choice. Again, it seems like it would not be used often, but you will be pleasantly surprised at how often you will rely on it.
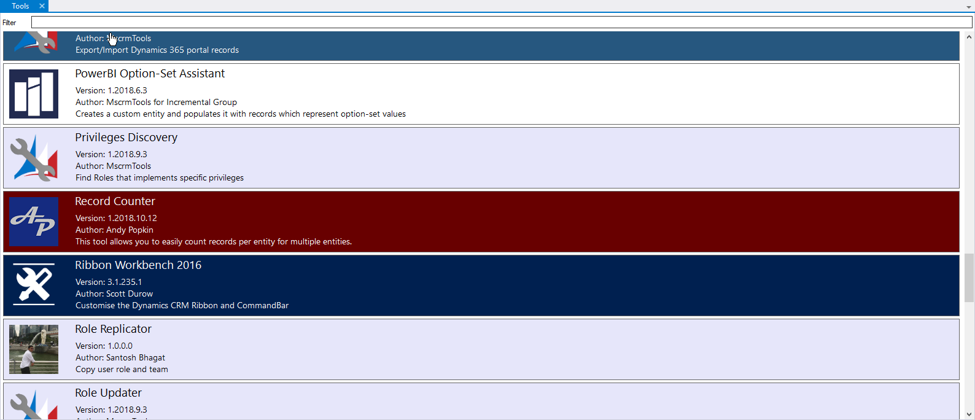
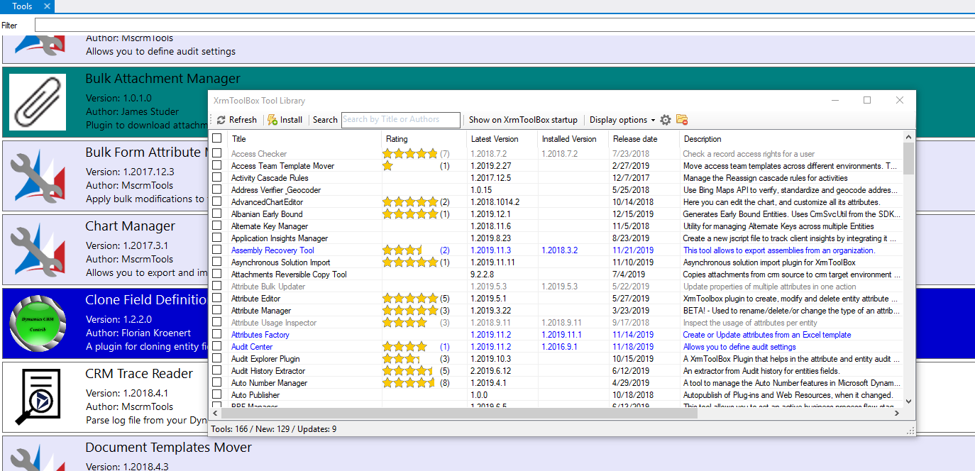
Many more optional tools can be added to the XRMToolBox list of tool modules. They are listed through an icon in the main navigation bar labeled as: Configuration/Tool Library. Once you click on Tool Library, you will be presented with a host of other optional tools you can add to your toolbox. The options are nearly endless, and you can browse and select at will.
Take a test drive in the XRMToolBox! I don’t think you’ll be disappointed!
This publication contains general information only and Sikich is not, by means of this publication, rendering accounting, business, financial, investment, legal, tax, or any other professional advice or services. This publication is not a substitute for such professional advice or services, nor should you use it as a basis for any decision, action or omission that may affect you or your business. Before making any decision, taking any action or omitting an action that may affect you or your business, you should consult a qualified professional advisor. In addition, this publication may contain certain content generated by an artificial intelligence (AI) language model. You acknowledge that Sikich shall not be responsible for any loss sustained by you or any person who relies on this publication.