This website uses cookies so that we can provide you with the best user experience possible. Cookie information is stored in your browser and performs functions such as recognising you when you return to our website and helping our team to understand which sections of the website you find most interesting and useful.
How to Accurately Recognize Vendor In-Transit Payments in NetSuite

Prior to the Vendor In-Transit Payments feature rolled out in NetSuite version 2019.1, the accounting system would only show the date the payment was created as the date of the payment. Using In-transit Payments allows a more precise accounting by showing the payment across time by recording the date of your intent to pay funds and then confirming the date that a deposit happens at the vendor’s bank. This process has two unique phases:
Phase 1: Recording the Payment
Enter a bill payment as normal to track that a payment is being made. This record does not post to a bank account but temporarily posts to an interim, non-posting Cash-in-Transit account.
The In-Transit box is checked on this bill, so when saved the transaction status is “IN TRANSIT” and the Confirm or Decline button appear at the top of the page.
 The G/L impact of this transaction is non-posting. Accounts Payable account is debited only after you receive notice that the payment amount has been received and deposited by the vendor’s bank. The payment status remains as In-Transit until you receive verification and mark the payment as Confirmed status.
A system journal is created which impacts the CIT and the Clearing Payments account that was created when the In-Transit feature was enabled.
In the next step, the bank processes the payment request.
- Payments may be SWIFT/SEPA, EFT/FTP electronic payments, ACH/wired, or paper checks.
- The result of the request is one of the following:
- The bank disburses funds to deposit the payment.
- The bank rejects the payment request.
Phase 2: Verifying Funds were Received
When you download transactional data from your bank account or your bank sends you a statement or data with the processing results, import the transactions that detail disbursements and rejections.
Reconcile matched General Ledger transactions to clear the actual bank payments against your in-transit payment records.
In-transit payments are resolved in one of two ways:
- Successful disbursements that have been confirmed by the vendor’s bank are marked as confirmed. The CIT account amount is reversed and the AP account is debited and the bank account is credited.
- Errors or rejected payments will be declined by the user. The vendor payment status is updated to Declined and the CIT account amount is reversed.
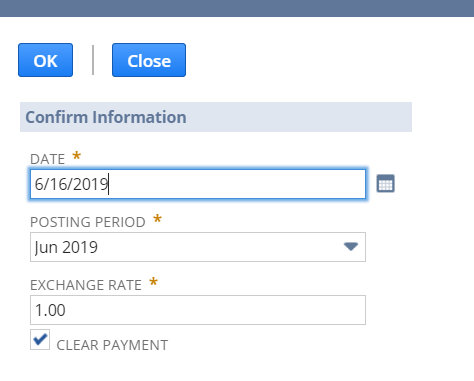
When you receive verification from your bank account statement data that the payment funds have been processed by both banks and received by the vendor, you mark the payment as Confirmed. Payments can be cleared in your bank ledger as soon as they are confirmed, which assists users in completing bank reconciliations.
When confirmed, the payment amount is reconciled by moving funds out of the interim Cash-In-Transit account, updating the true payment cash account and A/P account. The payment record is then updated with the actual bank accounts’ posting dates and the payment status is updated.
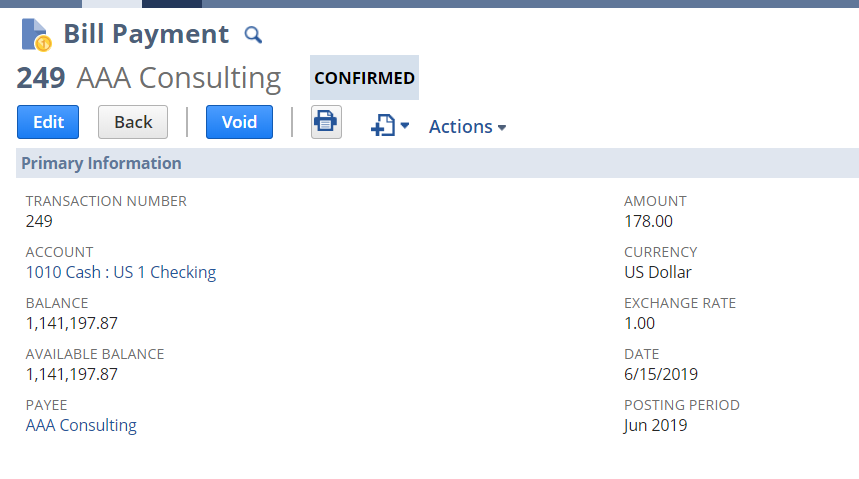
After saving, the status on the bill payment will show as Confirmed.
 A system journal is created which reverses the impact of the CIT and Payment Clearing accounts from when the payment was created. The original transaction now becomes a posting transaction which reduces the actual cash account and A/P.
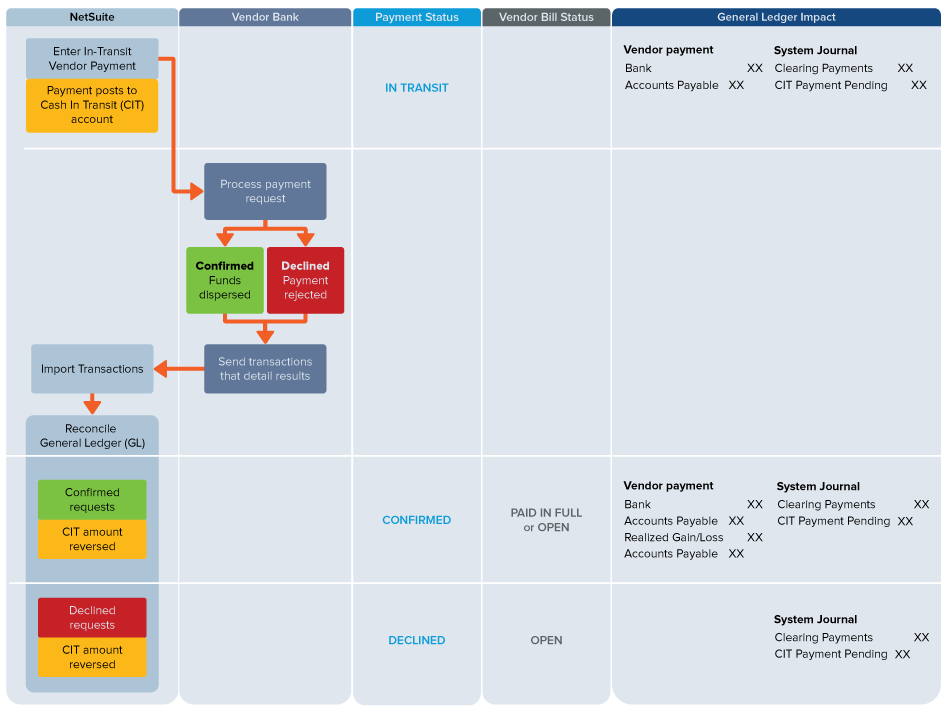
If the bank encounters errors during processing, you can decline the payment and the funds are removed from the Cash-In-Transit account. The process workflow shown below details the transactional processing and G/L impacts made at each phase.

To start using In-Transit Payments in NetSuite, following these steps to enable and setup the feature:
- Enabling the In-Transit Payments Feature
- Go to Setup > Company > Setup Tasks > Enable Features.
- Click the Accounting
- Under the Advanced Features heading, check the In-Transit Payments
- Click Save.
- Creating a Cash In-Transit (CIT) Clearing Account
- Create a G/L account for Cash-In-Transit (CIT), a clearing account to hold amounts where payments have been made, but the money has not been received by the vendor’s bank.
- This account must be the account type of “Other Current Liability.”
- Setting Preferences for In-Transit Payments
In NetSuite OneWorld accounts, you can set a global preference to use one CIT account for in-transit payments in all subsidiaries, or each subsidiary can use a different CIT account.
- Go to Setup > Accounting > Preferences > Accounting Preferences.
- Click the General
- Under Accounts Payable, choose settings in the following fields:
- Check the Use In-Transit Vendor Payments by Default box if you want vendor payments marked as In-Transit by default. This setting can be changed when you create individual vendor payments. This field defaults to be checked.
- In the Vendor In-Transit Payment Account field, choose an account to function as the interim Cash In Transit (CIT) account.
- Click Save.
If you’d like to learn more about In-Transit Vendor Payments or anything else about NetSuite, please contact us at any time! You can also learn about more great tips for NetSuite on our YouTube playlist or our other blog posts.
This publication contains general information only and Sikich is not, by means of this publication, rendering accounting, business, financial, investment, legal, tax, or any other professional advice or services. This publication is not a substitute for such professional advice or services, nor should you use it as a basis for any decision, action or omission that may affect you or your business. Before making any decision, taking any action or omitting an action that may affect you or your business, you should consult a qualified professional advisor. In addition, this publication may contain certain content generated by an artificial intelligence (AI) language model. You acknowledge that Sikich shall not be responsible for any loss sustained by you or any person who relies on this publication.


