


Since the release of SharePoint, the domain name chosen when first signing up for a Microsoft 365 tenant was the domain name a company was stuck with. Even with the ability to add custom domain names, there has never been an option to change the SharePoint and OneDrive URLs. Typically, the need to change the domain name stems from a rebranding, merger, or acquisition. Thankfully, Microsoft has now released the ability to change your SharePoint domain name. For example, if your organization name changed from Contoso to Fabrikam, you can now change your SharePoint URLs from contoso.sharepoint.com to fabrikam.sharepoint.com.
Important Notes Before You Begin:
- This feature is currently available to organizations that have no more than 10,000 total SharePoint sites and OneDrive accounts combined. If you get error 773 “Not Implemented” when you try to start a domain rename, the feature isn’t enabled yet for your organization. Try again later.
- This change affects only SharePoint and OneDrive URLs. It doesn’t impact email addresses.
- It isn’t available for organizations that have set up multi-geo.
- This feature is not available for Microsoft 365 Government GCC High and DoD customers.
- When you rename your SharePoint domain, a redirect at the previous address is created which will expire 1 year after the rename.
- You can only rename your SharePoint domain once.
- You cannot change your SharePoint domain name back to the original name after you rename it.
- For more info, check out this reference to Microsoft that includes a list of limitations and impacts: https://learn.microsoft.com/en-us/sharepoint/change-your-sharepoint-domain-name
Change SharePoint Domain Name
First you must add the new domain name to your Microsoft 365 tenant if you haven’t already. Check the availability of the new domain you want. For example, if you want your SharePoint and OneDrive URLs to begin with fabrikam.sharepoint.com, enter https://fabrikam.sharepoint.com in a browser. If you get a message that the address couldn’t be found (404), it’s probably available. If you get a sign-in screen or a message that your username couldn’t be found in the fabrikam.sharepoint.com directory, then the domain has already been taken and you’ll need to try a different one. In this case, your only option is to choose a different name.
Alternatively, if you own the domain for another subscription, you need to delete that tenant in Azure AD. Deleting a tenant typically takes three days to complete to make the domain available.
Warning: Do NOT use the domain to test this procedure in a test environment first. If you do, you won’t be able to use the domain for your production environment.
Add Domain
Go to https://aka.ms/SPORenameAddDomain.
You must use the link https://aka.ms/SPORenameAddDomain to go to the Custom domain names page in the Azure AD admin center. If you browse to the page instead of using the link, you won’t be able to add your custom onmicrosoft.com domain successfully.
Select Add custom domain.
In the Custom domain name box, enter the full new “.onmicrosoft.com” domain, and then select Add domain.
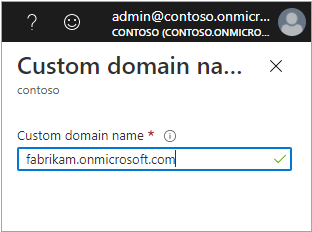
When adding the domain, it must be an “onmicrosoft.com” domain. For example, if you want to rename your tenant to fabrikam.sharepoint.com, the domain that you enter should be fabrikam.onmicrosoft.com. You do not need to purchase the “onmicrosoft.com” domain to add it and it does not require any public DNS registration. If you get a message that the domain isn’t available, try a different domain. After getting a confirmation that the domain was added successfully, you might see a message that the properties could not be found. Select the message to refresh domain references.
Warning: Do NOT add any other domains. Do NOT configure the new domain as the initial domain. If, after adding the domain, you are prompted to create a new TXT record with your domain name registrar, the domain has NOT been added correctly and you will NOT be able to perform a rename. If you are prompted, you will need to delete the invalid domain and try again.
In the navigation at the top of the page, select the name of your tenant to go back to the Custom domain names page. Make sure the onmicrosoft.com domain you added is on the list and the Status appears as Verified.

Rename the Domain
Next, we’ll use Microsoft PowerShell to rename your domain. Please note that if the status is NOT “Verified,” then you will NOT be able to perform a rename.
Changing your SharePoint domain name might take several hours to days depending on the number of sites and OneDrive users that you have. We strongly recommend that you make this change during a period of low usage (like a weekend) and tell users to avoid accessing SharePoint and OneDrive content during the change. In addition, any actions that create new OneDrives and sites (such as creating a new team or private channel in Microsoft Teams) will be temporarily blocked during the rename.
Download SharePoint Online Management Shell
Now you will need to download the latest SharePoint Online Management Shell. If you installed a previous version of the SharePoint Online Management Shell, go to Add or remove programs and uninstall “SharePoint Online Management Shell.” The app isn’t supported on Mac devices.
Make sure the version is 16.0.22810.12000 or earlier. You might receive an error Microsoft.SharePoint.Client.ResourceNotFoundException for later versions. You can install a specific version from Windows PowerShell using the Install-Module command, for example Install-Module -Name Microsoft.Online.SharePoint.PowerShell -RequiredVersion 16.0.22810.12000.
Connect as an Admin
Connect to SharePoint as a Global Administrator or SharePoint Administrator in Microsoft 365. For example, Connect-SPOService -Url https://contoso-admin.sharepoint.com.
Specify New Domain Name
Run the following command to specify the new domain name: Start-SPOTenantRename -DomainName <DomainName> -ScheduledDateTime <YYYY-MM-DDTHH:MM:SS> [-WhatIf] [-Confirm]
Where “DomainName” is the part before “sharepoint.com” or “onmicrosoft.com” and “ScheduledDateTime” is at least 24 hours in the future, but not more than 30 days. The time you enter is based on the current date and time of the computer you’re using. For example, Start-SPOTenantRename -DomainName "fabrikam" -ScheduledDateTime "2021-12-31T10:25:00".
If the PowerShell command Start-SPOTenantRename is not found or nothing is returned, make sure you installed the latest SharePoint Online Management Shell. Before installing the latest version, you might need to uninstall all previous versions by running: Uninstall-Module Microsoft.Online.SharePoint.PowerShell -Force -AllVersions.
Also check Control Panel’s Programs and Features screen for SharePoint Online Management Shell. Uninstall and reinstall if necessary.
You can get the status of the rename by running Get-SPOTenantRenameStatus. Make sure you open a new PowerShell window to sign in again. The date and time shown with this command is in UTC format.
During and after the rename, you can get the state of a site by running Get-SPOSiteRenameState.
Verify Domain Rename Success
To verify success of the rename operation, please ensure that you review the status of the rename operation, as well as the count of renamed sites in comparison to total sites. The count of sites that cannot be renamed to the new domain will be shown in the Attention Required field. To get more information on these sites, run Get-SPOSiteRenameState and pass the RenameJobID listed in the tenant rename status as the ParentOperationID, and the desired status (Success/Failed/Suspended). If you want to export these results to a CSV file, you can use the Export-Csv cmdlet.
Get-SPOSiteRenameState -ParentOperationID <RenameJobID> -State Failed | Export-Csv -Path <Path>
To cancel a rename that has not started, you can run Stop-SPOTenantRename.
Review SharePoint Settings
Finally, review features and settings after the rename. Review any firewall rules that might block access to the new domain. Review organization browser settings to make sure the new domain is a trusted location. This includes reviewing any Group Policy settings that might control browser settings. Review any third-party apps, custom apps, and scripts that access SharePoint. They might need to be modified to use the new domain. If you have custom SharePoint Framework solutions that require access to an API, check the API access page in the SharePoint admin center to ensure that the new domain name can be used by SharePoint Framework components.
We’ve recently assisted a client of ours that went through a rebranding using the steps defined in the blog, and it went smoothly. Some users may need to sign out and back into OneDrive on their computers, but overall, it’s a simple and clean process. If you need assistance, please reach out to us!
This publication contains general information only and Sikich is not, by means of this publication, rendering accounting, business, financial, investment, legal, tax, or any other professional advice or services. This publication is not a substitute for such professional advice or services, nor should you use it as a basis for any decision, action or omission that may affect you or your business. Before making any decision, taking any action or omitting an action that may affect you or your business, you should consult a qualified professional advisor. In addition, this publication may contain certain content generated by an artificial intelligence (AI) language model. You acknowledge that Sikich shall not be responsible for any loss sustained by you or any person who relies on this publication.