


Some environments require that additional details, or attributes, are entered for items that are Batch controlled. An example would be a company that purchases Steel Coil and needs to record a Heat number, Carbon content, Coil dimensions, etc. These attributes are recorded in D365 and available to users at subsequent processes for determining whether the batch and its attributes meet additional requirements for a unique application. In these cases, the standard Batch ID, Best Before Date and/or Expiration Date is not sufficient. To support these additional attributes, users can utilize the Batch Attributes functionality.
1. Navigate to Batch Attributes in either Inventory Management à Setup à Batch à Batch Attributes, or use Product Information Mgt à Setup à Categories and Attributes à Batch Attributes.
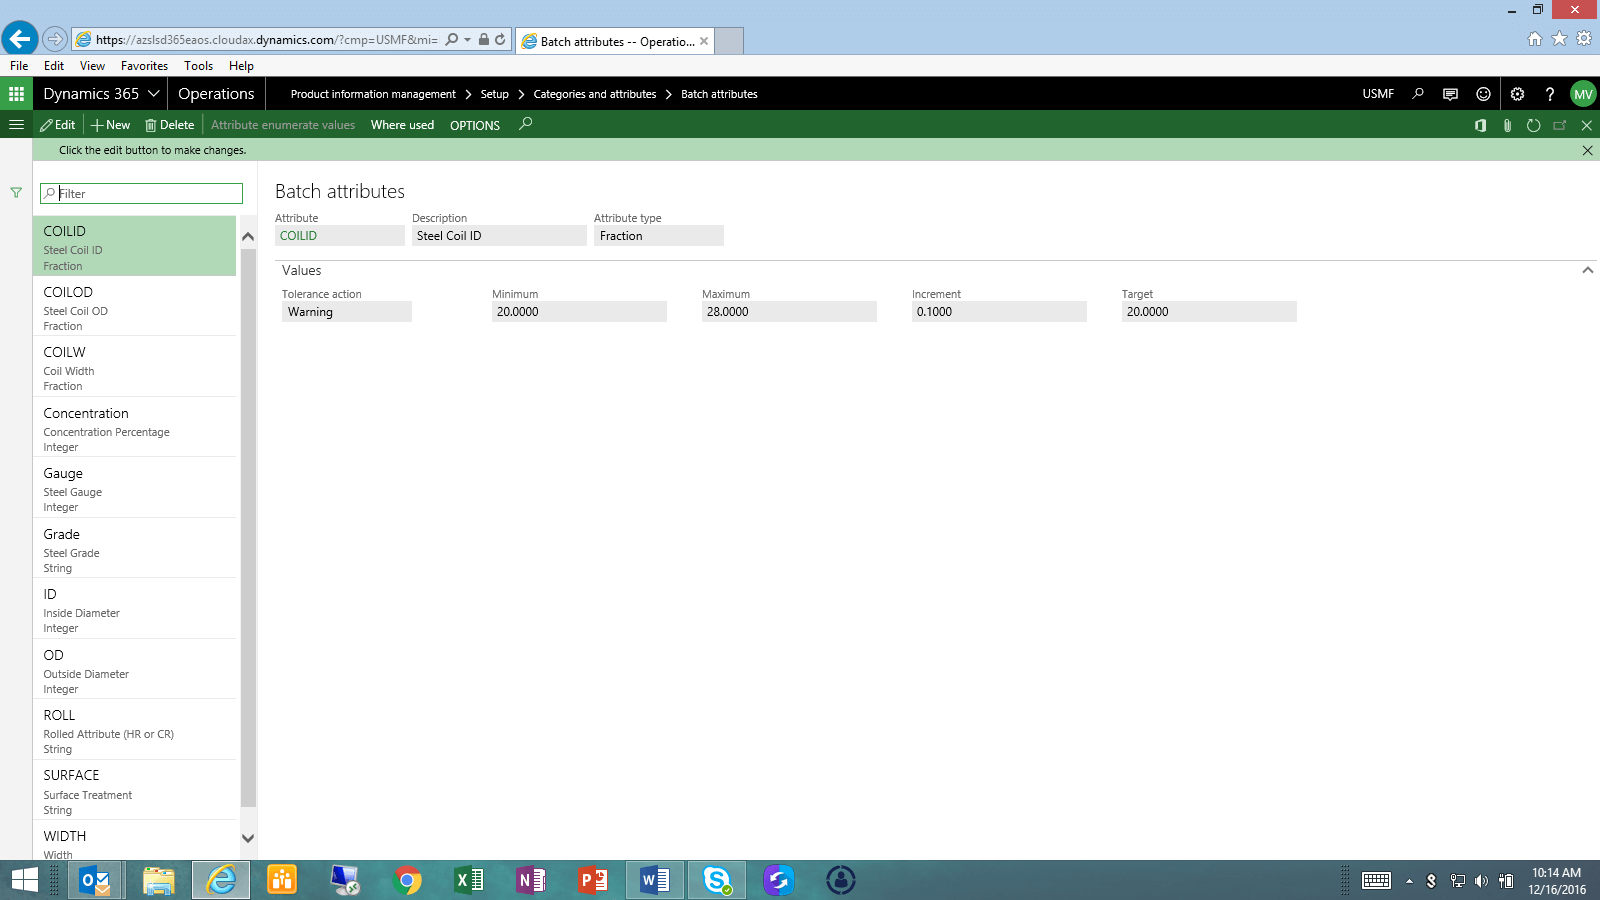
2. Batch Attributes are defined here using the New menu option. Attributes can be of type:
- String – the attribute is an alpha-numeric that is free-form and not bounded by high or low values.
- Integer – the attribute is an integer that has a minimum value, maximum value, an Increment, and can have a target value if desired.
- Fraction – same as Integer, but allows fractional or decimal values.
- Enumerate – select from a list of values that are predefined. When an attribute of this type is defined, the option of ‘Attribute enumerate values’ appears in the top menu, allowing the user to define the values and sequence in which they are presented. The user must select from this list.
- Date – the attribute is a date entered by the user.
Note that the Tolerance action can be defined as Warning or Not Allowed; providing feedback to a user that enters a value that is outside the Minimum or Maximum values defined for that attribute.
Attributes can be maintained up until a Batch record is created that utilizes these attributes, then they are frozen in the system, due to the need for referential integrity.
3. The next logical step, which is optional, is to collect the attributes that will be required for a specific product or product family into a Batch Attributes Group. Navigate to the Batch Attributes Group definition in the same menu area as Batch Attributes.
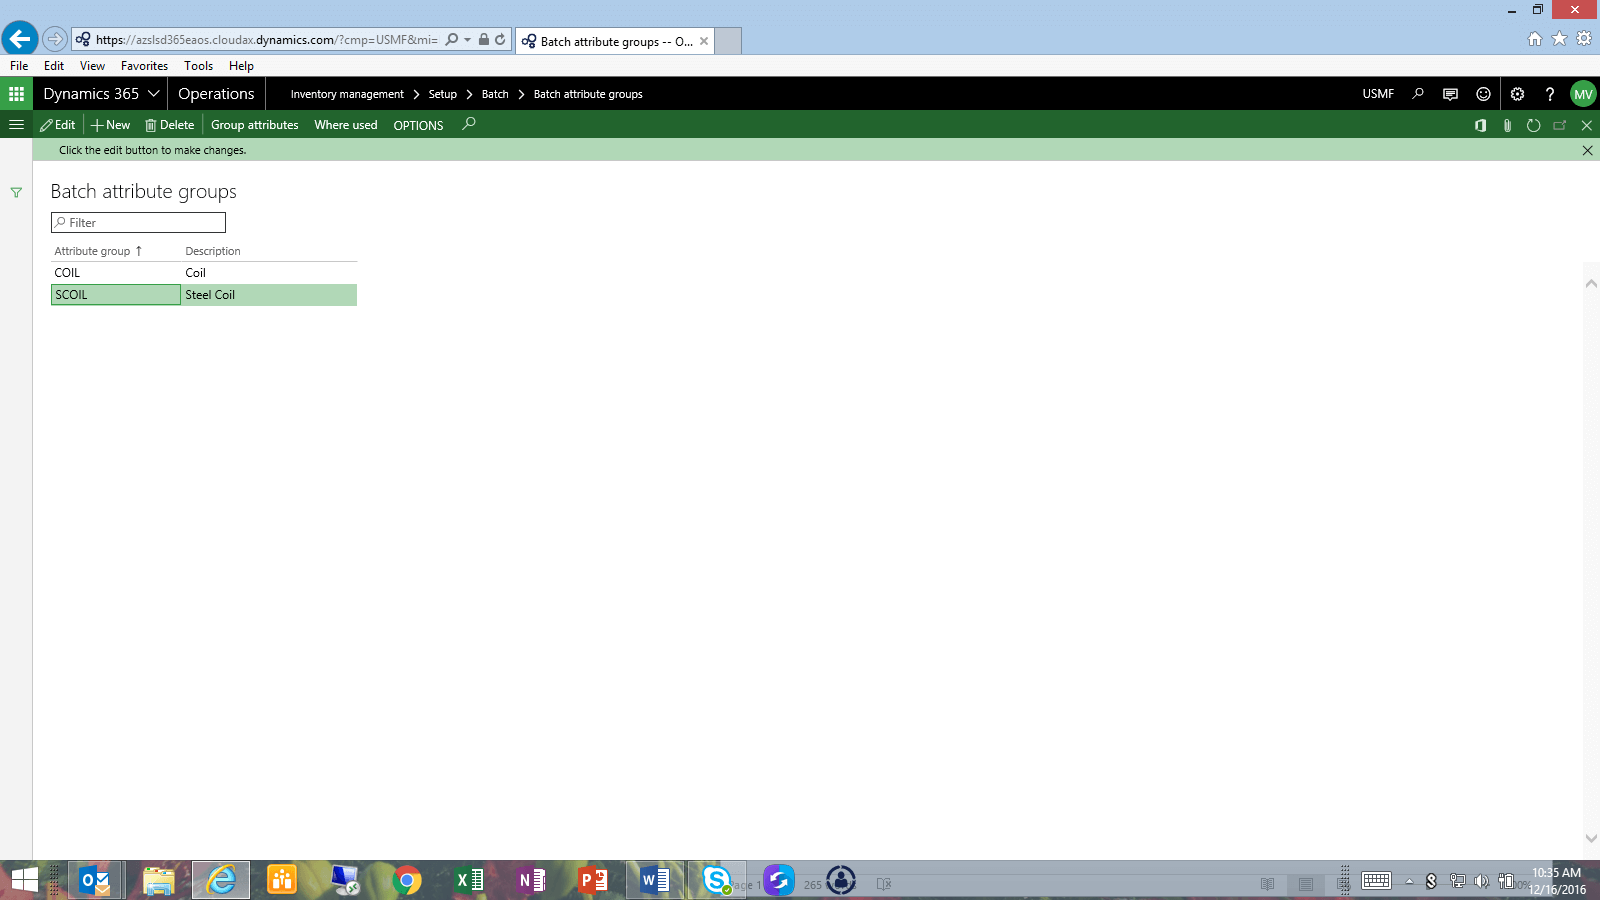
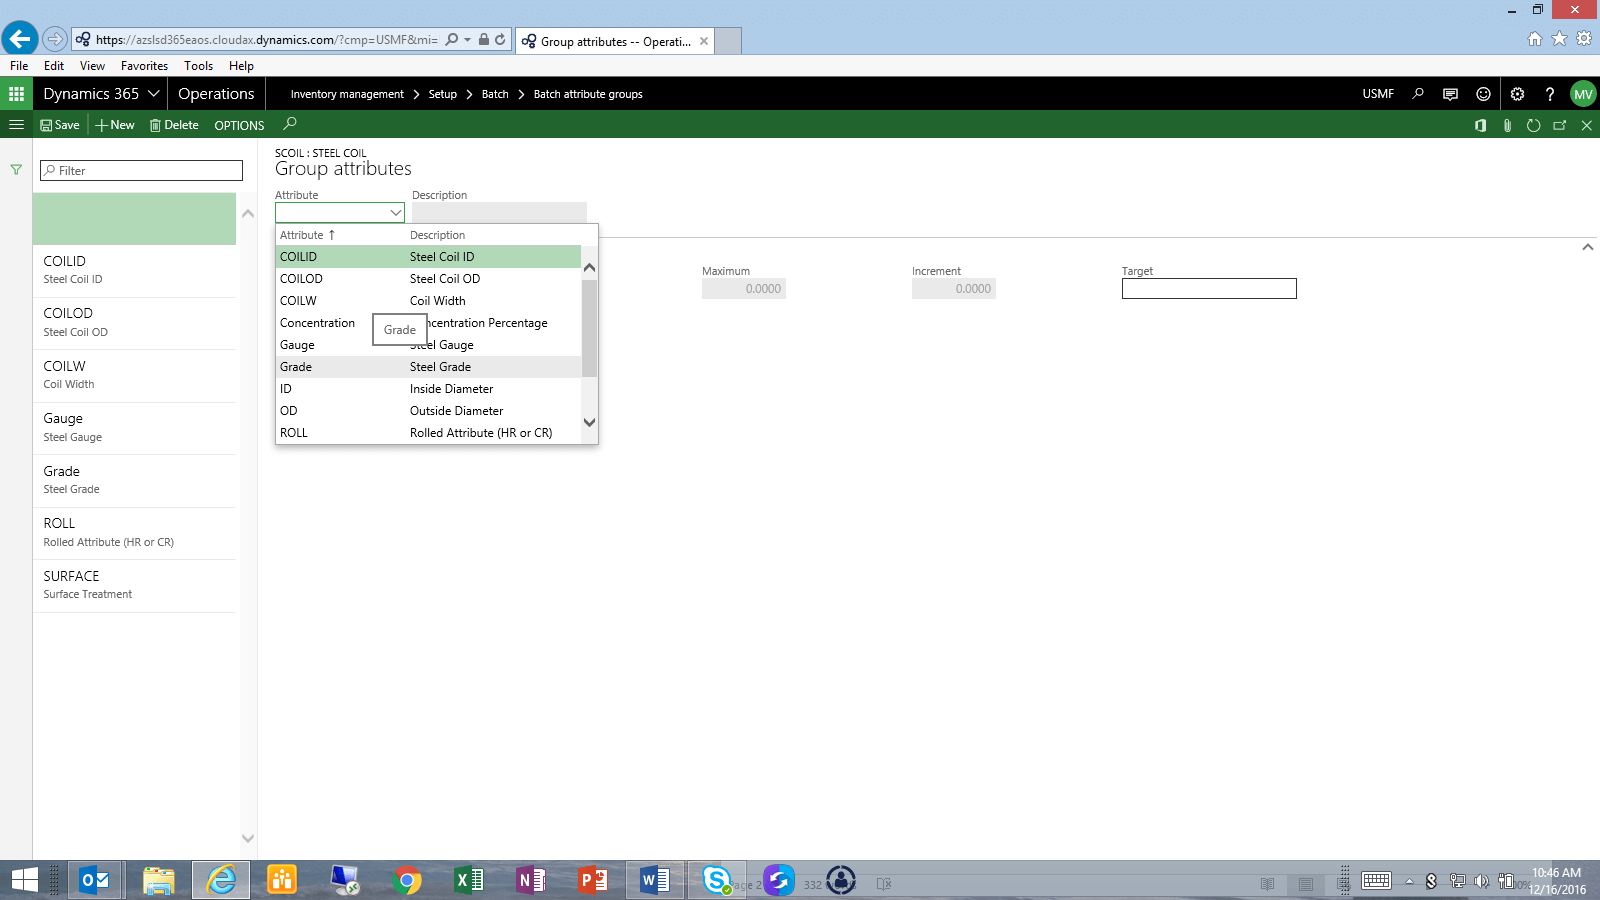
Define the Batch Attributes Group ID and Description, then focus on the new Batch Attributes Group record you have defined, and click on Group Attributes from the top menu. After this step, select New to add attributes to your Group, and click on the down carat in the Attribute field to select from the list of available attributes. Repeat this process to select all the attributes that apply to this Group. Note that the order in which you select/add attributes here is the order they are presented to the user later.
4. The user has now defined the additional attributes that need to be collected in the Batch Attributes Group.
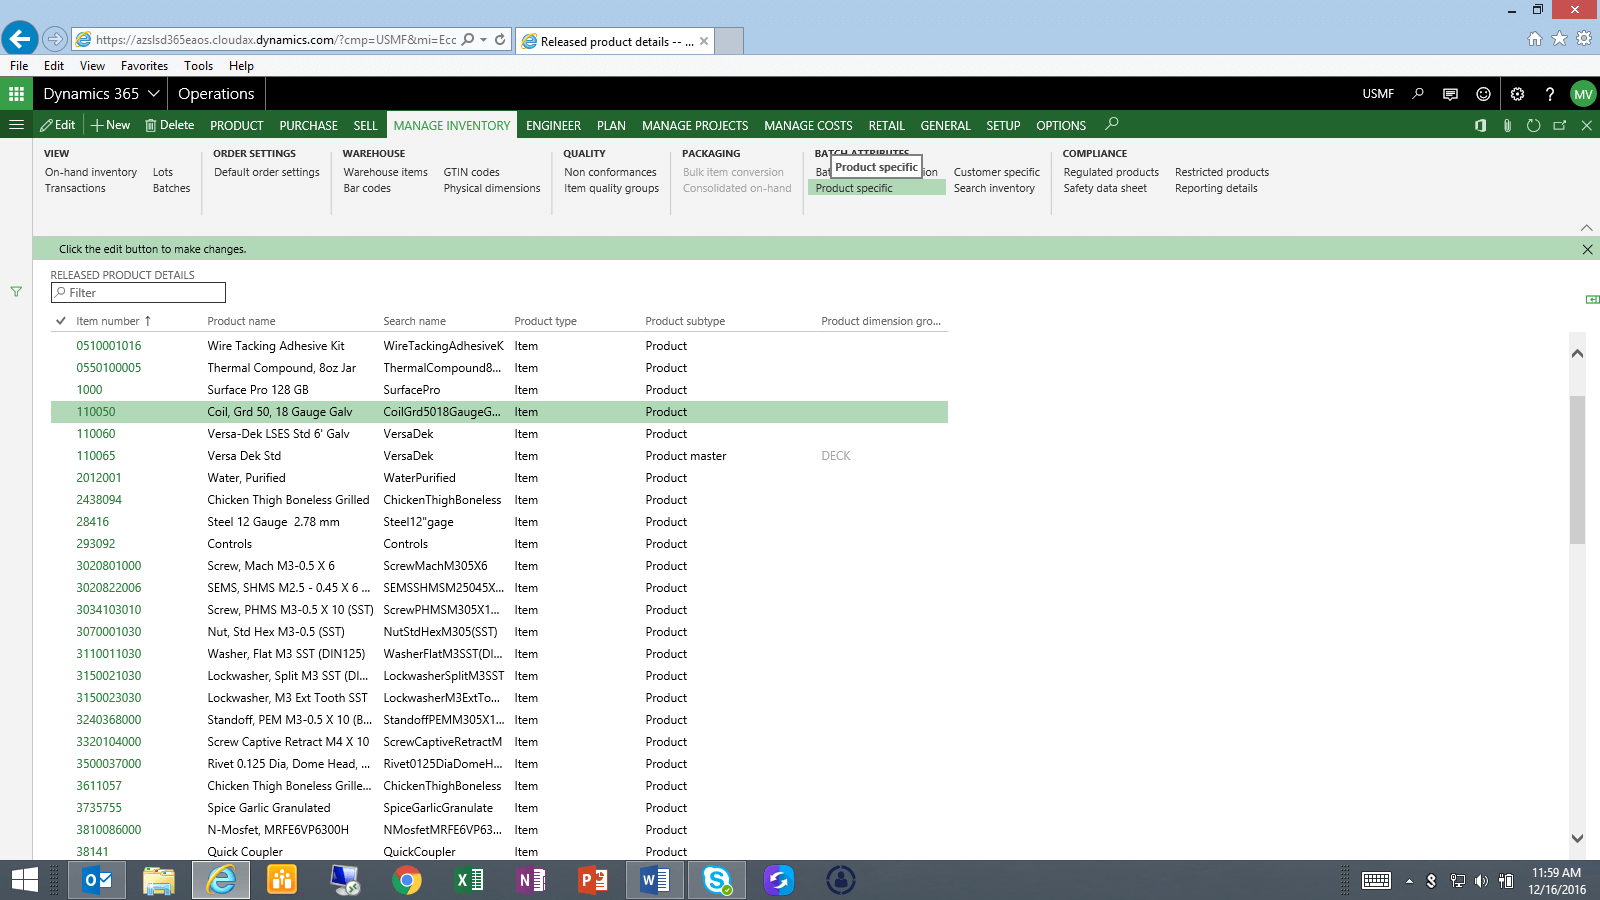
This Group is ready to be associated with a batch controlled item. Navigate to Product Information Mgt à Released Products. Select a product that requires batch control (has a Tracking Dimension Group that includes Batch control), and select the Inventory Management menu tab at top. In the Batch Attributes section of this menu, you will see options for both Product Specific and Customer Specific. Product Specific means that the attributes are common for the Product, and are NOT specific to the Customer for that product. In some environments, attributes for a product are specific to the customer that will buy the product (and could be defined as a result of a downstream Prod Order process). Let’s proceed in this document to define Product Specific Batch Attributes, by clicking on Product Specific.
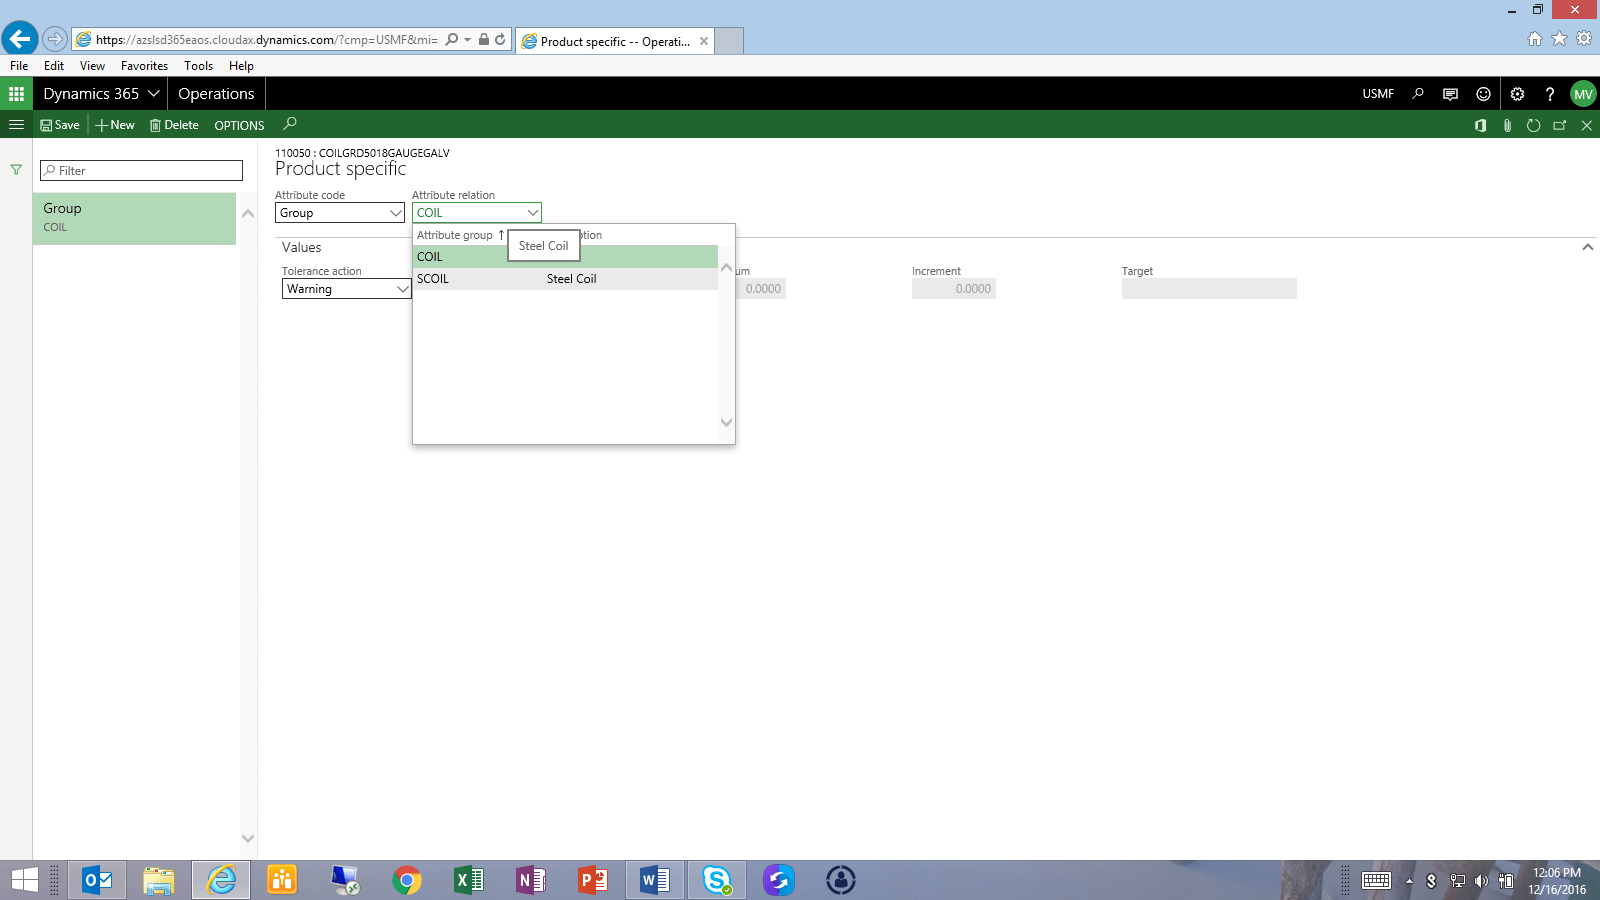
5. In the next form, the user will select New to define the attributes that apply to this product, and from the Attribute Code field, click on the down carat to select either Table, Group, or All. If the user desires to define here the individual attributes for this product, select Table. In our example, we defined a Group of attributes and will select that Group from the available groups. Save and close this window after selecting the Group.
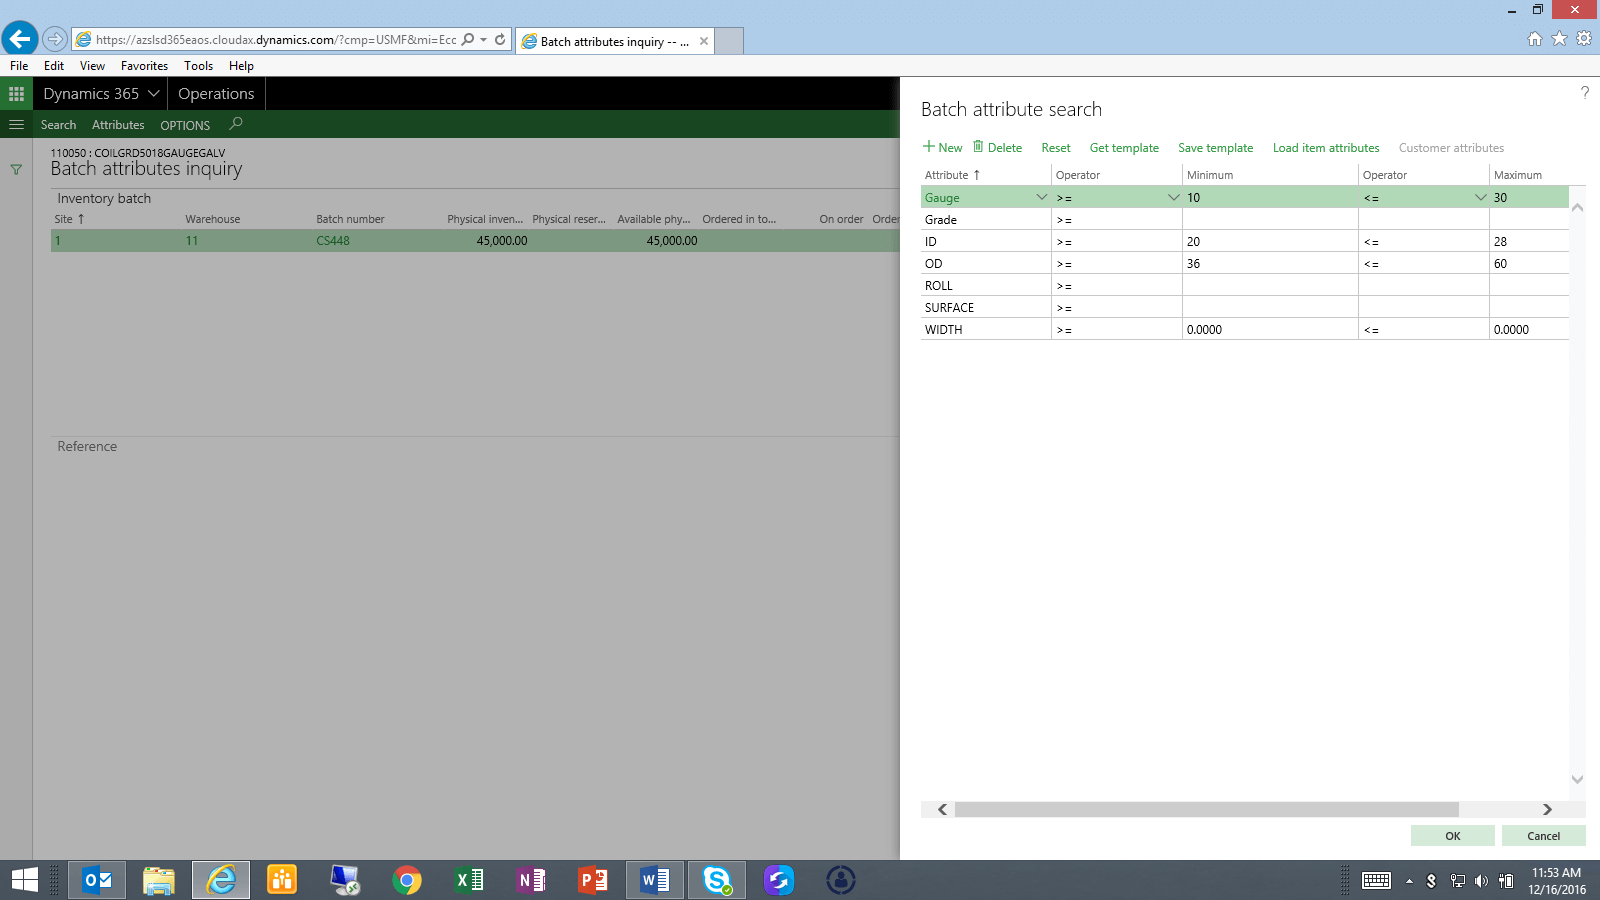
Note that there is a nice Search Inventory option in this same Batch Attributes section of the Products Inventory Management menu. The example below shows the search options that are available to the user when a Product is selected that has inventory with attributes populated. This advanced search allows the user to specify custom minimum and maximum options to return those batches that meet the criteria. For example, this could answer the user question of: “Which batches/coils in inventory have an OD of less than 48” and a Surface attribute of Galv?”
6. Batch Attributes in action:
Specifying Batch Attributes for a product during Purchase Receiving:
a. From the P/O line to be received, select Update Line à Process à Registration
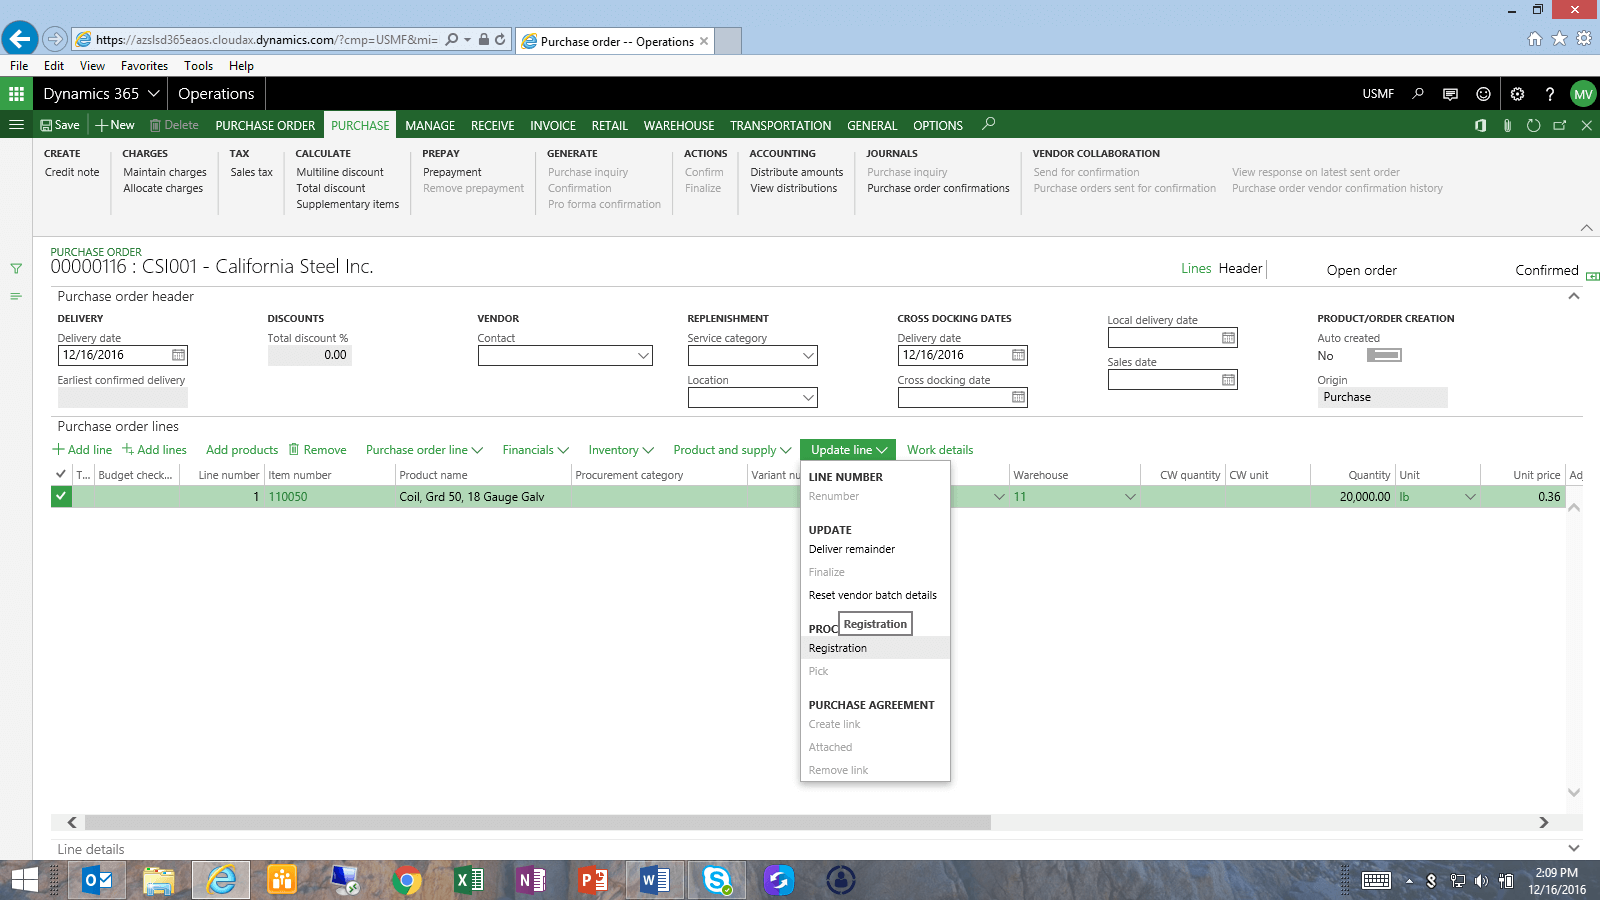
Note that this Registration process can be performed as part of the main menu Receive à Product Receipt also, but is shown in this document to focus on the relevant batch attributes functionality.
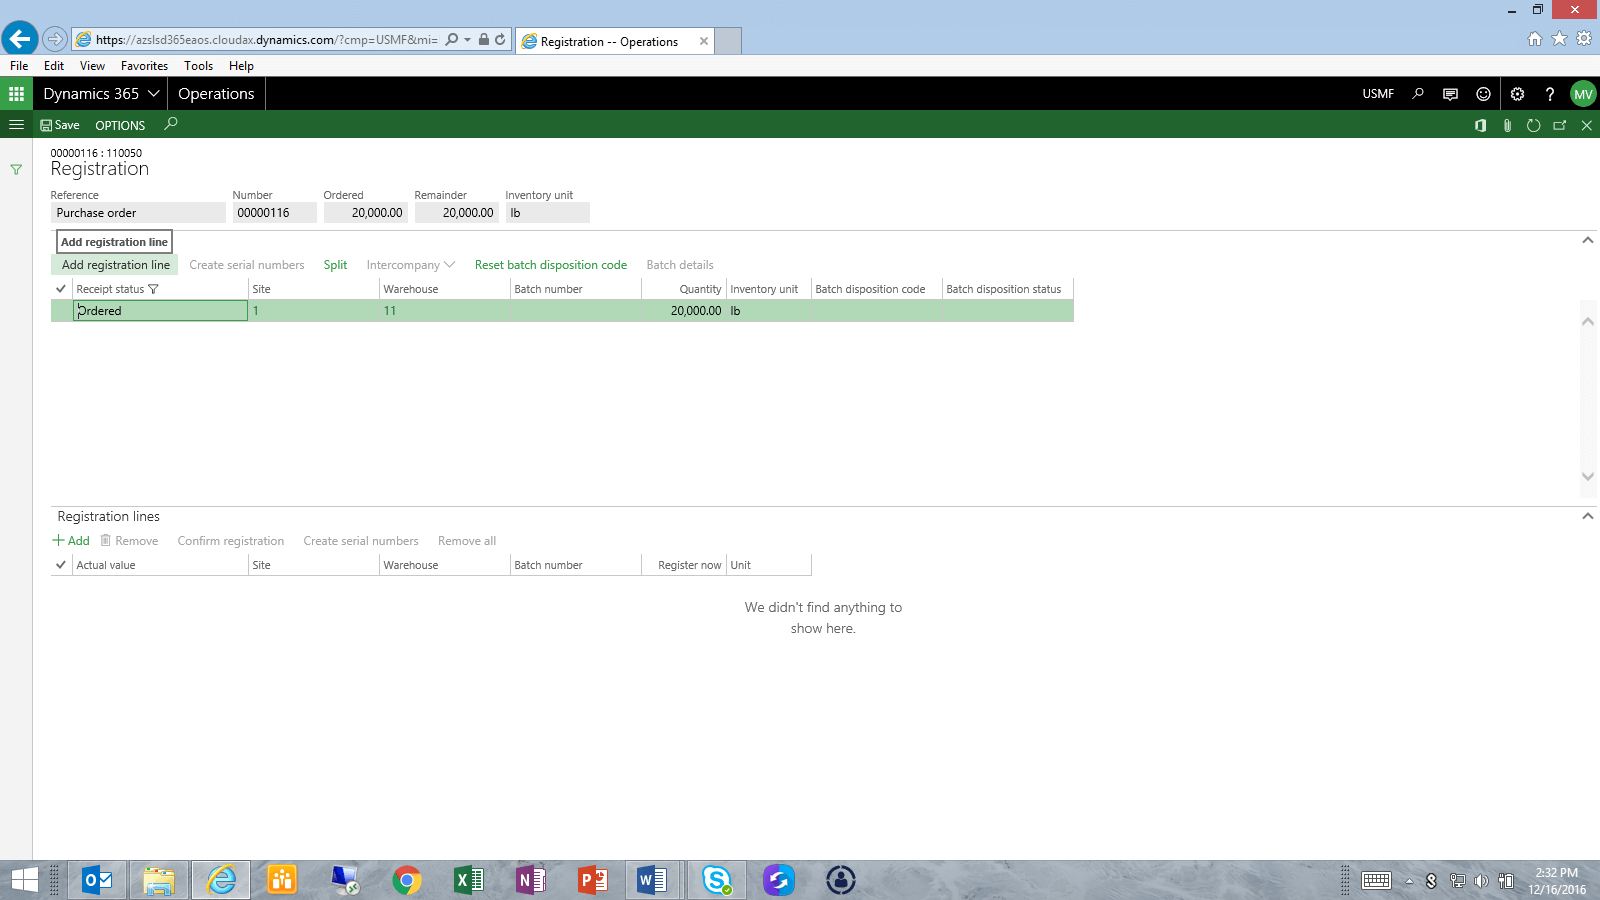
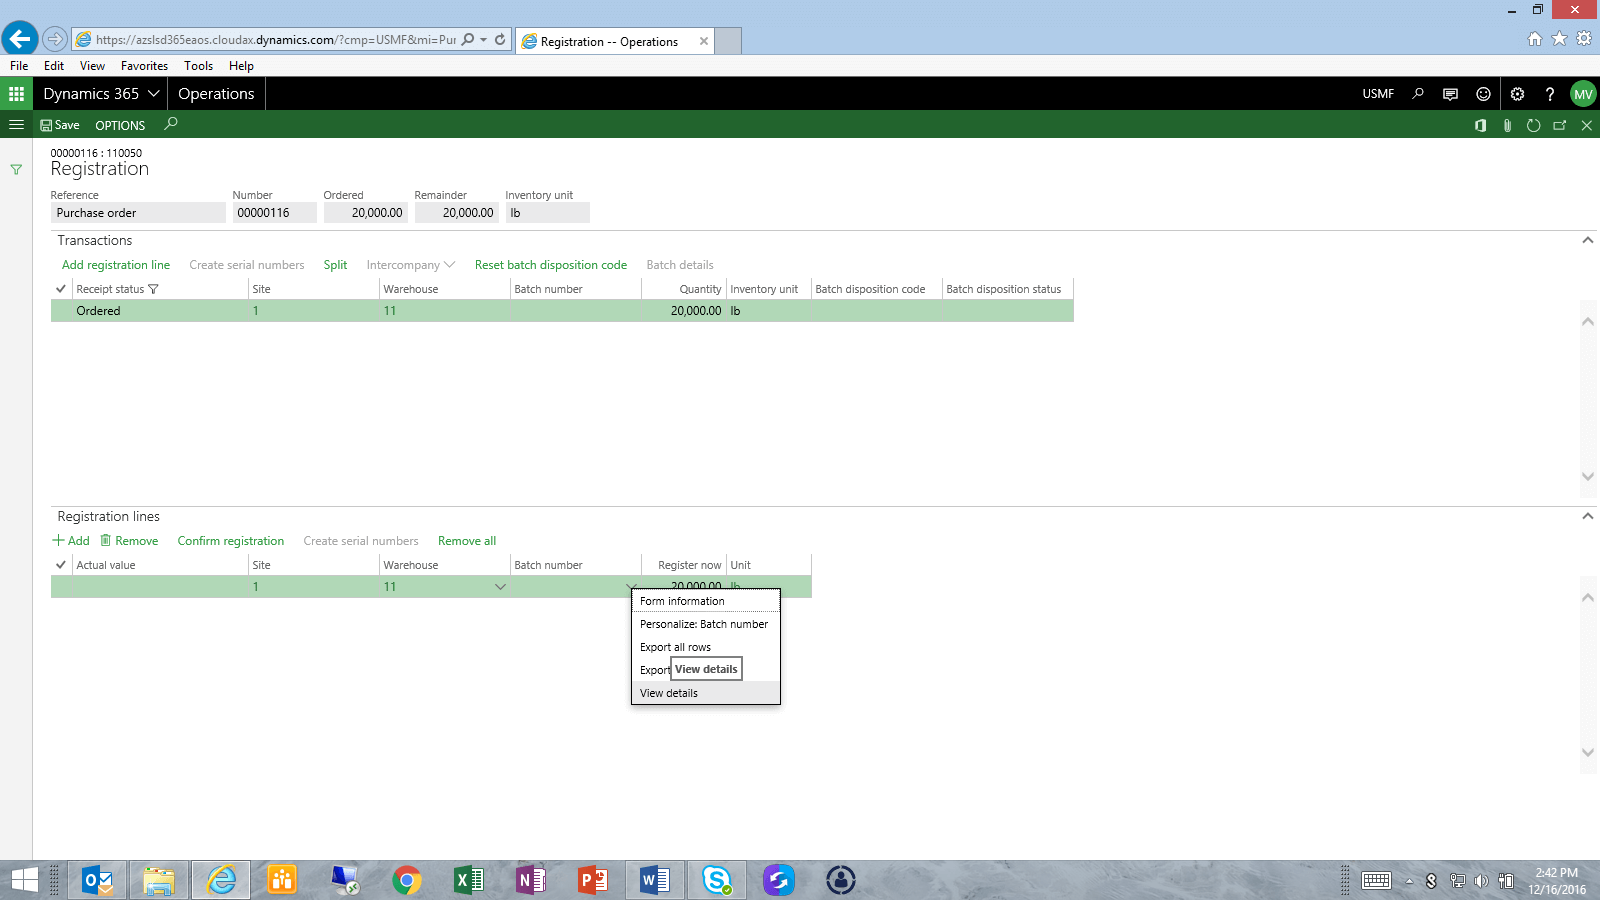
b. The user can add a Registration Line from the Transactions section menu option shown below, or by selecting Add from the Registration lines section.
c. After the Registration Line is generated, the user will right-click on the down carat in the Batch Number field and select View Details to define a new Batch record (this assumes that the Vendor has provided a new Batch ID for this product, and new attributes will be entered. Of course, if the product to be received was part of a Batch already defined, the user could select that record and proceed)
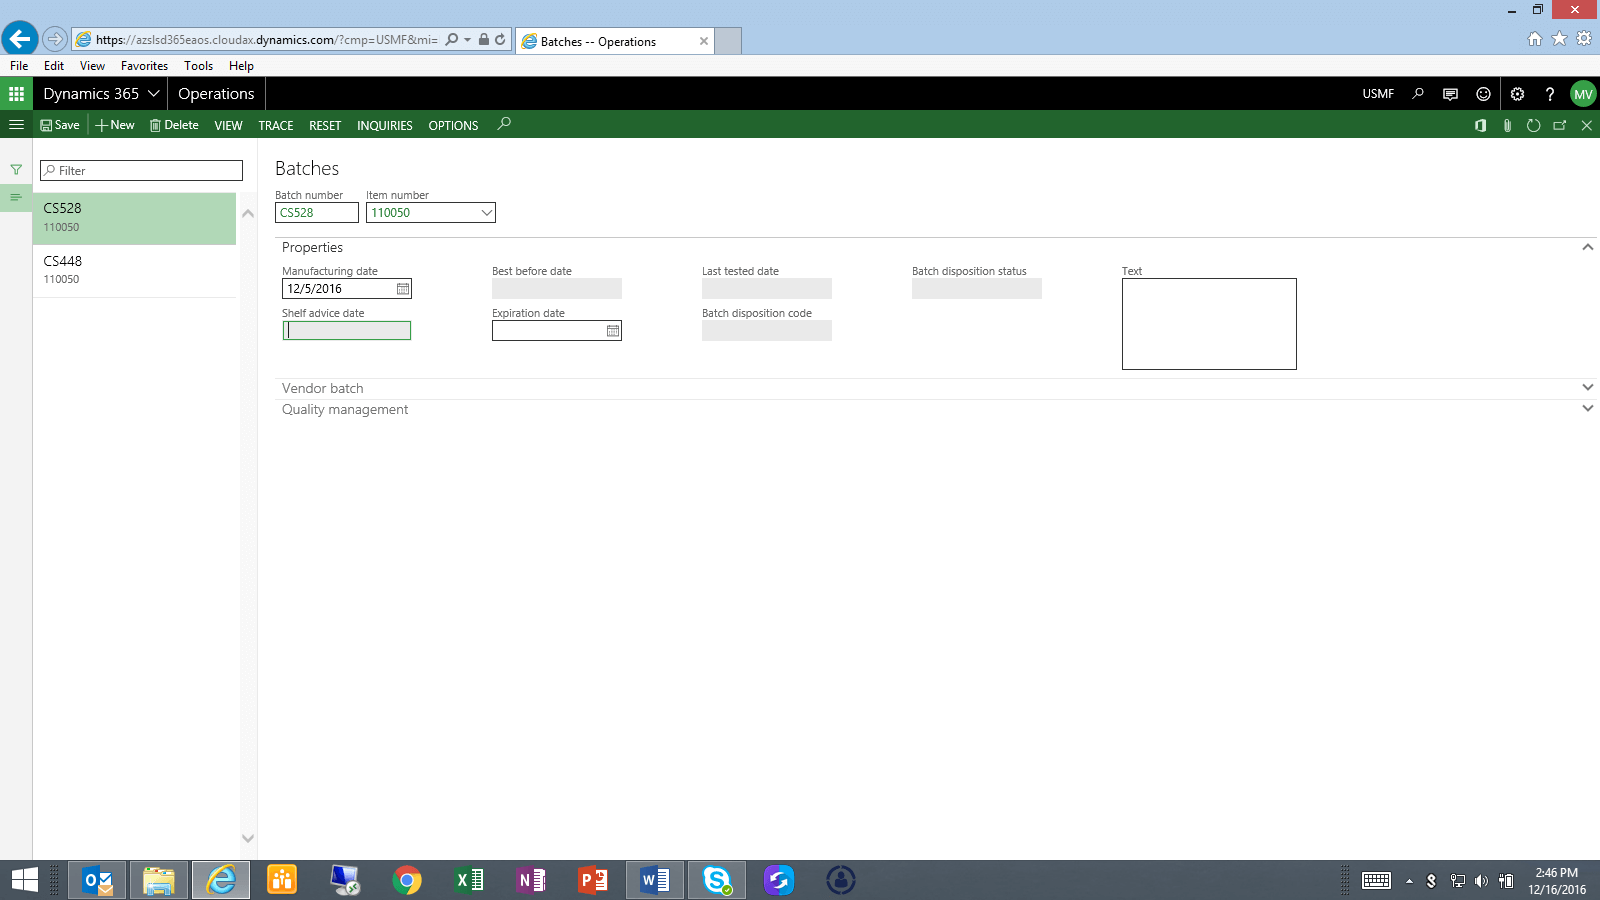
d. The user will select New from the top menu, and proceed to enter the Batch ID and any additional information needed, including Vendor batch information if needed. Select Save for this Batch ID information.
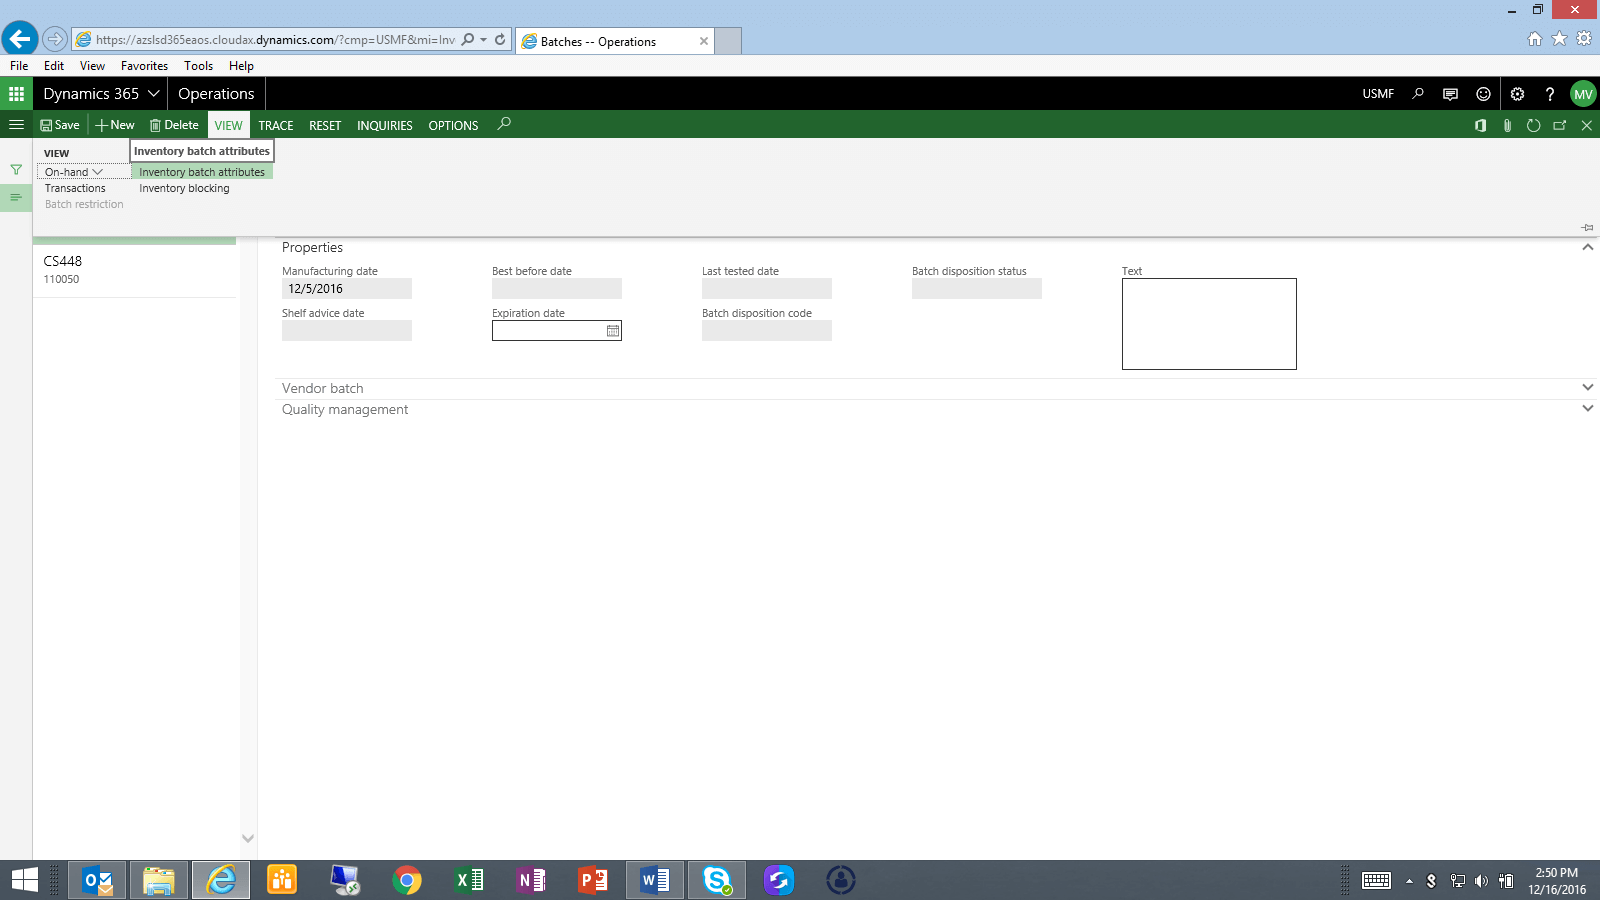
e. With the new Batch ID selected, the user will select from the top menu, View à Inventory Batch Attributes.
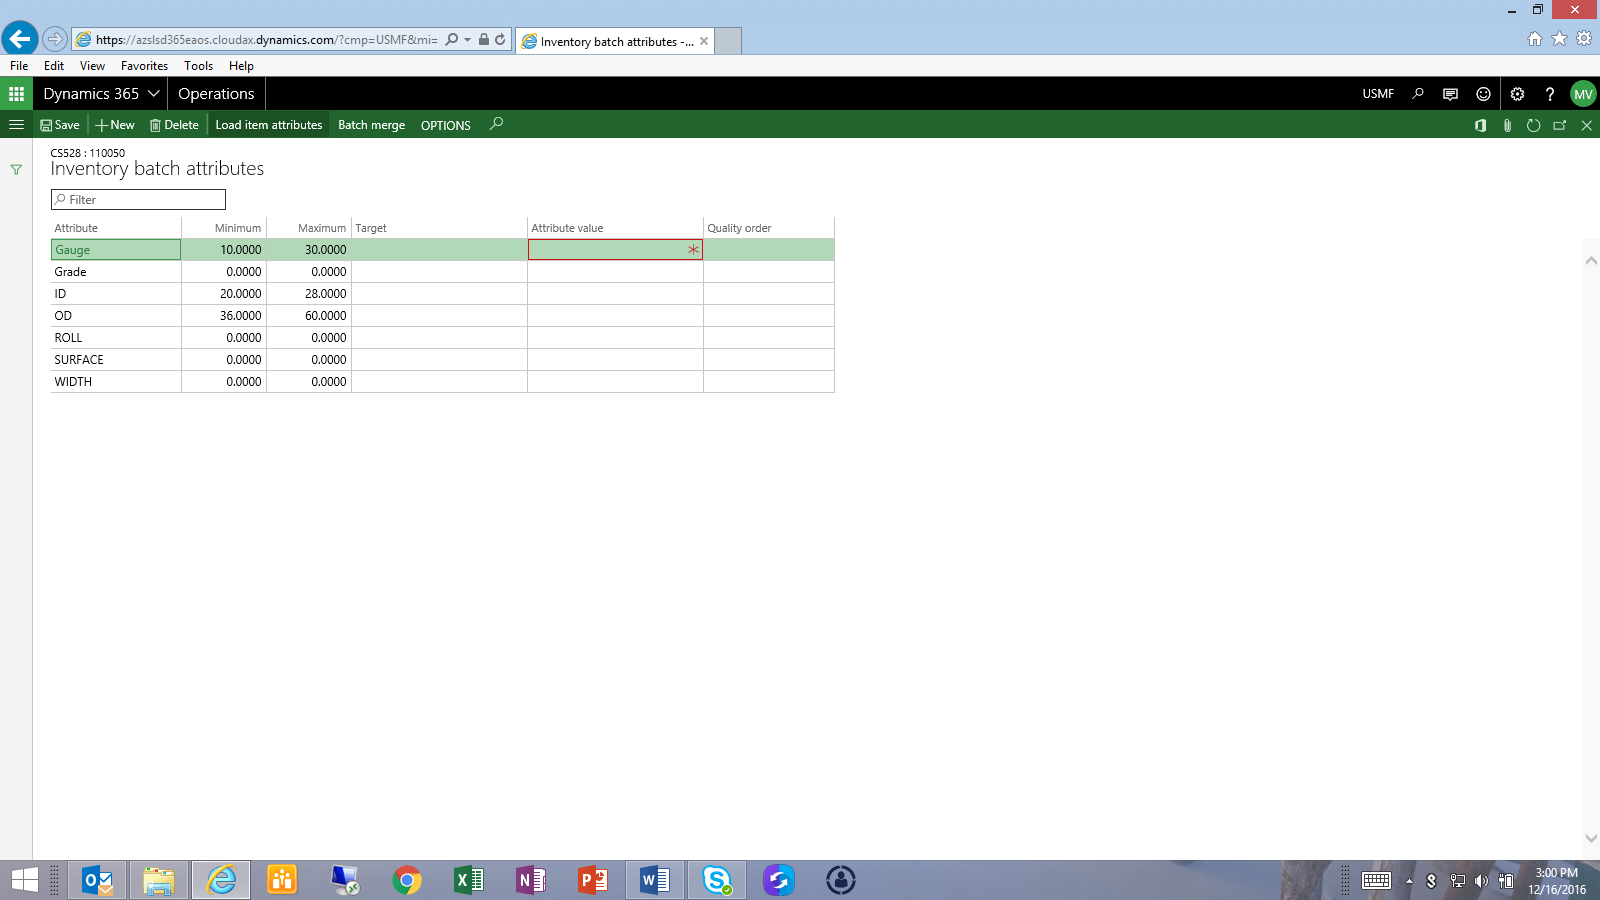
f. In the Inventory Batch Attributes form, the user can select New from the top menu and proceed to add attributes and values one at a time. However, since we defined an Attribute Group, we will select the Load Item Attributes option from the top menu, and the form will populate with all attributes. The user then enters the value for each attribute.
g. After populating attribute values, the user selects Save and returns to the Registration form (2 steps back), selects the Batch just defined, and proceeds to Confirm the Registration, and complete the Purchase Receipt.
This publication contains general information only and Sikich is not, by means of this publication, rendering accounting, business, financial, investment, legal, tax, or any other professional advice or services. This publication is not a substitute for such professional advice or services, nor should you use it as a basis for any decision, action or omission that may affect you or your business. Before making any decision, taking any action or omitting an action that may affect you or your business, you should consult a qualified professional advisor. In addition, this publication may contain certain content generated by an artificial intelligence (AI) language model. You acknowledge that Sikich shall not be responsible for any loss sustained by you or any person who relies on this publication.