


With the release of Dynamics 365 (D365) for Operations, one of the most often requested missing features was alerts. Flow is often mentioned as a replacement and triggers for D365 for Operations—coming in the near future—will provide a wealth of functionality compared to the alerts of Ax 2012.
That said, they can take a bit more work to get things going, like a past due date alert for a purchase order line.
Let’s take an example. I want to send an email message to my team for every purchase order line that is more than 5 days late per our requested receipt date.
First things first – you’ll need to sign up for Flow.
Once you’ve done that, click on “My flows” and “Create from blank.”

In the flow designer, give the flow a name.

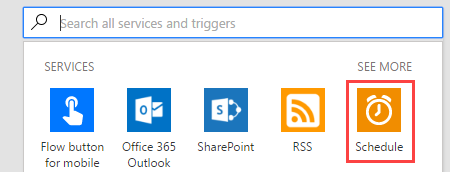
Then from the services and triggers list, select “Schedule.” This will allow us to run our flow on a recurring basis, such as on a nightly basis.
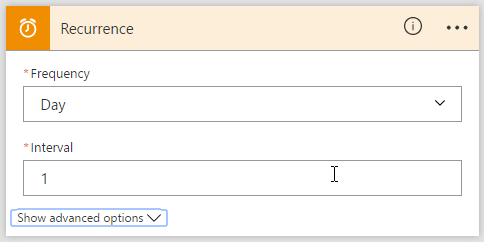
Specify the frequency and interval, and use the advanced options to pick a specific start time if necessary.
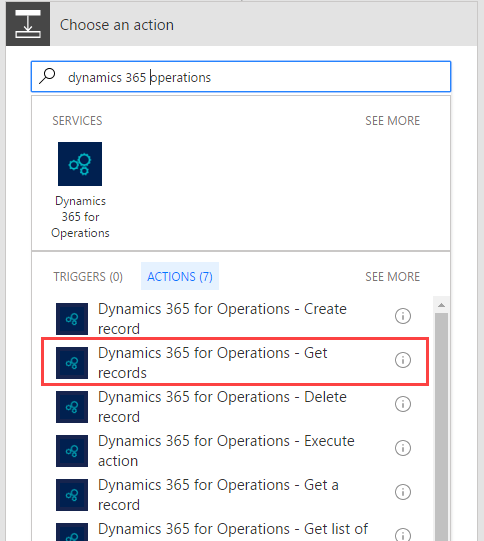
Next, we will get records from D365. Click “New step” and select “Dynamics 365 for Operations – Get records.”
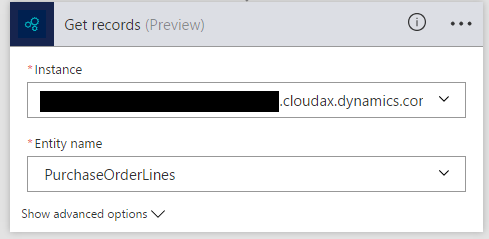
You’ll be asked to sign in if you have not used this action before. Once signed in, select the D365 instance you want to connect to, and then select the entity “PurchaseOrderLines.”
Click “Show advanced options” and enter a filter.

Our filter for this example will have two parts: selecting only open lines and then filtering on the requested delivery date.
The purchase order status field is an enum and requires a little extra work to filter on. The format required is the following:
FieldName eq Microsoft.Dyanmics.DataEntities.Enum’Value’
This then equates to:
PurchaseOrderLineStatus eq Microsoft.Dynamics.DataEntities.PurchStatus’Backorder’
The ‘eq’ is the expression for equality (see the full list here)
The date field is a little tricky. Something not immediately obvious with Flow is that you can use a lot of the same functionality as LogicApps even though it is not exposed on the designer. So to calculate our date (today – 5) we can make two LogicApp API calls.
The utcnow function will return the date and time as of when the Flow is executed. We pass one parameter—the format of the date we want returned to us.
We pass the result of the utcnow function call to adddays, which will add, or subtract, the specified number of days to the date it is given. And again, we pass a date format: RequestedDeliveryDate lt @{adddays(utcnow(‘yyyy-MM-dd’), -5, ‘yyyy-MM-dd’)}
The “lt” expression gives us a “less than” condition. Enclosing the above in @{ …} tells Flow that these are function calls to be executed.
So our complete filter expression looks like this:
PurchaseOrderLineStatus eq Microsoft.Dynamics.DataEntities.PurchStatus’Backorder’ and RequestedDeliveryDate lt @{adddays(utcnow(‘yyyy-MM-dd’), -5, ‘yyyy-MM-dd’)}
Next, we add an email action. I’m using o365, but there a multiple methods to send an email. You could also send a text message using Twillio, tweet, etc.
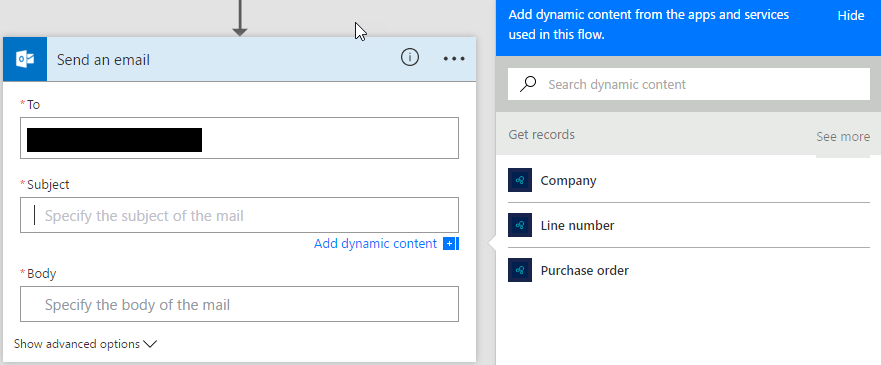
Click in one of the fields and notice the dynamic content displayed on the right-hand side. Click “See more” to reveal all fields from our entity.
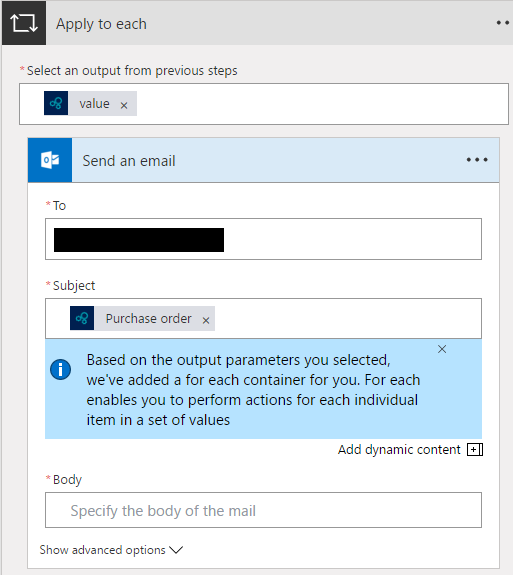
Note what happens when you click on a field. Our send action is automatically embedded within a “Apply to each” loop, which will iterate over all the records we select from D365, and send one email for per past due purchase order line.
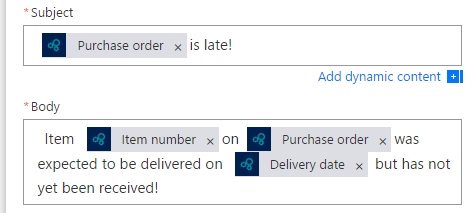
Compose your subject and body using the dynamics content, mixed with plain text, save, and run!
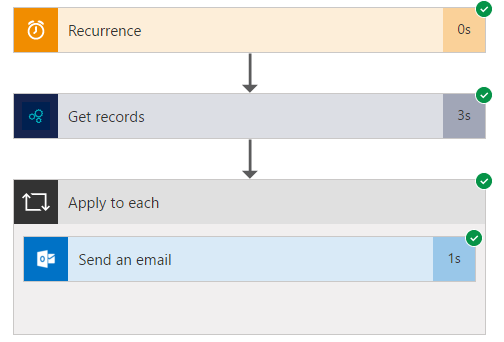
When you run the flow manually, or from the info icon on the “My flows” page, you can view the execution history, and troubleshoot any errors.
Useful References
- OData Filter Expressions: https://msdn.microsoft.com/en-us/library/hh169248(v=nav.90).aspx
- LogicApp API reference: https://docs.microsoft.com/en-us/rest/api/logic/definition-language
- Date Time Formatting: https://msdn.microsoft.com/library/az4se3k1%28v=vs.110%29.aspx
This publication contains general information only and Sikich is not, by means of this publication, rendering accounting, business, financial, investment, legal, tax, or any other professional advice or services. This publication is not a substitute for such professional advice or services, nor should you use it as a basis for any decision, action or omission that may affect you or your business. Before making any decision, taking any action or omitting an action that may affect you or your business, you should consult a qualified professional advisor. In addition, this publication may contain certain content generated by an artificial intelligence (AI) language model. You acknowledge that Sikich shall not be responsible for any loss sustained by you or any person who relies on this publication.