


One of the best features in NetSuite is the ability to customize your dashboard. You can add and remove KPIs, KPI Scorecards, and numerous other portlets to bring the right information directly to your dashboard when you need it. To take this a step further, you can create custom dashboards and publish them to specific roles in order to bring the right information directly to the individuals who need it.
- Make sure you are logged in to a role with the same Center Type as the role(s) you wish to publish the dashboard to. For instance, if you are publishing this dashboard to the A/P Clerk, and the A/P Clerk is using the Accounting Center center, make sure you are logged in to a role that uses the Accounting Center center. There is also a role permission required to be able to publish dashboards. Contact your System Administrator or Client Account Manager for information on this permission.
- Configure the dashboard(s) you wish to publish. You can publish one tab or several at one time. This will include setting up the portlets and aligning them the way you want. If you are publishing a dashboard that contains a custom center tab, ensure the role(s) you are publishing have access to this custom center tab.
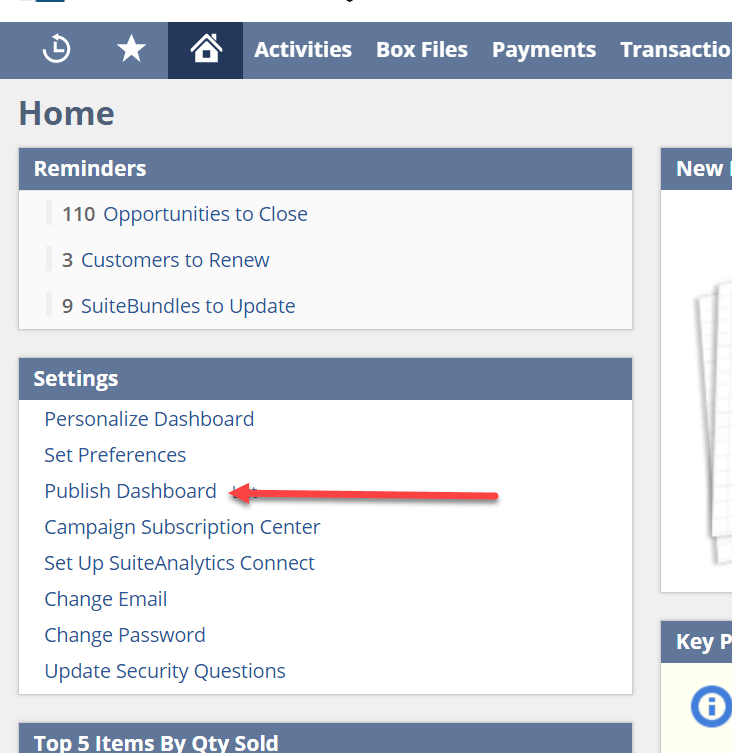
- From the Home dashboard, locate and click the Publish Dashboard link in the Settings portlet:
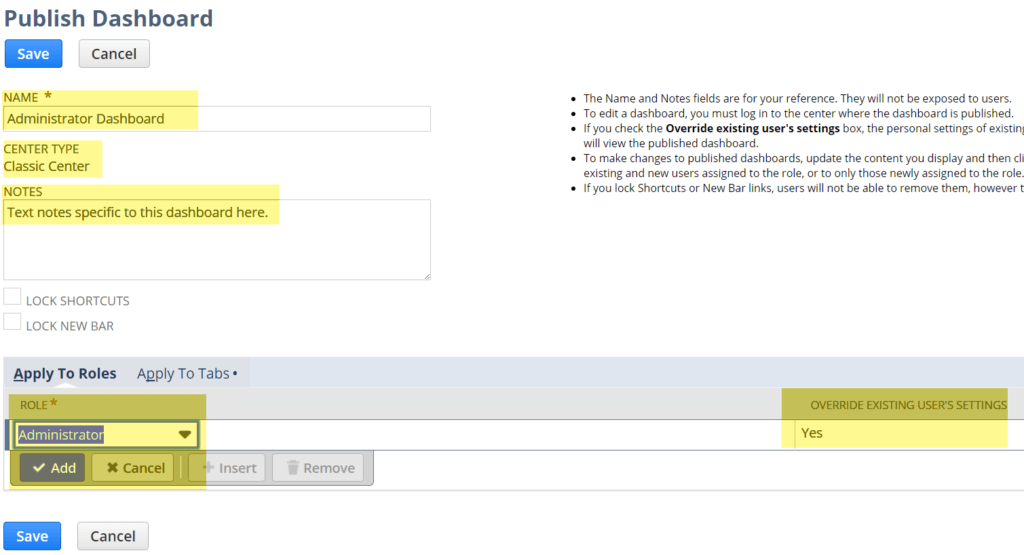
- Give the published dashboard a name and enter any dashboard-specific notes in the Notes field. The Center Type will let you know what center type the role must have in order to have this published dashboard pushed to it. Pick the role(s) you wish to publish this dashboard to in the drop-down menu.
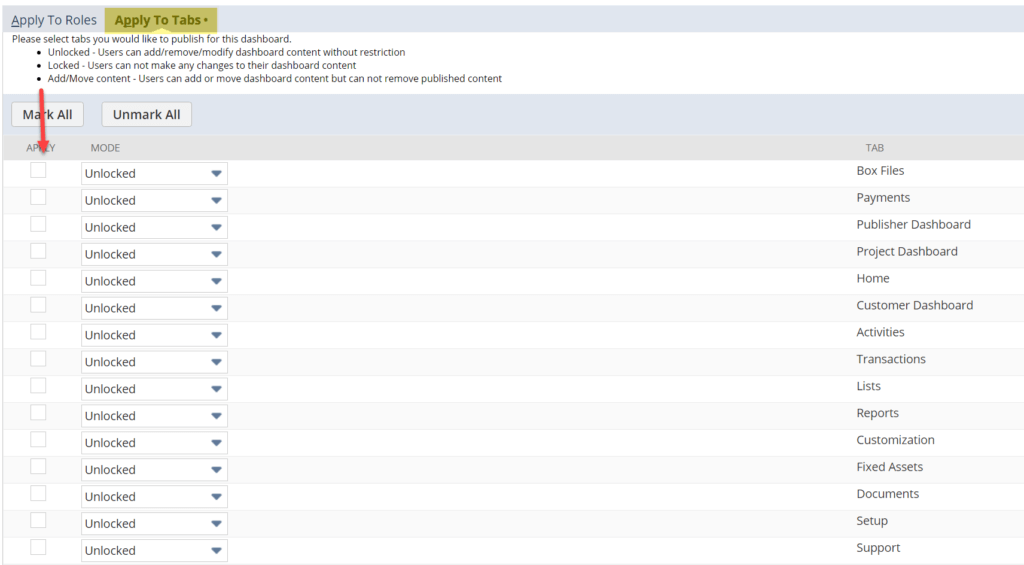
- In the Apply To Tabs link, select the tabs you wish to push to users with this published dashboard. You can select all of them or specific ones. Please note that if you choose Yes in the Override Existing User’s Settings from the step above, any modifications a user has made to a published tab will be overridden with the new content and layout once the published dashboard is pushed. The Mode drop-down allows you to choose whether users can modify the layout after the push, or if you wish to have it locked:
- Once you have configured these settings, click the Save button. NetSuite will now publish the dashboard to the selected roles based upon the configurations you have set from the steps above. Users will have to log out and back in before seeing the new content.
If you are looking to get assistance in publishing your dashboard or would like more information about it, please feel free to contact us. You can also learn about more great tips for NetSuite on our YouTube playlist or our other blog posts.
This publication contains general information only and Sikich is not, by means of this publication, rendering accounting, business, financial, investment, legal, tax, or any other professional advice or services. This publication is not a substitute for such professional advice or services, nor should you use it as a basis for any decision, action or omission that may affect you or your business. Before making any decision, taking any action or omitting an action that may affect you or your business, you should consult a qualified professional advisor. In addition, this publication may contain certain content generated by an artificial intelligence (AI) language model. You acknowledge that Sikich shall not be responsible for any loss sustained by you or any person who relies on this publication.