


In Part 1 of this series, we covered the basics of systems integrations, differentiating between data integrations versus application integrations. Before we can continue the discussion of the Microsoft integration options, we need to get our environments set up.
Here in Part 2 we will cover:
- Installation of a Dynamics 365 Field Service trial environment
- Configuration of PowerApps Connections, which are required by the Common Data Service (CDS) Data Integrator and Microsoft Flow.
You will also need an existing, licensed Dynamics 365 Finance and Operations* environment. A trial instance will not work properly with the CDS Data Integrator.
* Licensing for Dynamics products changed significantly in October 2019. As part of the changes, the Dynamics 365 Finance and Operations module has been split into two distinct modules: “Finance” and “Supply Chain Management.” See this article for an excellent overview.
If you already have access to an updated Field Service instance, you can skip step 1.
Set up the Dynamics 365 Field Service Trial Environment
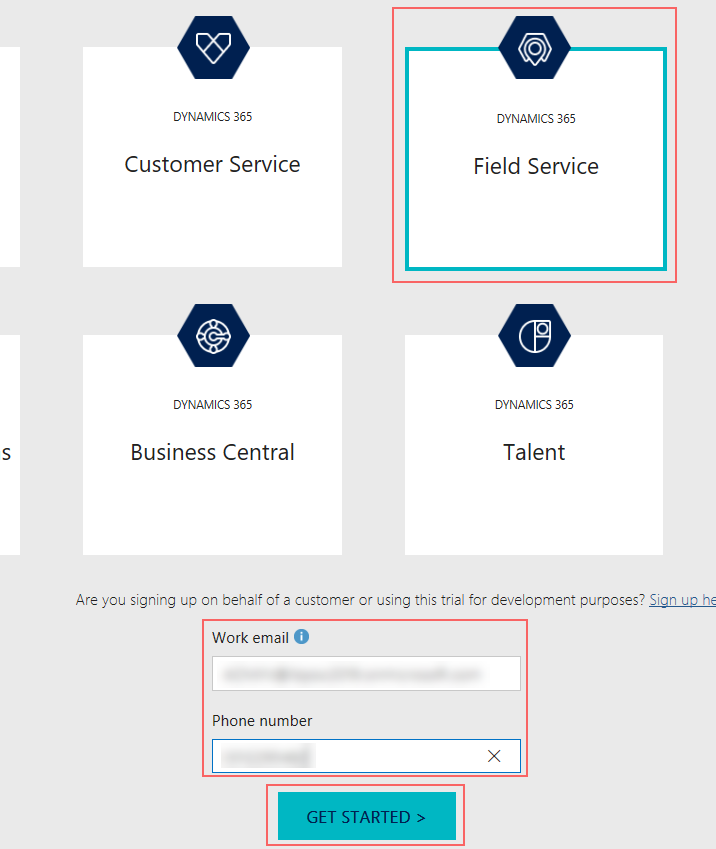
- Navigate to https://trials.dynamics.com.
- Select Field Service on the Trials page.
- Provide the Work email and Phone number. Use your work account and phone number, or you can register a new environment using an email address.
- Select Get Started.
- If you use your work account, you will see a message letting you know you have an account and be prompted to Sign in with your credentials for the account. You may see an additional message letting you know you already have a license.
- If you did not use a work account, you will be prompted to provide a phone number for identity verification and complete a sign-up.
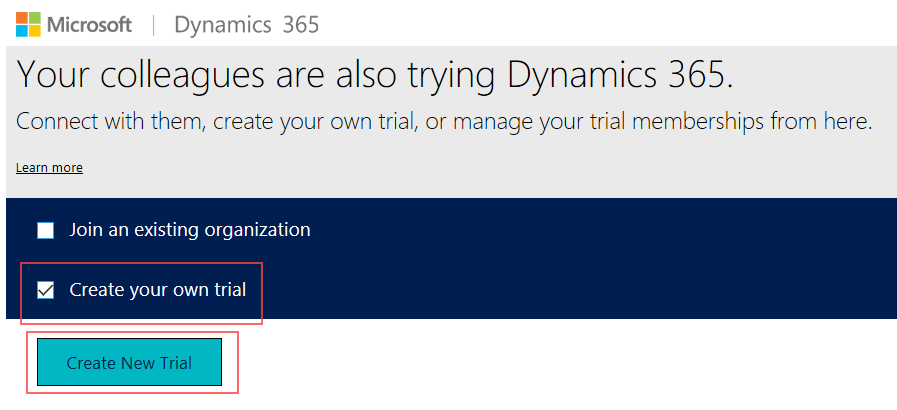
- If you already have a D365 license, you may be prompted to either join an existing organization or create your own. If so, select Create your own trial.
- Leave Field service Note the option to change the organization name, which will allow you to differentiate from other environments and give a more meaningful name. Select Complete Setup.
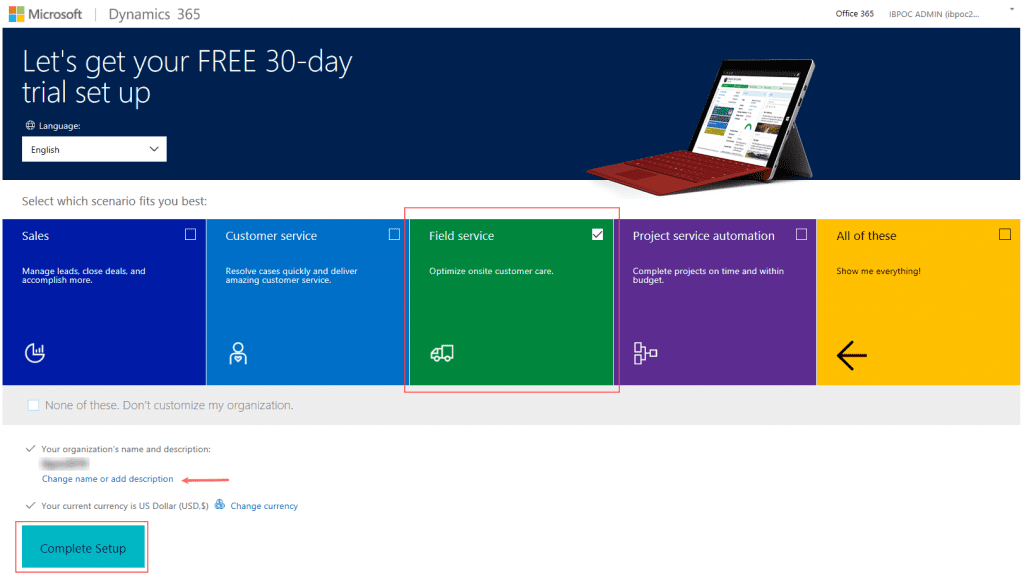
- After setup completes, you will be taken to your trial instance, with some sample data in place. Field Service is ready!
Configure the PowerApps Connections
Power Platform Environments
First, let’s review our Power Platform environments. These include Dynamics 365 Customer Engagement (CE) instances, as well as PowerApps environments. Dynamics 365 Finance and Operations and Business Central environments are not on the Power Platform, and so they will not appear among the listed environments here.
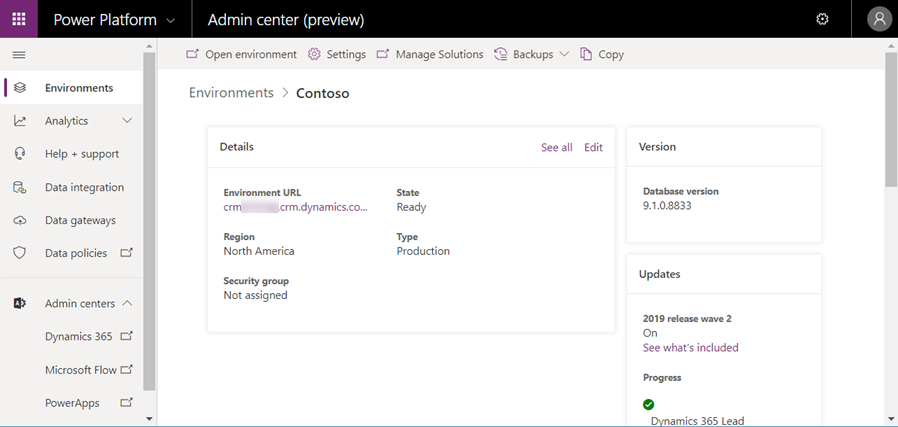
- Navigate to the Power Platform Admin Center and select the Environments menu: https://admin.powerplatform.microsoft.com/environments.
- The list of Power Platform environments available to you based on your given credentials are shown. Note that you can access the Dynamics and Power Platform admin centers from this page as well. We will be coming back to the Data Integration menu when we begin to discuss the CDS Data Integrator functions in Part 3.
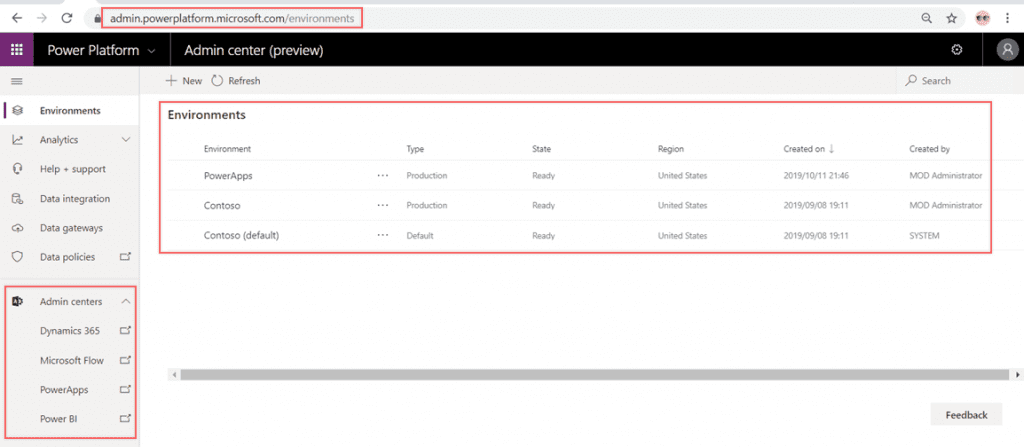
- Select an environment to view details, such as URL, database version, and applied updates.
Now that we have our ERP and Power Platform environments in place, we need to get them talking to one another. It is time to set up the Connections.
Power Platform Connections
Connections are set up in PowerApps, and for a specified environment. However, you are not restricted to connecting to sources only from the selected environment. In fact, you are not even limited to sources from the same tenant or even limited to Microsoft. You can connect to just about anything from PowerApps using one of the growing numbers of out-of-the-box connectors or using custom connectors that you can build. Let’s begin.
- Navigate to https://make.powerapps.com, select the environment you want to use to host your connections, and then expand the Data menu and choose Connections.
- Select the environment where you want to host your Connections and click Create a connection. For this example, I will put my Connections in the “Contoso” instance of my CE trial environment. (Note that if you already have connections, you will click + New Connection in the upper left area of the screen.)
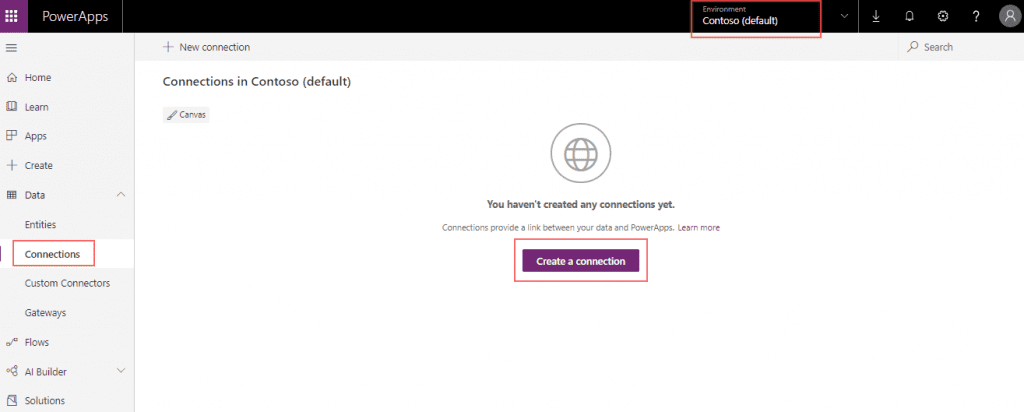
NOTE: It is very easy to forget to choose the right PowerApps environment. Consider this first if you are in PowerApps and not seeing what you expect. You may be looking in the wrong environment!
- Let’s set up the CE instance first. Select the “+” next to Dynamics 365 from the list of Connections and click Create when prompted. Use the Search feature to filter the list if necessary.
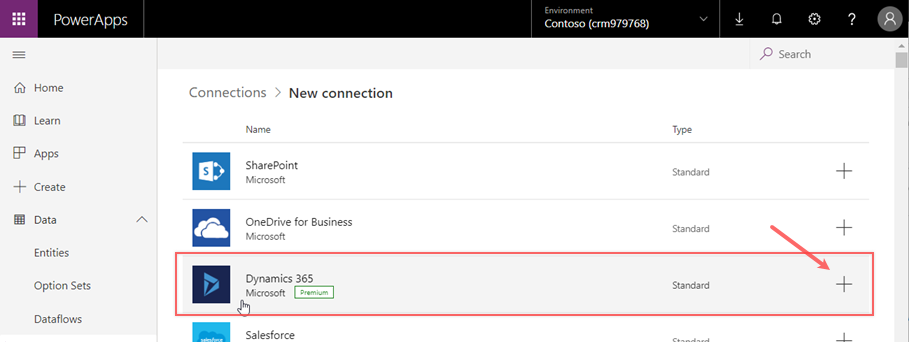
- When prompted, provide the credentials that the Connection will use to access the CE instance. Important: these credentials must have full access to the CE entities that will be involved in the integrations. In a production environment, this would typically be a shared, secure integration service account. It is bad practice to use a regular named user, but for now we can use our own credentials.
- The new Connection will now show in the list of Connections for the environment.
- Repeat the above process for the Finance and Operations (F&O) Connection, using the Dynamics 365 F&O connection type and credentials. Just as with the CE Connection, the account used to connect to F&O must have full rights to the data involved in integration. (Note that this is likely to change in the coming months, as Microsoft completes the rollout of the new licensing model and F&O is divided into Finance and Supply Chain.)

We are finally ready to integrate some data! Move on to Part 3 to see how the CDS Data Integrator can be used to bring data from our connected F&O instance into our Field Service instance.
This publication contains general information only and Sikich is not, by means of this publication, rendering accounting, business, financial, investment, legal, tax, or any other professional advice or services. This publication is not a substitute for such professional advice or services, nor should you use it as a basis for any decision, action or omission that may affect you or your business. Before making any decision, taking any action or omitting an action that may affect you or your business, you should consult a qualified professional advisor. In addition, this publication may contain certain content generated by an artificial intelligence (AI) language model. You acknowledge that Sikich shall not be responsible for any loss sustained by you or any person who relies on this publication.