


In Part 3 of this series, we installed the CDS Data Integrator templates from Microsoft, established our connections, and created the “Warehouse” integration Project. Let’s give it a test drive.
Run the Standard Warehouses Integration
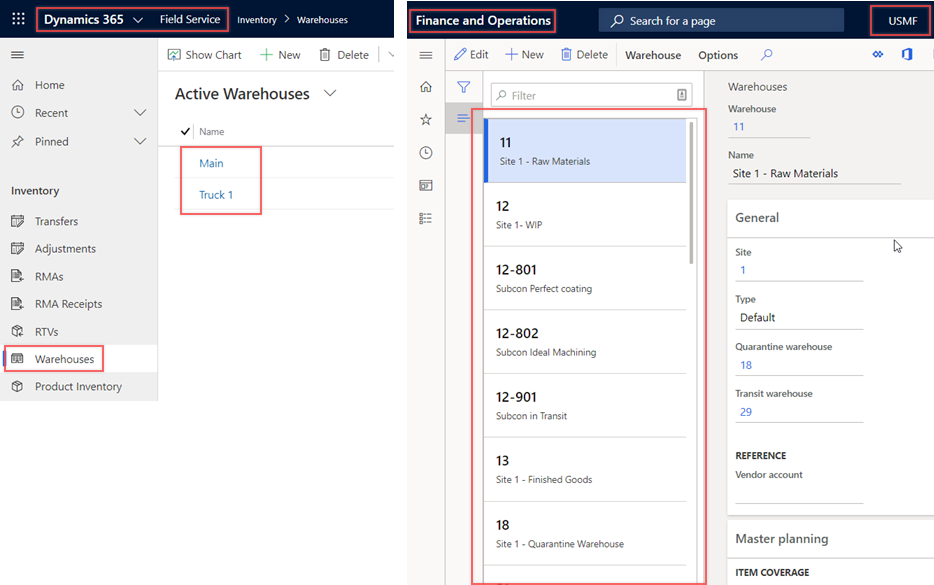
Take a look at both your Source and Destination lists of warehouses before running the integration. You might see a couple of warehouses in CE that came with the Field Service installation sample data. Most important is that your F&O instance has some warehouses, since our integration will not do much if there is no data at the source! Below is my data before running the integration.
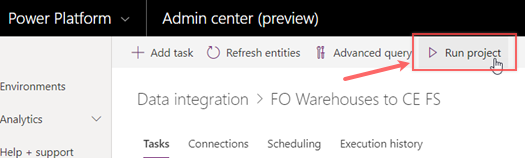
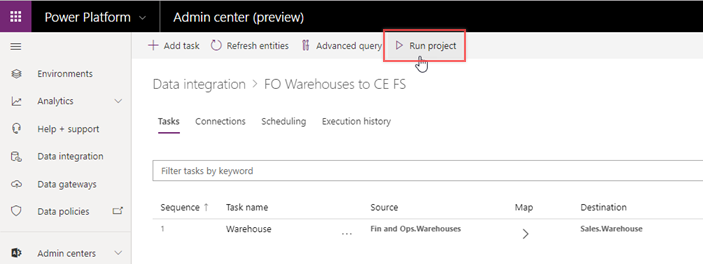
- In the Power Platform Data Integration Warehouse integration project, select Run project. After a moment, you should see a message the project is running. Switch over to the Execution history tab to monitor progress.

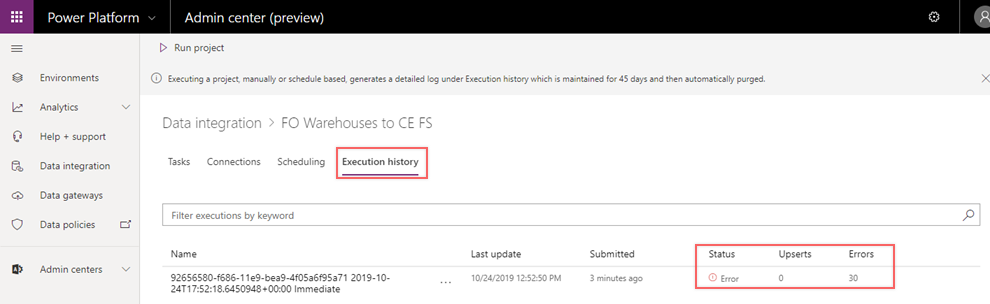
- After a minute or so, I found that my integration failed, with a pretty cryptic error. In this case, it is a common error so let’s take a moment to unpack it so you are ready to handle this scenario if it should happen to you.

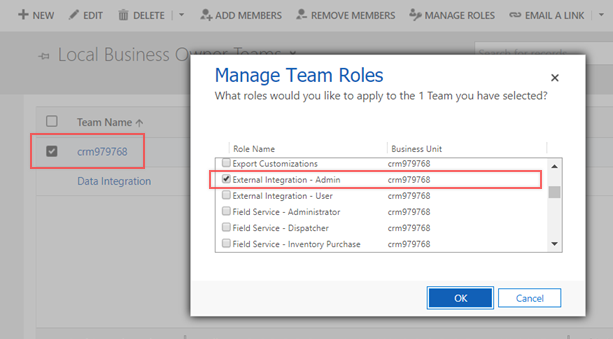
- This error occurred because of an issue that is as common with CDS Data Integrator as it is with any integration effort: permissions. Even though the CE account used in our Connection is a CE System Administrator, I am getting a permissions error. Why? In this case, we find that CE requires that the default Team for the selected Organization Unit must have privilege to manage the data. In CE, that is granted using the “External Integration – Admin” security role. Once this change is made and the integration re-ran, the integration completed successfully, in my case posting several upserts into the target CE environment.
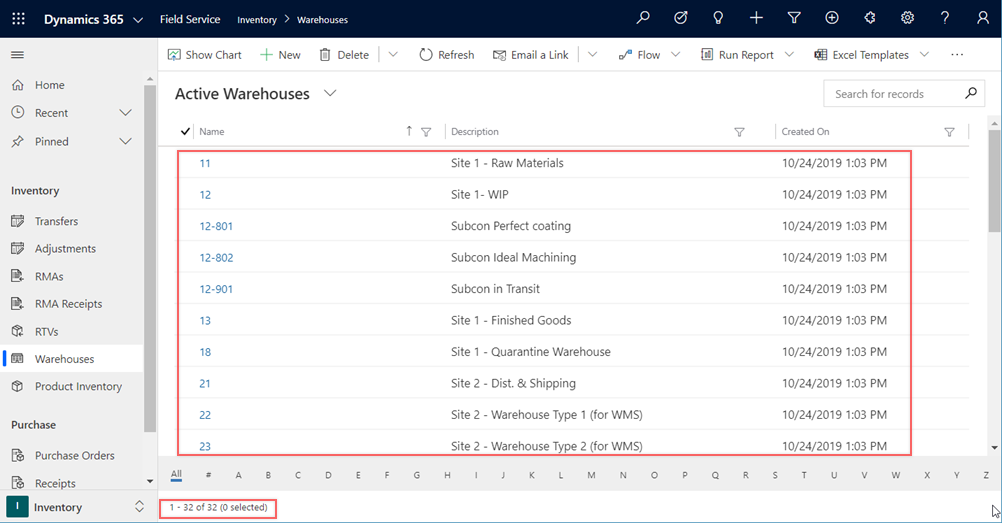
- Review the list of warehouses in CE to confirm. All F&O warehouses should have moved across, with the creation date reflecting the time of the integration.
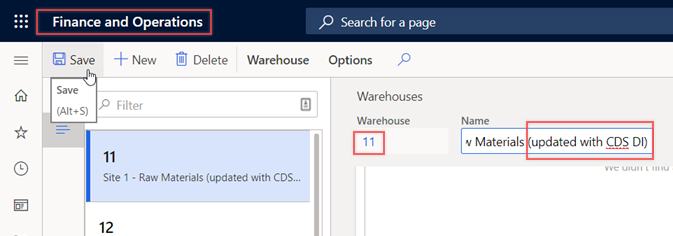
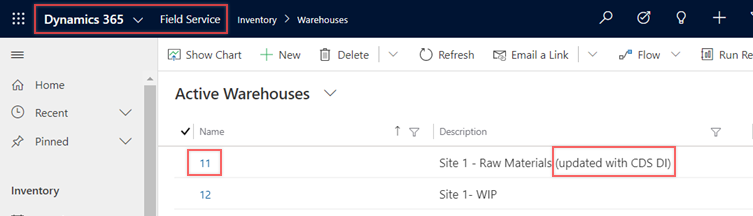
- Now let’s see what happens when we make a change. In F&O, change the warehouse Name and re-run the integration to see the update has pushed through to CE.

Apply a Filter to the Integration
The standard integration pulls all records from the source system, but what if we wanted to exclude Warehouses that would probably not matter to Field Service workers? Let’s update the integration to ignore “quarantine” and “transit” warehouses.
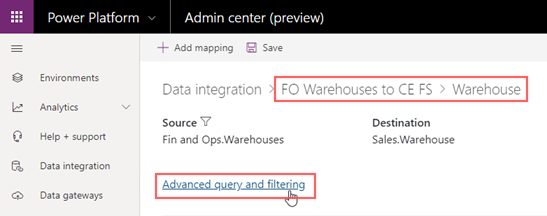
- In the Power Platform Data Integration Warehouse integration project, click the Tasks tab and then select the “Warehouse” task. Then, select Advanced query and filtering.
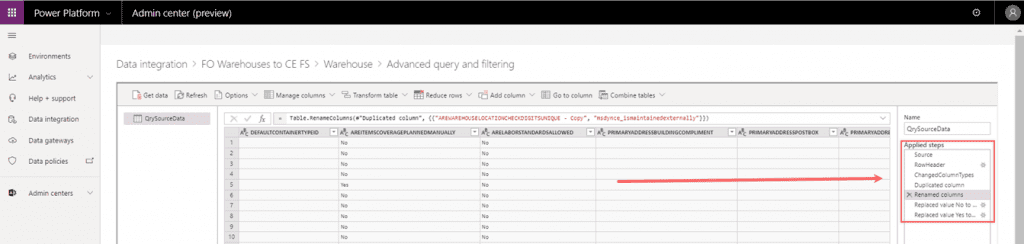
- The Power Query screen is displayed. There is a lot going on here, but as mentioned in Part 3, we will not dive very deep into Power Query in this series. However, I strongly recommend that you do explore it, since it is used in many different contexts throughout the Microsoft suite of products and is quite, well, powerful.
- Looking to the right on the window, you can see a set of transformations that have already been applied as part of the Microsoft Template, such as the renaming of the field used to represent “ismaintainedexternally.”

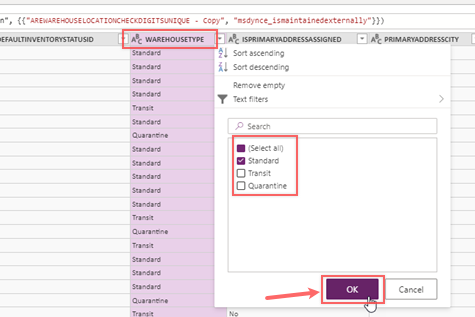
- Let’s apply the filter to limit only to “Standard” warehouse types. Scroll across until you find the WAREHOUSETYPE Click the drop down and filter to “Standard” only, and then click OK.
- Click Insert when prompted for confirmation, then Save.
- To test, first delete all warehouses from CE to clear the warehouses that were pulled from F&O earlier, and then re-run the integration. You should see a lower number of upserts this time around, and spot-checking should reveal that only the F&O Standard warehouses (labeled as a Type of “Default” in F&O) were pushed over to CE this time.
Now, let’s extend the integration to bring over more data
Extend the Integration to Transfer More Information
One frequent request we get with our Field Service implementations is to see the warehouse address in Field Service. The standard CE warehouse entity does not have an address, so prior to this step, it has been added using standard CE no-code customization.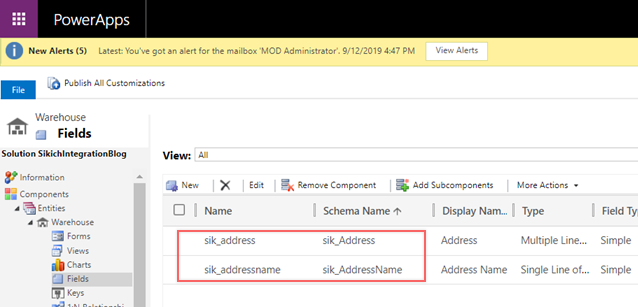
We can now extend the integration to include the F&O address.
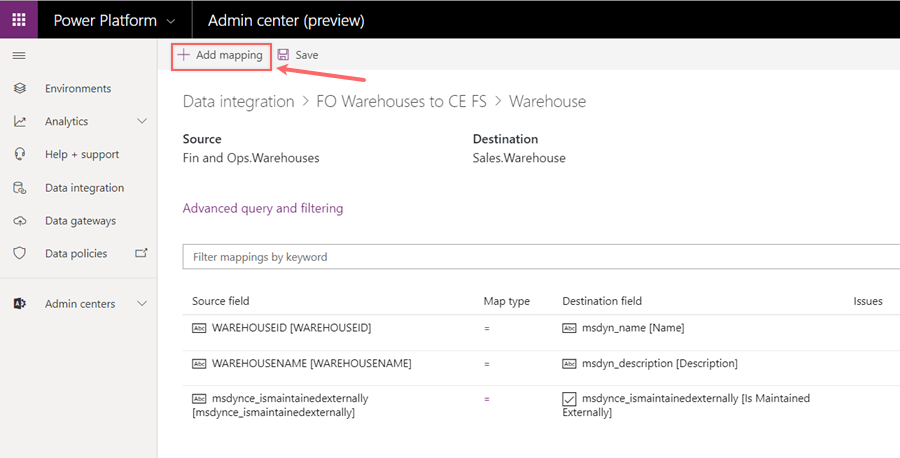
- In the Power Platform Data Integration Warehouse integration project, click the Tasks tab and then select the “Warehouse” task. Click + Add mapping on the Warehouse task form.
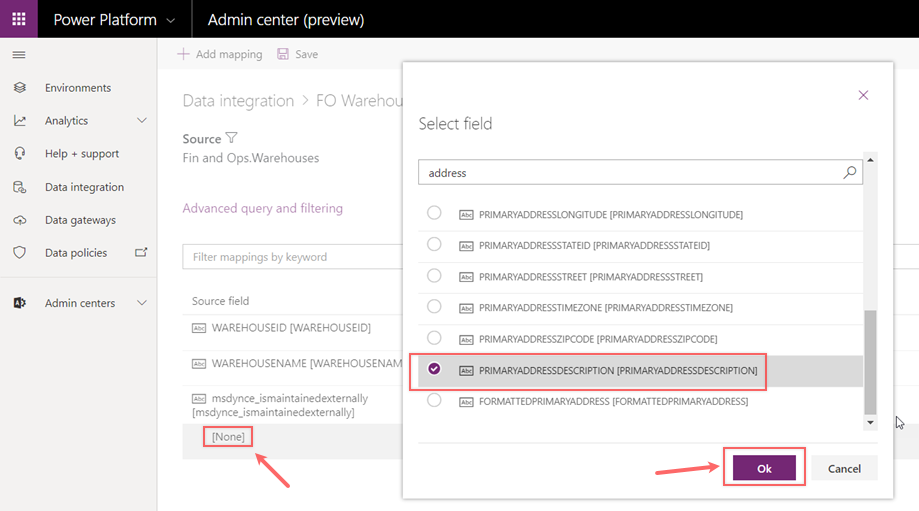
- Click the “[None]” link under the Source column, and then search for and select PRIMARYADDRESSDESCRIPTION. Click Ok.
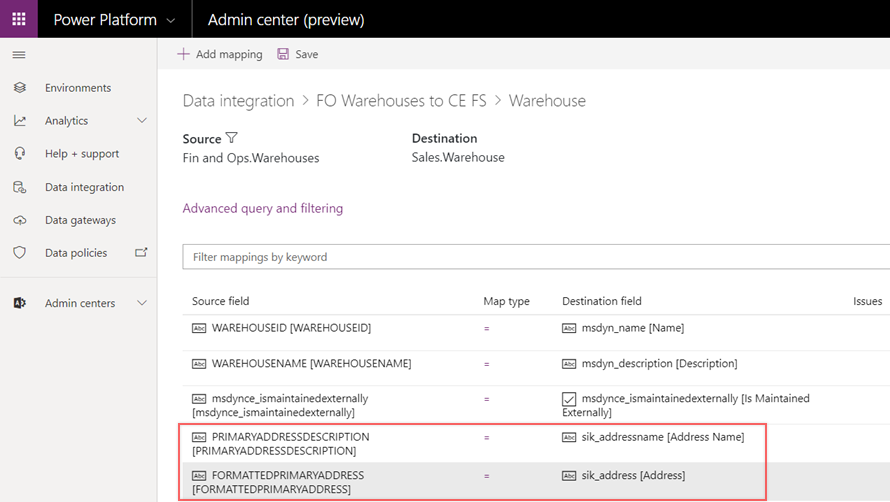
- Repeat the “Add mapping” process but this time selecting FORMATTEDPRIMARYADDRESS field.
- Now, map the fields to the custom address fields on the CE warehouse entity using the same process. Your mapping should look similar to the below screenshot when done. Be sure to Save when complete.
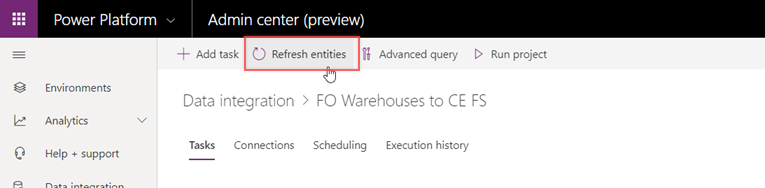
 NOTE: If the fields do not appear in your list, you most likely need to refresh your CDS entities. Return to the Warehouse integration project form and click Refresh entities. Then, open the Warehouse task once again to complete the mappings.
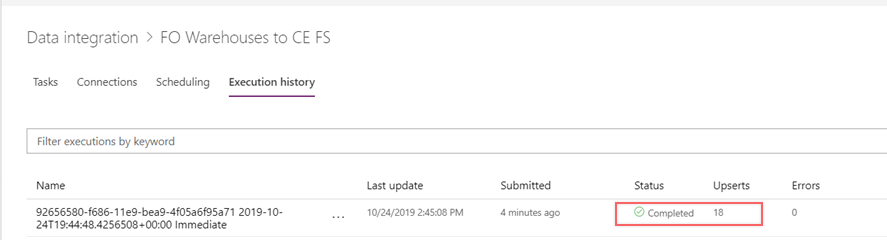
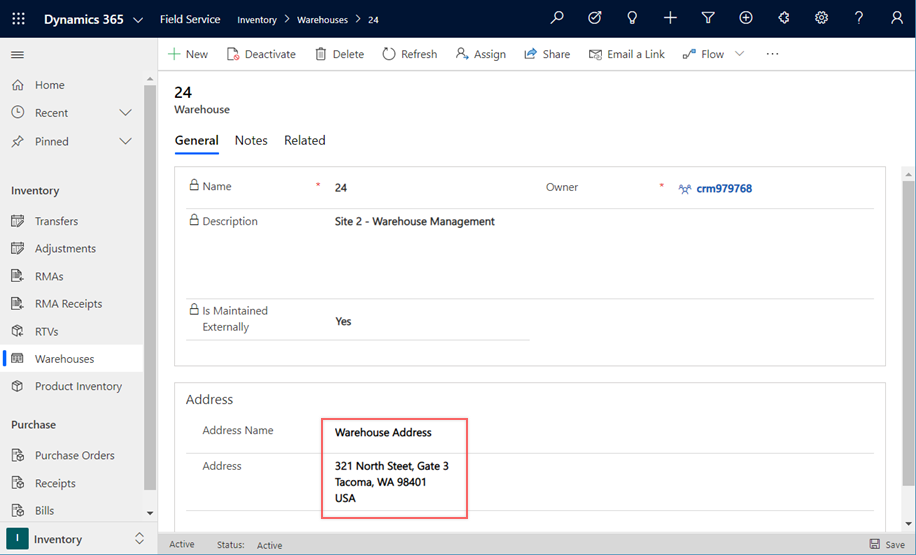
- Run the integration again, and once completed successfully you should see that any address data in F&O has come across to CE as expected. (Note: for my example, the CE Warehouse form was expanded to include the custom address fields.)
Schedule the Integration
It is of course not practical to run all of your integrations manually, as we have done so far. Fortunately, CDS data integrations can be scheduled.
The best practice is of course to schedule any data integration only as frequently as needed, to avoid any chance of data logjams that could occur if you attempt to run too many overlapping integrations. For demonstration purposes only, we will schedule our Warehouse integration to run much more often than needed: every 5 minutes.
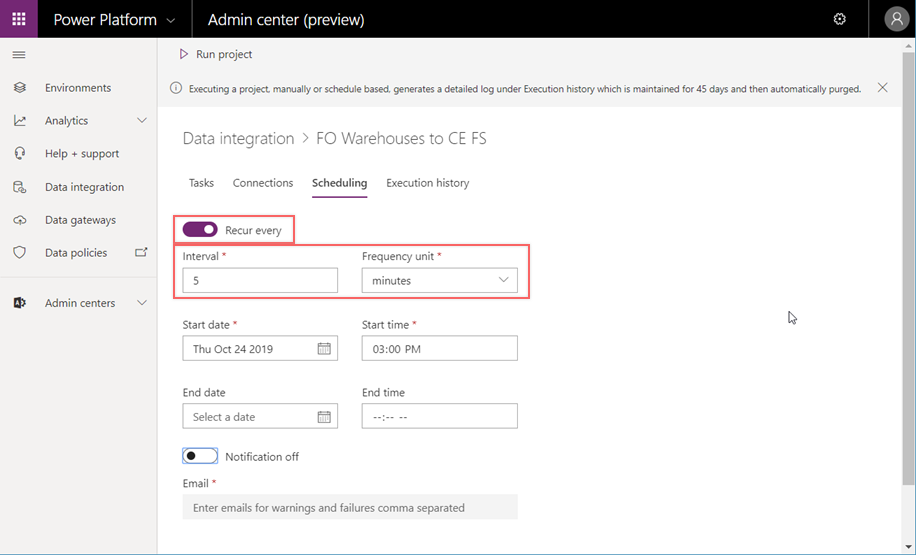
- In the Power Platform Data Integration Warehouse integration project, click the Scheduling tab and then toggle “Run manually” to be “Recur every.” Set the Interval to “5,” and the Frequency unit to “minutes.” Leave other fields as they are.
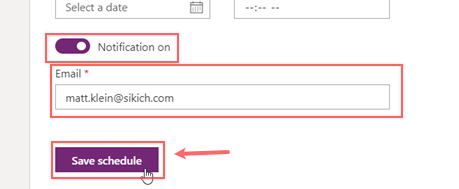
- The Data Integrator can alert an administrator when an integration fails. Toggle “Notification off” to “Notification on” and enter your email address for our testing. Then, click Save schedule.
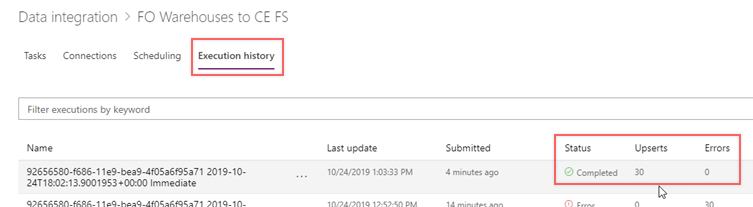
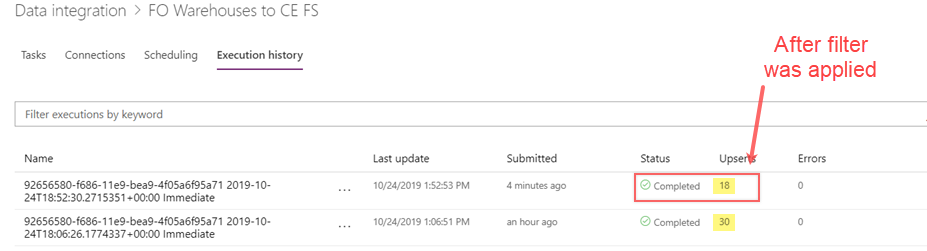
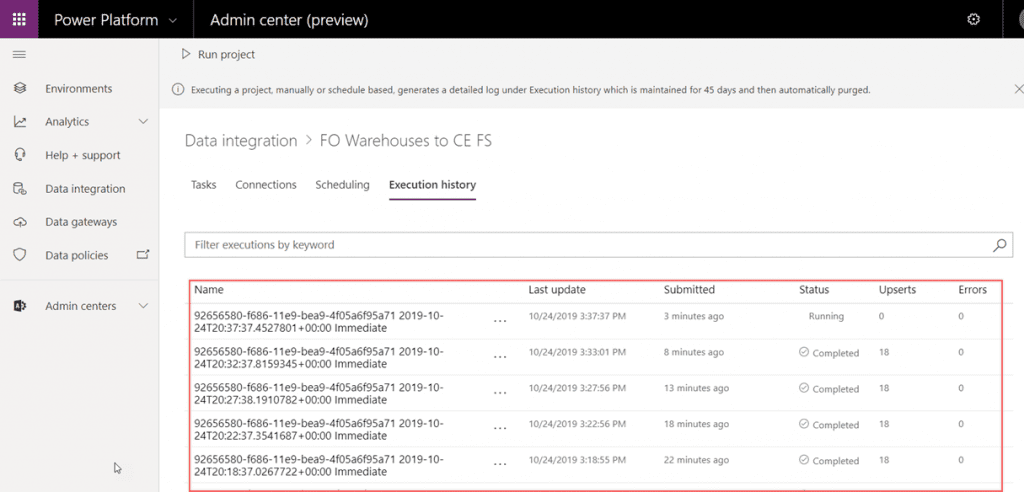
- Upon switching to a scheduled integration, our Warehouse integration will run automatically and notify us each time an integration job fails. After a while, the Execution history will look something like the below screenshot.
- In the event of an error, you will receive an email similar to the below.

There is quite a bit more to the CDS Data Integrator and related tools like Power Query, but I hope this gives you a good sense of the capability of the product and how it may apply to your data integration scenarios.
In Part 5, we will look at an application integration scenario and the use of Microsoft Flow to support it. See you there!
This publication contains general information only and Sikich is not, by means of this publication, rendering accounting, business, financial, investment, legal, tax, or any other professional advice or services. This publication is not a substitute for such professional advice or services, nor should you use it as a basis for any decision, action or omission that may affect you or your business. Before making any decision, taking any action or omitting an action that may affect you or your business, you should consult a qualified professional advisor. In addition, this publication may contain certain content generated by an artificial intelligence (AI) language model. You acknowledge that Sikich shall not be responsible for any loss sustained by you or any person who relies on this publication.