


This article will give a quick description for how to set up recurring Dynamics 365 SQL DB backups from a Tier 1 environment to an Azure storage account.
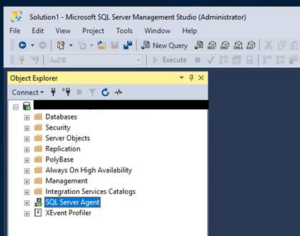
Sign in to your Tier 1 environment and run SQL Server Management Studio (SSMS) as Admin. Connect to your server.
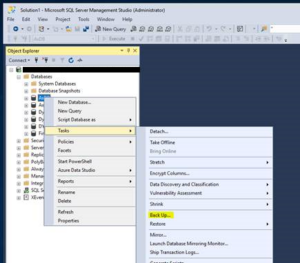
Right click the AxDB data base and select Tasks > Back Up…
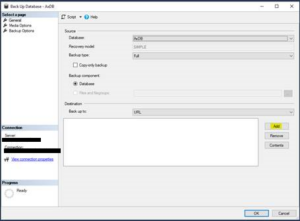
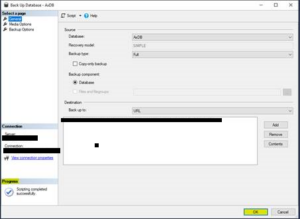
Keep the source information the same, and set the destination information to back up to “URL.” Click “Add.”
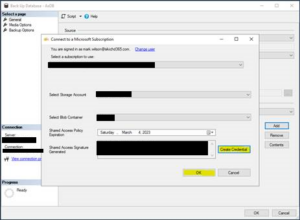
Select “New container.”
- You will be prompted to log into your Microsoft account with the Azure storage container you wish to send the backup to.
- In the drop-down, select the storage account followed by the blob container

Click “Create Credential.”
- This will generate a Shared Access Signature.
- Click “OK.”
Click “OK” again, and you will see your URL in the destination block.
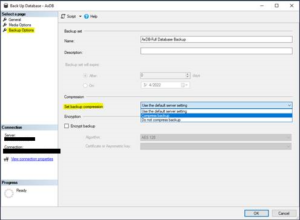
Optional: Under “Backup Options” change “Set backup compression” to “Compress backup.”
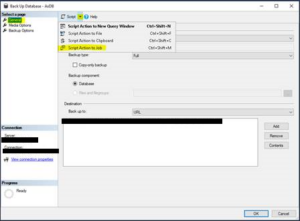
Under the “General” tab, select the “Script” drop-down. Choose “Script Action to Job.”
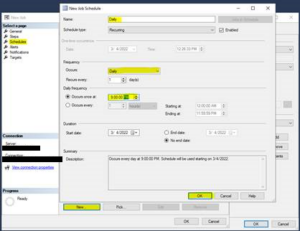
On the left-hand side, click “Schedules.”
- Then click “New.”
- Rename the schedule to “Daily.”
- Set the occurrence to “Daily.”
- Set the desired time for the backup to occur. Here I will set it to run each day at 9:00 PM. This will use the time of the local machine.
- Click “OK.”
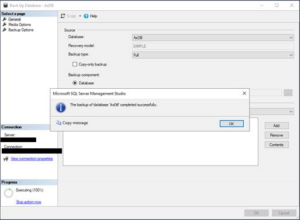
Click “OK.” You should see in the bottom left-hand corner that “Scripting completed successfully.” Click “OK.” This will execute the job. We are not done with our configurations, but a backup will be taken at this time and placed on the Azure storage account container you selected.
After clicking “OK” you should see that the backup successfully completed.
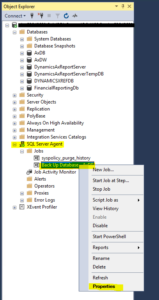
On the right-hand side, under “Jobs,” find your job “Back Up Database – AxDB.”
- Right click and choose properties.
- Ensure your SQL Server Agent is running. (See optional step below to automate this process.)
Click “Steps” in the left-hand column. Then click “Edit.”
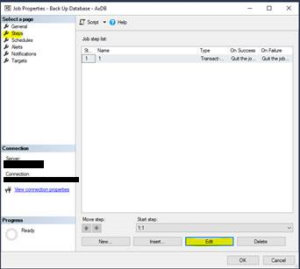
- Here you can see the SQL command being executed. We will need to update this to ensure that file names are unique. We will do this by appending date-time information to it.
- Here is an example of the updated SQL call with a date-time stamp appended to the end. Update the URL with your correct path.
DECLARE @FileLoc NVarchar(100) = CONCAT(‘https://<YOURURL>/axdb_backup_’,format(getdate(),’yyyyMMddHHmmssffff’),’.bak’)BACKUP DATABASE [AxDB] TO URL = @FileLoc WITH NOFORMAT, NOINIT, NAME = N’AxDB-Full Database Backup’, NOSKIP, NOREWIND, NOUNLOAD, STATS = 10
Click “OK” to save the changes.

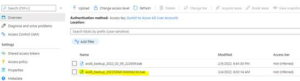
Now we will wait for our job to run. After it does (on a schedule or manually), we can go to the Azure portal storage account and look for our backup.
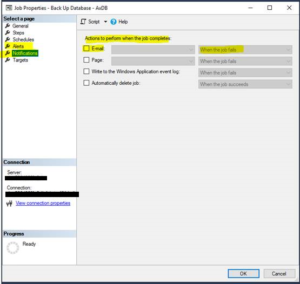
Optional
Using the jobs properties, we can configure alerts for failures. This way we can get emails if an issue occurs. This config is out of the scope of this document but is handy to know that there are options available here. SSMS jobs also provide additional logging of previous runs, to help debug possible issues.
Optional
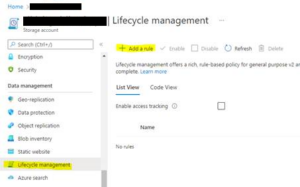
In the Azure portal, we can select the storage account we are interested in sending on backups too.
From the left-hand side, select “Lifecycle management” then click “Add rule.”
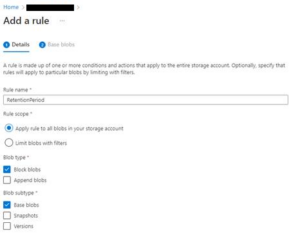
Name your rule “RetentionPeriod” and click “Next.”
Set the number of days to keep a blob before deleting it.
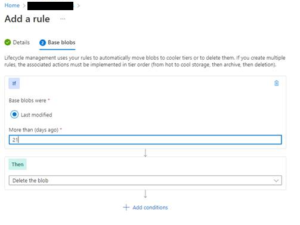
This is a quick and useful way to avoid keeping every back up file.
Optional
Set the SQL Server Agent to start automatically to avoid needing to manually start the service after an environment restart.

For more D365 expert advice, contact us today.
Post originally published https://markedcode.com/index.php/2022/08/24/sql-backup-to-azure/
This publication contains general information only and Sikich is not, by means of this publication, rendering accounting, business, financial, investment, legal, tax, or any other professional advice or services. This publication is not a substitute for such professional advice or services, nor should you use it as a basis for any decision, action or omission that may affect you or your business. Before making any decision, taking any action or omitting an action that may affect you or your business, you should consult a qualified professional advisor. In addition, this publication may contain certain content generated by an artificial intelligence (AI) language model. You acknowledge that Sikich shall not be responsible for any loss sustained by you or any person who relies on this publication.